
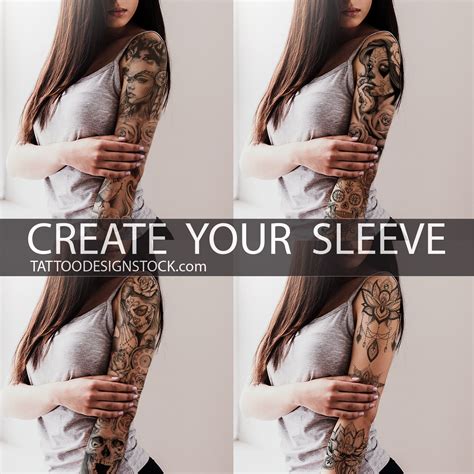
When it comes to body art, sleeve tattoos are the ultimate commitment. They are large, intricate designs that cover the entire upper arm, and they can take months or even years to complete. But if you’re willing to put in the time and effort, a sleeve tattoo can be a truly stunning work of art.
The first step in creating a sleeve tattoo design is to choose a theme. What do you want your tattoo to represent? Your personality? Your hobbies? Your beliefs? Once you have a general idea of what you want, you can start to brainstorm specific images and symbols that will represent your theme. For instance, if you’re a nature lover, you might incorporate images of trees, flowers, and animals. If you’re a musician, you might include musical instruments and notes.
Conceptualizing Your Vision
Conceptualizing your sleeve tattoo design is a multifaceted process that demands introspection, inspiration, and meticulous planning. Begin by reflecting upon your personal values, beliefs, and life experiences. Consider the symbols and motifs that resonate deeply with you, whether it’s the majesty of a roaring lion, the wisdom of an ancient tree, or the serenity of a flowing river. These elements will serve as the building blocks of your design.
Once you’ve identified your core themes, research various visual styles and artistic techniques. Browse through tattoo portfolios, art books, and online galleries to explore the possibilities. From the bold strokes of traditional Japanese tattoos to the intricate linework of realism, each style boasts its unique aesthetic. Consider the scale, placement, and color palette that best complement your vision, ensuring that your design is both visually striking and personally meaningful.
Brainstorm ideas by sketching rough drafts and experimenting with different compositions. Arrange your symbols and motifs in a way that creates a cohesive narrative or conveys a specific message. Consider the flow and transitions between elements, ensuring that the overall design is harmonious and visually engaging. Seek inspiration from nature, mythology, literature, or your own imagination to create a tattoo that is truly unique and representative of your individuality.
|
Consider These Elements:
|
Explore These Styles:
|
|
Core themes and personal meaning
|
Traditional Japanese
|
|
Visual references and artistic techniques
|
Realism
|
|
Symbolism and motifs
|
Watercolor
|
|
Composition and flow
|
Neo-traditional
|
|
Scale, placement, and color palette
|
Blackwork
|
Gathering Inspiration
Creating a sleeve tattoo design is a personal and creative endeavor. To craft a design that truly resonates with you, it’s essential to gather inspiration from various sources.
Explore Different Styles
There is a wide range of tattoo styles to explore, including traditional, realistic, watercolor, geometric, and many more. Each style has its unique characteristics and aesthetics. Take the time to research different styles to identify ones that align with your preferences and vision. Consider the following:
- Traditional: Bold lines, bright colors, and classic symbols are hallmarks of traditional tattoo styles.
- Realistic: These tattoos aim to depict subjects with lifelike detail and textures.
- Watercolor: As the name suggests, watercolor tattoos resemble painted artwork, characterized by soft blending and vibrant hues.
- Geometric: Angular shapes, lines, and patterns form the basis of geometric tattoos, creating striking and modern designs.
Identify Your Interests and Passions
Your sleeve tattoo should reflect your personality and passions. Consider the following:
- What themes, symbols, and imagery resonate with you?
- Do you have any hobbies, interests, or experiences that could inspire your design?
- What kind of story or message do you want to convey through your tattoo?
Seek References and Collect Imagery
Once you have identified some style directions and thematic elements, start gathering references and imagery that inspire you. This could include:
- Art books and magazines
- Online tattoo galleries and social media
- Movie stills and video games
- Nature and travel photographs
| Gather Inspiration From |
Examples |
| History and Mythology |
Ancient artifacts, folklore, and legendary figures |
| Nature and Wildlife |
Animals, landscapes, and ocean scenes |
| Pop Culture |
Movies, TV shows, music, and literature |
Determining Placement and Size
Deciding on the placement and size of your sleeve tattoo is a crucial step that influences the overall impact and feasibility of your design. Here are key considerations to guide your decision-making:
Placement
The placement of your sleeve tattoo can significantly affect its visibility, meaning, and potential discomfort during the tattooing process. Here are some considerations to keep in mind:
- Full Sleeve: Extends from the shoulder to the wrist, covering the entire upper arm. Offers ample space for elaborate and detailed designs.
- Half Sleeve: Covers either the upper or lower half of the upper arm. A good option for smaller designs or as part of a larger piece.
- Quarter Sleeve: Extends from the elbow to either the shoulder or wrist. Ideal for smaller, condensed designs.
- Inner Sleeve: Placed on the underside of the upper arm. More visible when the arm is raised.
- Outer Sleeve: Located on the top side of the upper arm. More prominent when the arm is hanging down.
Size
The size of your sleeve tattoo is determined by several factors, including the placement, the complexity of the design, and your personal preference. Consider the following guidelines:
| Size |
Approximate Coverage |
| Small |
Quarter Sleeve or less |
| Medium |
Half Sleeve |
| Large |
Three-quarter Sleeve or Full Sleeve |
Remember that larger tattoos require more time and expense to complete, but they also offer greater artistic freedom and impact.
Choosing an Artist and Style
### Selecting the Right Artist
Matching with an ideal artist hinges on alignment in vision and aesthetics. Research local studios and scour online portfolios to identify artists whose style resonates with your desired tattoo design. Book consultations to discuss your ideas and assess their technical skills.
### Understanding Tattooing Styles
Tattoo styles encompass a vast spectrum of techniques and motifs. Here’s a concise table to guide your style exploration:
| Style |
Characteristics |
| Traditional American |
Bold lines, vivid colors, iconic symbols (e.g., eagles, skulls) |
| Realistic |
Lifelike depictions of people, objects, or landscapes |
| Neo-Traditional |
Modernized take on traditional American, featuring enhanced details and color palettes |
| Japanese |
Intricate designs, often featuring mythical creatures, flowers, and waves |
| Tribal |
Inspired by indigenous cultures, characterized by geometric patterns and symbols |
### Envisioning Your Sleeve
Visualize your desired sleeve, considering factors such as length, coverage, and overall aesthetic. Determine whether you prefer a full, three-quarter, or half sleeve. Think about the placement of larger design elements and how they will interact with the contours of your arm.
Developing the Linework
The linework is crucial in any tattoo design, and this is especially true for sleeve tattoos. The lines should be clean, precise, and flow seamlessly together to create a dynamic and visually appealing artwork.
Here are some tips for developing the linework for your sleeve tattoo:
1. Use a variety of line weights.
2. Experiment with different line styles.
3. Pay attention to the overall flow of the lines.
4. Use negative space to your advantage.
5. Consider the placement of the linework on your arm.
Placement of the Linework on Your Arm
When considering the placement of the linework on your arm, there are a few things to keep in mind:
- The shape of your arm: The shape of your arm will affect the way the linework looks. For example, if you have a muscular arm, you can use thicker lines to create a more bold look. If you have a thinner arm, you may want to use thinner lines to create a more delicate look.
- The size of your arm: The size of your arm will also affect the way the linework looks. If you have a large arm, you can use more intricate linework to create a more dramatic look. If you have a smaller arm, you may want to use simpler linework to create a more understated look.
- Your personal style: Ultimately, the placement of the linework on your arm should reflect your personal style. If you prefer bold and dramatic designs, you may want to place the linework in a more prominent location on your arm. If you prefer more subtle and understated designs, you may want to place the linework in a less prominent location on your arm.
| Arm Shape |
Line Thickness |
| Muscular |
Thick lines |
| Thin |
Thin lines |
Incorporating Color and Shading
Color and shading are essential elements of any sleeve tattoo design. They can be used to create depth, contrast, and realism. When choosing colors, it is important to consider the overall theme of your sleeve. For example, a dark and brooding sleeve may benefit from darker colors, while a bright and cheerful sleeve may be more suited to lighter colors.
Shading is another important aspect of sleeve tattoo design. It can be used to create the illusion of depth and dimension. When shading, it is important to use a variety of tones to create a smooth and natural transition. You can also use shading to highlight certain elements of your tattoo, such as the eyes or the teeth.
Here are some tips for incorporating color and shading into your sleeve tattoo design:
- Consider the overall theme of your sleeve when choosing colors.
- Use a variety of colors to create contrast and depth.
- Use shading to create the illusion of depth and dimension.
- Highlight certain elements of your tattoo with shading.
- Use a color wheel to help you choose colors that will work well together.
- Consult with your tattoo artist about the best way to incorporate color and shading into your design.
Color Theory
Color theory is the study of how colors interact with each other. It can be used to create a variety of effects in your sleeve tattoo design. For example, complementary colors (colors that are opposite each other on the color wheel) can be used to create contrast and excitement. Analogous colors (colors that are adjacent to each other on the color wheel) can be used to create a more harmonious look.
Shading Techniques
There are a variety of shading techniques that can be used to create different effects in your sleeve tattoo design. Some of the most common shading techniques include:
- Cross-hatching: This technique is created by crossing two or more lines over each other.
- Stippling: This technique is created by placing small dots close together.
- Blending: This technique is created by smoothly transitioning from one color to another.
Integrating Personal Significance
Sleeve tattoos are highly personal statements, and incorporating personal significance into their design can make them truly meaningful. Here are some ideas for integrating personal significance:
Symbology and Imagery
Use symbols and images that have special meaning to you. These could include cultural symbols, religious icons, or personal experiences that you want to commemorate.
Portraits and Figures
Include portraits of loved ones, mentors, or inspirational figures who have played an important role in your life. You can also include figures from mythology, history, or literature that resonate with you.
Storytelling
Use the tattoo to tell a personal story or narrative. This could be a representation of your life journey, a specific event that you want to remember, or a message that you want to convey.
Interests and Hobbies
Incorporate elements that represent your interests and hobbies, such as nature motifs, musical instruments, or literary references. This adds a touch of individuality and makes the tattoo more reflective of who you are.
Custom Lettering
Include custom lettering that holds special significance. This could be quotes, song lyrics, or even your own personal mantra. Custom lettering can add a personal touch and make the tattoo more meaningful.
Table of Personal Significance in Sleeve Tattoo Design
| Element |
Significance |
| Symbol of strength |
Represents overcoming adversity |
| Portrait of a loved one |
Honoring their memory or connection |
| Nature scene |
Reflecting a love for the outdoors |
| Song lyrics |
Expressing a personal message or inspiration |
Preparing for the Tattooing Process
1. Research and Find an Artist
Finding the right tattoo artist is crucial. Look for someone who specializes in sleeve tattoos and whose style aligns with your vision.
2. Choose a Theme and Concept
Decide what message or story your sleeve tattoo will convey. Consider your personal experiences, interests, and aspirations.
3. Gather Reference Images
Collect images that inspire you and reflect your chosen theme. This could include artwork, photographs, or other tattoo designs.
4. Connect with the Artist
Share your ideas and reference images with the artist. Discuss the size, placement, and potential elements of your sleeve tattoo.
5. Get a Consultation
Schedule a consultation to discuss your design in detail and ensure it aligns with your expectations and the artist’s expertise.
6. Decide on Size and Placement
Determine the size and placement of your sleeve tattoo. Consider the flow, visibility, and potential for future additions.
7. Choose Colors and Ink
Select the colors and ink types that will best complement your design and skin tone. Consider traditional, vibrant, or muted color palettes.
8. Prepare Your Body
Ensure your skin is clean, well-moisturized, and free from any infections or blemishes prior to the tattoo session.
9. Take Care of Your Tattoos
Follow the artist’s instructions for aftercare to ensure your sleeve tattoo heals properly and maintains its vibrancy.
10. Be Patient with the Process
Creating a sleeve tattoo is a multi-session process that requires time and patience. Trust the artist, enjoy the journey, and appreciate the gradual transformation of your body art.
How To Create A Sleeve Tattoo Design
A sleeve tattoo is a large, elaborate tattoo that covers most or all of the arm. It can be a single design or a collection of smaller tattoos that are connected together. Sleeve tattoos are often very personal and meaningful to the wearer, and they can be a great way to express oneself through art.
If you’re thinking about getting a sleeve tattoo, there are a few things you should keep in mind. First, you’ll need to decide on a design. This can be anything from a realistic portrait to an abstract design. Once you have a design in mind, you’ll need to find a tattoo artist who specializes in sleeve tattoos. They will be able to help you refine your design and create a tattoo that is both beautiful and meaningful to you.
Getting a sleeve tattoo is a big commitment, but it can be a very rewarding experience. If you’re thinking about getting one, take the time to do your research and find an artist who you trust. With a little planning, you can create a sleeve tattoo that you’ll love for years to come.
People Also Ask About How To Create A Sleeve Tattoo Design
How much does a sleeve tattoo cost?
The cost of a sleeve tattoo will vary depending on the size, complexity, and detail of the design. However, you can expect to pay anywhere from $1,000 to $5,000 for a full sleeve tattoo.
How long does it take to get a sleeve tattoo?
Getting a sleeve tattoo is a multi-session process that can take anywhere from several weeks to several months to complete. The length of time will vary depending on the size and complexity of the design, as well as the speed at which the artist works.
What is the best way to care for a sleeve tattoo?
After getting a sleeve tattoo, it is important to follow the artist’s instructions for care. This will typically involve keeping the tattoo clean and dry, and avoiding picking or scratching at it. You should also avoid exposing the tattoo to sunlight for prolonged periods of time.
