
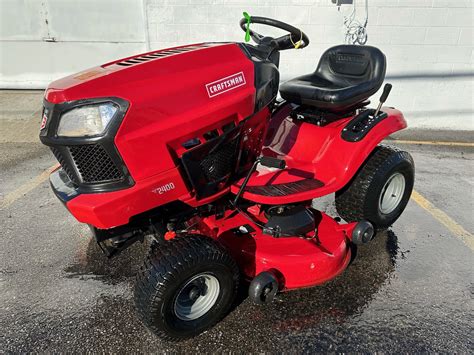
How to Start a Riding Mower
Riding mowers are a convenient and efficient way to maintain your lawn. But if you’re new to using one, starting it up can be a bit daunting. Don’t worry, though! With a few simple steps, you’ll be able to get your mower up and running in no time.
Step 1: Safety First
Before you do anything else, make sure you’re wearing appropriate safety gear. This includes eye protection, gloves, and closed-toe shoes. You should also make sure the mower is on a level surface and that the blade is disengaged.
Step 2: Preparing the Mower
Once you’re safely prepared, it’s time to get the mower ready to start. Begin by checking the fuel level. If it’s low, add some fuel to the tank. Next, check the oil level and add oil if necessary. Finally, make sure the spark plug is clean and properly connected.
Step 3: Starting the Mower
Now it’s time to start the mower. Insert the key into the ignition and turn it to the "on" position. Then, pull the recoil starter cord until the engine starts. Once the engine is running, let go of the recoil starter cord and allow the engine to idle for a few minutes.
Selecting the Right Riding Mower
Choosing the perfect riding mower for your needs requires careful consideration of several factors. Here’s how to navigate this decision:
Size and Capacity
Determine the size of your lawn to choose a mower with an appropriate cutting deck width. Generally, a 30-40-inch deck suits small to medium lawns, while 42-48-inch decks are ideal for larger lawns. Consider the hilliness of your yard and the presence of obstacles or flower beds that may necessitate a narrower deck.
Engine Power
Engine horsepower determines the mower’s ability to handle different terrains and grass conditions. For flat lawns with light grass, a mower with 14-18 horsepower will suffice. For hilly lawns or dense vegetation, consider a mower with 20-24 horsepower or higher.
Features and Accessories
Consider the features and accessories that enhance your mowing experience. A mulching kit allows you to recycle clippings back into your lawn, reducing the need for fertilizer. A bagging system collects clippings for easy disposal. Additional features include adjustable seat height, cruise control, and headlights for nighttime mowing.
Additional Considerations
Other factors to consider include fuel type (gas, diesel, or electric), warranty, and operator comfort. Electric mowers are environmentally friendly and quieter, but their run time may be limited by battery capacity. Diesel mowers offer greater torque and fuel efficiency, but they are louder and more expensive. An extended warranty provides peace of mind against unexpected repairs, while a comfortable seat and ergonomic controls enhance your riding experience.
Selecting the right riding mower involves evaluating your lawn size, terrain, and personal preferences. By considering these factors, you can choose a mower that meets your specific mowing needs and ensures a beautifully manicured lawn.
Preparing Your Yard
Before operating your riding mower, it’s crucial to prepare your yard to ensure a safe and efficient mowing experience. Here are some key steps to follow:
Clear the Yard of Obstacles
Inspect your lawn meticulously for any potential hazards that could damage your mower or cause injury. Remove debris such as rocks, sticks, toys, or garden hoses that may obstruct the mower’s path.
Trim Overgrown Areas
Tall grass and weeds can hinder the mower’s operation and increase the risk of blockages. Use a string trimmer or brush cutter to clear overgrown areas before mowing. This will make the mowing process smoother and prevent the mower from getting clogged.
Additional Tips:
– Use a rake or leaf blower to gather and remove loose debris from the lawn.
– Check for underground cables or pipes to avoid any potential damage.
– Keep pets and children away from the mowing area to ensure safety.
– If mowing in a large area, divide it into smaller sections to make it more manageable.
Fueling and Servicing
Fueling
It’s crucial to use the correct fuel and follow the manufacturer’s guidelines for your mower. Most riding mowers require unleaded gasoline with an octane rating of 87 or higher. Refuel when the tank is almost empty, not when it’s completely empty.
Servicing
Regular servicing is essential for optimal performance and longevity of your riding mower. Here are some key maintenance tasks:
Oil Check and Change:
Check the oil level regularly, and change it as per the manufacturer’s specified intervals. Using the wrong oil or failing to change it frequently can lead to engine damage.
Air Filter Cleaning or Replacement:
A clean air filter ensures optimal airflow to the engine. Clean or replace the air filter as recommended in the user manual to prevent engine wear and improve performance.
Battery Maintenance:
Keep the battery terminals clean and tight to ensure a good connection. If the mower won’t start or has weak cranking power, it may be time to replace the battery.
Blades Sharpening or Replacement:
Sharp mower blades provide a clean cut and reduce wear on the engine. Sharpen or replace the blades as needed to maintain optimal cutting performance and prevent damage to your lawn.
| Service Task |
Recommended Frequency |
| Oil Change |
Every 25-50 hours of operation |
| Air Filter Cleaning/Replacement |
Every 10-25 hours of operation |
| Battery Maintenance |
Monthly or as needed |
| Blades Sharpening/Replacement |
As needed, based on cutting performance |
Operating Instructions
Operating a riding mower requires a combination of skills and safety precautions. Before using the mower, read the manufacturer’s instructions thoroughly and adhere to all safety guidelines.
Ensure that the area to be mowed is clear of any obstacles, such as sticks, stones, or toys. Maintain a safe distance from slopes and edges to prevent accidents.
Familiarize yourself with the mower’s controls, including the throttle, steering wheel, and brake pedal. Adjust the seat to a comfortable position and fasten your seatbelt before starting the mower.
Starting the Engine
- Insert the ignition key and turn it to the “On” position.
- Press down on the brake pedal and hold it down.
- Pull the starter cord or turn the ignition switch to the “Start” position.
- Once the engine starts, release the brake pedal and allow the engine to warm up.
Additional Tips for Starting a Riding Mower Engine:
| Problem |
Possible Causes |
Solutions |
| Engine won’t start |
– Dead battery
– Faulty spark plug
– Clogged fuel filter |
– Charge or replace the battery
– Clean or replace the spark plug
– Replace the fuel filter |
| Engine starts but stalls quickly |
– Loose spark plug wire
– Empty fuel tank
– Clogged carburetor |
– Tighten the spark plug wire
– Refill the fuel tank
– Clean the carburetor |
Adjusting the Cutting Height
1. Check the Deck Level
Before adjusting the cutting height, ensure the mower deck is level. Park the mower on a flat surface and measure the distance from the ground to the bottom of the deck at several points. The measurements should be the same all around.
2. Locate the Adjustment Levers
Riding mowers typically have levers or knobs on the side of the deck that adjust the cutting height. There may be multiple levers, one for each side of the deck.
3. Raise or Lower the Deck
Move the adjustment levers or knobs to raise or lower the deck. The cutting height will usually be indicated on a scale or by notches on the levers.
4. Set the Desired Height
Choose the desired cutting height and set the adjustment levers accordingly. The optimal cutting height depends on the grass type, season, and personal preference.
5. Consider Different Lawn Conditions
- Short Grass (1-2 inches): Ideal for dry, hot conditions or when the grass has been recently mowed.
- Medium Grass (2-3 inches): Suitable for most lawns and provides a healthy balance of appearance and durability.
- Long Grass (3-4 inches): Recommended for taller varieties of grass, such as fescues, or during spring or fall growth when the grass is growing rapidly.
- Very Long Grass (4+ inches): Use caution when mowing grass this long, as it can put strain on the mower and produce uneven cuts. It’s best to mow in multiple passes, gradually reducing the height over time.
Basic Safety Precautions
1. Read the Operator’s Manual
Before operating your riding mower, thoroughly read and understand the operator’s manual. This manual will provide you with important safety instructions, operating procedures, and maintenance guidelines.
2. Wear Appropriate Clothing
When mowing, always wear closed-toe shoes or boots to protect your feet. Avoid loose clothing or jewelry that could become entangled in the mower’s moving parts.
3. Inspect the Mower Before Use
Before each use, inspect the mower for any damage, loose parts, or leaks. Check the tire pressure, battery connections, and ensure the blades are not dull or damaged.
4. Clear the Mowing Area
Remove any obstacles, such as stones, sticks, or debris, from the mowing area before starting the mower. These objects can damage the mower or cause a safety hazard.
5. Operate in Open Areas
Avoid operating the mower in enclosed areas, such as garages or sheds. The exhaust gases can accumulate and create a dangerous environment.
6. Be Aware of Your Surroundings
While operating the mower, pay attention to your surroundings and be aware of any people, pets, or obstacles that may enter the mowing area. Maintain a clear line of sight and be prepared to stop the mower if necessary.
|
Operator Safety |
Equipment Safety |
| 1 |
Wear appropriate clothing |
Inspect the mower before use |
| 2 |
Clear the mowing area |
Check tire pressure |
| 3 |
Operate in open areas |
Ensure blades are not dull or damaged |
| 4 |
Be Aware of Your Surroundings |
Check battery connections |
|
|
Check for loose parts or leaks |
|
|
Clear fuel and oil spills |
Essential Maintenance Tips
1. Clean the mower deck
After each use, clean the mower deck to remove grass clippings and debris. This will help prevent the deck from rusting and will also improve mowing performance.
2. Sharpen the mower blade
A sharp mower blade will cut grass cleanly and evenly. Sharpen the blade at least once a season, or more often if you mow frequently.
3. Check the tire pressure
The tire pressure should be checked before each use. Underinflated tires can make the mower difficult to push or pull, and can also damage the lawn.
4. Lubricate the mower
Lubricate the mower according to the manufacturer’s instructions. This will help keep the mower running smoothly and extend its life.
5. Store the mower in a dry place
When the mower is not in use, store it in a dry place to protect it from the elements.
6. Winterize the mower
If you live in a cold climate, you will need to winterize the mower before storing it for the winter. This involves draining the fuel and oil, and removing the battery.
7. Trouble with starting
If you are having trouble starting the mower, check the following:
- Is the fuel tank full?
- Is the spark plug clean?
- Are the mower blades sharp?
- Is the mower battery charged?
8. Routine maintenance schedule
In addition to the essential maintenance tips listed above, it is also important to follow a regular maintenance schedule. This will help keep your mower running in top condition and extend its life. The following table provides a recommended maintenance schedule for riding mowers:
| Task |
Frequency |
| Sharpen the mower blade |
Every 25 hours of use |
| Lubricate the mower |
Every 50 hours of use |
| Clean the mower deck |
After each use |
| Check the tire pressure |
Before each use |
| Store the mower in a dry place |
When not in use |
| Winterize the mower |
Before storing for the winter |
Storage and Winterization
Proper storage ensures your riding mower remains in optimal condition during the off-season and extends its lifespan. Follow these steps for proper storage:
1. Empty the Fuel Tank
Run the engine until it stalls due to lack of fuel. This prevents fuel degradation and carburetor problems.
2. Add Fuel Stabilizer
Add fuel stabilizer to the remaining fuel in the tank. This prevents fuel breakdown and keeps the carburetor clean.
3. Disconnect the Battery
Disconnect the battery cables and tape them together to prevent accidental reattachment.
4. Change the Oil and Filter
Changing the oil and filter removes contaminants and protects the engine during storage.
5. Clean the Undercarriage
Remove grass clippings and dirt from the undercarriage using a hose or blower. This prevents corrosion and improves airflow.
6. Lubricate Moving Parts
Lubricate all moving parts, such as chains, pulleys, and pivot points to prevent rust and premature wear.
7. Inflate Tires
Overinflate the tires slightly to prevent flat spots during storage. Do not overinflate to avoid tire damage.
8. Cover the Mower
Use a breathable cover to protect the mower from dirt, moisture, and UV rays.
9. Protect from Rodents
Place mothballs or other rodent deterrents around the mower to prevent damage caused by gnawing. Consider using a trap if necessary.
Additional tips for winterization:
| Item |
Action |
| Carburetor |
Drain or add anti-freeze to prevent water damage. |
| Spark Plugs |
Remove and clean or replace for easy starting in the spring. |
| Transmission |
Check and top up transmission fluid levels if necessary. |
Safety First
Before operating a riding mower, ensure you have read and understood the manufacturer’s instructions. Always wear appropriate safety gear, including protective eyewear, earplugs, and closed-toe shoes. Ensure your work area is clear of obstacles and bystanders.
Pre-Mowing Inspection
Before mowing, check the following:
- Oil level
- Fuel level
- Tire pressure
- Blade sharpness
- Air filter cleanliness
Starting the Mower
1. Sit on the mower and engage the parking brake.
2. Turn the ignition key to the “on” position.
3. Move the throttle lever to the “start” position.
4. Engage the starter by pulling the recoil cord or turning the key further.
5. Once the engine starts, let it run for a few minutes to warm up.
Tips for Maintaining a Healthy Lawn
1. Mow regularly at the appropriate height for your grass type.
2. Water deeply and infrequently to encourage root growth.
3. Fertilize your lawn according to the manufacturer’s instructions.
4. Aerate your lawn regularly to reduce compaction and improve root penetration.
5. Control weeds and pests by using selective herbicides and insecticides.
Troubleshooting
If your riding mower won’t start, try the following:
- Check for a spark at the spark plug.
- Verify that the fuel line is connected and not clogged.
- Clean the air filter.
- Replace the spark plug.
Additional Tips
1. Mow in dry weather conditions to prevent clumps and rutting.
2. Avoid mowing over sticks, rocks, or other debris that could damage the mower blades.
3. Keep the mower deck clean to prevent grass buildup and corrosion.
4. Store the mower in a dry location when not in use.
Mowing Height Guide
| Grass Type |
Mowing Height |
| Cool-season grasses (fescue, Kentucky bluegrass) |
1.5-2.5 inches |
| Warm-season grasses (Bermuda, zoysia) |
1-2 inches |
How to Start a Riding Mower
Starting a riding mower can be a simple task, but it is important to follow the correct steps to ensure safe and efficient operation. Here’s a step-by-step guide on how to start a riding mower:
-
Safety First: Before starting the mower, make sure the area is clear of people, pets, and obstacles. Wear appropriate safety gear such as safety glasses and work gloves.
-
Check the Fuel Level: Ensure that the mower has enough fuel to operate. Check the fuel tank and fill it up if necessary.
-
Engage the Parking Brake: Make sure the parking brake is engaged to prevent the mower from moving while you are starting it.
-
Locate the Ignition Switch: Find the ignition switch and turn it to the “ON” position.
-
Pull the Starter Cord: If your mower has a manual starter, pull the starter cord with a smooth, firm motion. Be careful not to yank the cord too hard, as this can damage the starter.
-
Hold the Throttle: Once the engine starts, hold the throttle lever slightly to keep it running.
People Also Ask About How to Start a Riding Mower
There could be several reasons why your riding mower won’t start. Here are some common troubleshooting steps:
-
Check the battery: Make sure the battery is charged and properly connected.
-
Inspect the spark plug: Remove the spark plug and check for any damage or fouling. Replace it if necessary.
-
Clean the fuel filter: A clogged fuel filter can restrict fuel flow and prevent the engine from starting. Remove the fuel filter and clean it or replace it if needed.
Here are some signs that indicate a dead battery:
-
The engine cranks slowly or not at all.
-
The lights or electrical components are dim or not working.
-
The battery terminals are loose or corroded.
Yes, it is generally safe to jump-start a riding mower. However, it is important to follow the correct procedure to avoid any damage to the mower or yourself.
Here are the steps to jump-start a riding mower:
-
Make sure both the riding mower and the donor vehicle are turned off.
-
Connect one end of a jumper cable to the positive (+) terminal of the donor vehicle’s battery.
-
Connect the other end of the same jumper cable to the positive (+) terminal of the riding mower’s battery.
-
Connect one end of the other jumper cable to the negative (-) terminal of the donor vehicle’s battery.
-
Connect the other end of the second jumper cable to a metal surface on the riding mower, not directly to the negative (-) terminal of the battery.
-
Start the donor vehicle and let it run for a few minutes to charge the riding mower’s battery.
-
Attempt to start the riding mower.
-
Once the riding mower starts, disconnect the jumper cables in the reverse order of how they were connected.
