10 Stunning Ways to Display Wedding Photos

10 Stunning Ways to Display Wedding Photos

$title$

Documenting the most special, unforgettable day of two people’s lives is a responsibility that every wedding photographer takes seriously. These photographs serve as eternal mementos, capturing the essence of the love, joy, and excitement of this momentous occasion. Displaying them in a manner that both preserves their beauty and complements the couple’s unique style is of paramount importance. In this article, we will explore an array of creative and elegant ways to showcase wedding photographs, transforming them from mere images into cherished works of art that adorn the couple’s home and evoke fond memories for years to come.

One timeless method of displaying wedding photographs is through the use of albums. Traditional or contemporary, albums provide a curated collection of images that tell the story of the wedding day in a cohesive and organized manner. Each page can be designed to complement the theme and mood of the wedding, from elegant simplicity to whimsical flair. Furthermore, albums offer the advantage of protection, safeguarding the photographs from the elements and wear and tear.

For a more modern and dynamic approach, digital photo frames offer a versatile and interactive way to display wedding photographs. With their high-resolution screens and customizable settings, these frames allow couples to showcase a rotating selection of images, creating a virtual album that is constantly refreshed and updated. Additionally, some digital photo frames feature music playback capabilities, enabling couples to create a truly immersive experience that combines visual and auditory memories of their wedding day.

Digital vs. Physical Display

In the digital age, there are numerous ways to showcase your treasured wedding photos. Let’s explore the pros and cons of both digital and physical display options to help you make an informed decision.

Digital Display

Pros:

  • Convenience: Digital photos can be easily shared, stored, and accessed from anywhere with an internet connection.
  • Customization: Using digital tools, you can enhance, crop, and create various layouts for your photos.
  • Versatility: Digital photos can be displayed on a wide range of devices, including smartphones, tablets, laptops, and TVs.

Cons:

  • Lack of Tangibility: Digital photos may feel less personal and tangible than physical prints.
  • Durability: Digital storage can be susceptible to data loss or hardware failure.
  • Privacy Concerns: Consider data privacy implications when sharing photos online.

Physical Display

Pros:

  • Preservation: Physical prints can last for generations if properly stored and protected.
  • Tactile Experience: Holding and viewing physical photos provides a more intimate and tangible experience.
  • Decorative Element: Framed photos can add a touch of elegance and personalization to your home décor.

Cons:

  • Space Limitation: Displaying a large number of physical photos can require significant space.
  • Maintenance: Physical prints need to be regularly cleaned, protected from fading, and stored in controlled conditions.
  • Limited Customization: Physical prints cannot be easily edited or rearranged after they have been printed.
Display Option Pros Cons
Digital Convenience, customization, versatility Lack of tangibility, durability, privacy concerns
Physical Preservation, tactile experience, decorative element Space limitation, maintenance, limited customization

Wall Display Options: Frames and Canvases

Frames

Frames are a classic way to display wedding photos and can add an elegant touch to any room. You can choose from a variety of frame styles, including wood, metal, and acrylic. Frames can be purchased in standard sizes or custom-made to fit your specific photo. When choosing a frame, consider the style of your decor and the size and shape of your photo.

Canvases

Canvases are a great way to display large wedding photos. They can be hung on the wall or propped up on a shelf or table. Canvases are available in a variety of sizes and can be printed with a variety of finishes, including matte, glossy, and metallic. When choosing a canvas, consider the style of your decor and the size and shape of your photo.

Digital Photo Frames

Digital photo frames are a great way to display your wedding photos in a variety of ways. They can be set to cycle through a slideshow of your photos, or you can choose to display a single photo. Digital photo frames are available in a variety of sizes and styles, so you can find one that fits your needs and décor.

Types of Digital Photo Frames

Type Description
Standalone These frames have built-in memory and do not require a computer to operate.
Wi-Fi enabled These frames can connect to the internet and display photos from social media or photo sharing websites.
Cloud-based These frames store photos in the cloud and can be accessed from anywhere with an internet connection.

Creating a Photo Gallery Wall

A photo gallery wall is a beautiful and personal way to display your wedding photos. Here are a few tips for creating one:

  1. Choose a theme.
  2. Gather your photos.
  3. Choose a layout.
  4. Mount your photos.
  5. Hang your photos.

5. Hang Your Photos

Once your photos are mounted, it’s time to hang them. There are a few different ways to do this:

  • Frames: You can frame your photos and hang them using nails or hooks.
  • Canvas prints: Canvas prints are a great option for large-scale photos. They can be hung using nails or screws.
  • Command strips: Command strips are a damage-free way to hang photos. They can be used on walls, doors, and other surfaces.

When hanging your photos, be sure to use a level to ensure that they are straight. You may also want to use a measuring tape to ensure that they are evenly spaced.

Hanging Method Pros Cons
Frames – Classic and elegant
– Protects photos from damage
– Can be expensive
– Difficult to hang large photos
Canvas prints – Modern and stylish
– Can be printed in large sizes
– More expensive than framed photos
– Can be damaged if not properly cared for
Command strips – Damage-free
– Easy to hang and remove
– Not as strong as frames or nails
– May not be suitable for large photos

Using Technology for Interactive Display

Incorporate technology to enhance the visual experience of showcasing your wedding photos.

1. Digital Photo Frames

Display your photos on stylish digital photo frames that rotate seamlessly through your collection.

2. Slideshows on Tablets or Laptops

Use tablets or laptops to showcase slideshows of your favorite memories, allowing guests to browse and interact with the display.

3. Virtual Reality Headsets

Provide guests with virtual reality headsets that offer an immersive experience, letting them feel as if they’re present at your special day.

4. Augmented Reality Apps

Develop an augmented reality app that allows guests to scan the venue and view additional photos, videos, and memories associated with specific locations.

5. Motion-Activated Displays

Set up motion-activated displays that respond to gestures or interactions, giving guests control over the display and making it more engaging.

6. Social Media Integration

Integrate social media platforms into your display, allowing guests to share their favorite photos and comments directly from the event.

7. Interactive Photo Booths

Rent an interactive photo booth that captures candid moments and allows guests to instantly share their prints or digital copies.

Photo Booth Type Features
Traditional Photo Booth Capture single or group photos, instant prints optional
GIF Photo Booth Create animated GIFs for a more interactive experience
360° Photo Booth Allow guests to capture a full 360-degree spin, creating immersive videos

Social Media Display and Sharing

1. Sharing from a Wedding Website

Create a dedicated wedding website where guests can view and download high-resolution photos. Share the website link on social media and encourage guests to post their favorites.

2. Establishing a Unique Hashtag

Craft a unique hashtag that represents your wedding. Encourage guests to use the hashtag when sharing photos on Instagram or Twitter.

3. Utilizing Facebook Live

Live stream your wedding or reception on Facebook Live for guests who cannot attend in person. They can comment and interact during the event.

4. Setting Up a Social Media Table

Designate an area at your reception where guests can take photos and share them instantly on social media. Provide a dedicated backdrop and props for memorable captures.

5. Encouraging Photo Booth Fun

Rent or set up a photo booth with props and a custom backdrop. Encourage guests to strike poses and share their photos on social media.

6. Creating a Digital Photo Booth

Use an app or website that allows guests to take and share photos digitally. They can add filters, stickers, and captions before posting them on social media.

7. Streaming Live Video on Instagram or TikTok

Go live on Instagram or TikTok to share real-time moments from your wedding. Guests can tune in and interact with the live stream.

8. Creating Personalized Social Media Filters

Design custom Snapchat filters or Instagram overlays that guests can use to add a unique touch to their photos. Include your wedding hashtag or a memorable quote.

Displaying Photos on Objects and Decor

Transforming everyday objects and decor into captivating displays for your cherished wedding memories is a fantastic way to relive your special day and add a touch of elegance to your home.

Picture Frames

Classic picture frames are always a timeless choice, providing a simple and versatile way to showcase your photos. From ornate antique frames to sleek modern designs, there’s a frame to complement any style.

Shadow Boxes

Shadow boxes offer a unique way to display photos while adding depth and dimension. Arrange your photos alongside small mementos, such as pressed flowers, fabric swatches, or handwritten notes, to create a charming and personal display.

Canvas Prints

Canvas prints are a modern and stylish way to showcase your wedding photos. They add a touch of sophistication to any room and can be customized to various sizes and styles.

Wood Plaques

Personalized wood plaques are a rustic and charming way to display your photos. Engrave your names, wedding date, or a special quote to create a cherished keepsake.

Picture Ledges

Picture ledges provide a versatile and flexible way to display multiple photos in a row or create a gallery wall. Experiment with different heights and arrangements to find the perfect layout.

Ornaments

During the holiday season, incorporate your wedding photos into your festive decor by creating custom ornaments. Sublimate or paint your photos onto ceramic, glass, or wood baubles to add a special touch to your Christmas tree or mantle.

Magnets

Create cheerful and functional displays by attaching wedding photos to magnets. These can be displayed on your refrigerator, memo board, or any other magnetic surface for a constant reminder of your special day.

Coasters

Protect your surfaces while showcasing your wedding memories with custom coasters. Choose from various materials such as cork, wood, or ceramic and add your favorite photos to create a practical and stylish addition to your living space.

Lamps

Cast a warm glow on your wedding photos by incorporating them into lamps. Sublimate your photos onto lampshades or create custom light boxes for a romantic and ethereal display.

Preserving and Storing Wedding Photos

Preserving and storing your wedding photos is crucial to ensure their longevity and to keep those precious memories alive for generations to come. Here’s a comprehensive guide to ensuring the safety and accessibility of your wedding photos:

Physical Albums and Scrapbooks

Physical albums and scrapbooks provide a tangible way to preserve your wedding photos. Use acid-free materials to protect the photos from deterioration and store them in a cool, dry place away from direct sunlight.

Digital Storage

Digital storage allows for easy sharing and backup of your wedding photos. Use high-quality external hard drives or cloud storage services to ensure redundancy and protect against data loss.

Online Photo Albums

Online photo albums offer a convenient way to share and manage your wedding photos. Create private albums and invite guests to view, download, and share their favorites.

Photo Prints

Photo prints allow you to display your wedding photos in your home or office. Use high-quality printers and papers to ensure vibrant colors and durability.

Photo Boxes and USB Sticks

Photo boxes and USB sticks provide a compact and portable way to store and transport your wedding photos. Store them in a safe place or gift them to guests as keepsakes.

Frames and Display Cases

Frames and display cases protect and enhance the presentation of your wedding photos. Choose frames that complement your decor and display photos in a variety of sizes and styles.

Photo Canvases

Photo canvases transform your wedding photos into works of art. Printed on high-quality canvas, they add a touch of sophistication and elegance to your home.

Photo Mugs and Calendars

Photo mugs and calendars are practical and sentimental keepsakes. They feature your wedding photos, making them a constant reminder of your special day.

Social Media Sharing

Share your wedding photos on social media to connect with friends and family. Use relevant hashtags and tags to make your photos discoverable.

Safe Storage Practices

To ensure the longevity of your wedding photos, follow proper storage practices:

Avoid Do
Direct sunlight Store in a cool, dry place
High humidity Keep away from water sources
Acidic materials Use acid-free storage materials
Extreme temperatures Maintain a stable temperature
Dust and dirt Store in clean and sealed containers

How to Display Wedding Photos

Your wedding photos are a precious keepsake that you’ll cherish for a lifetime. So it’s important to display them in a way that does them justice. Here are a few ideas for how to do just that:

  • Create a gallery wall. This is a great way to display a large number of photos in a creative way. You can hang frames in different sizes and shapes, or use shelves to create a more dynamic display.
  • Use an album. This is a classic way to display your wedding photos. Albums come in a variety of styles, so you can find one that matches your taste and décor.
  • Frame your photos. This is a simple but elegant way to display your photos. You can choose frames in a variety of styles and materials, so you can find ones that match your décor.
  • Use a digital photo frame. This is a great way to display your photos without taking up a lot of space. Digital photo frames come in a variety of sizes and styles, so you can find one that fits your needs.

People Also Ask About How to Display Wedding Photos

How do you display wedding photos on a table?

You can display wedding photos on a table in a variety of ways. One popular option is to use picture frames. You can find picture frames in a variety of sizes and styles, so you can find ones that match your décor. Another option is to use photo albums. Photo albums come in a variety of sizes and styles, so you can find one that fits your needs.

How do you hang wedding photos on a wall without frames?

There are a few ways to hang wedding photos on a wall without frames. One option is to use washi tape. Washi tape is a Japanese paper tape that comes in a variety of colors and patterns. You can use washi tape to create a border around your photos, or you can use it to attach them to the wall.

How do you display wedding photos on a mantle?

You can display wedding photos on a mantle in a variety of ways. One popular option is to use picture frames. You can find picture frames in a variety of sizes and styles, so you can find ones that match your décor. Another option is to use photo albums. Photo albums come in a variety of sizes and styles, so you can find one that fits your needs.

5 Simple Steps to Master Transfer Paper

10 Stunning Ways to Display Wedding Photos

Transfer paper is an art material that allows you to transfer images or designs onto a T-shirt, canvas, wood or any other surface. It’s a great way to customize and make your own clothes, home decor, and gifts. Transfer paper is relatively easy to use, but there are some tricks and tips to help you get the best results. In this article, we will provide a step-by-step guide on how to use transfer paper.

The first step is to prepare your design. You can use a computer to create your design, or you can use a pre-made design. If you are using a computer, you will need to mirror your design before printing it out. This is because the design will be transferred in reverse onto the transfer paper. Once you have your design, print it out onto regular paper.

Next, you will need to prepare your surface. The surface should be clean and free of any dust or debris. If you are transferring to a fabric surface, you may want to wash and dry the fabric first. Once the surface is prepared, you can apply the transfer paper. Place the transfer paper on the surface, with the printed side facing up. Use a ruler or a credit card to smooth out the transfer paper and remove any bubbles.

Materials Required

Transfer Paper

Transfer paper is a specialized type of paper that allows you to transfer designs or images onto a surface. It comes in a variety of types and finishes, each suitable for specific applications.

1. Laser Transfer Paper

Laser transfer paper is designed to be used with laser printers. It features a thin coating that absorbs the laser toner particles, creating a durable image that can be easily transferred to a variety of surfaces, including wood, metal, glass, and ceramics.

Laser transfer paper comes in two main types:

Light transfer paper: This type is best suited for transferring dark-colored images onto light-colored surfaces. It provides high contrast and crisp details.

Dark transfer paper: This type is ideal for transferring light-colored images onto dark-colored surfaces. It creates a high-opacity image that stands out against the background color.

Type Image Color Surface Color
Light transfer paper Dark Light
Dark transfer paper Light Dark

Selecting the Correct Transfer Paper

Choosing the right transfer paper is crucial for successful image transfer. Consider the following factors when making your selection:

Inkjet or Laser Transfer Paper

Transfer Method Compatibility
Inkjet Inkjet printers only
Laser Laser printers only

Select inkjet transfer paper if you have an inkjet printer, and laser transfer paper if you have a laser printer.

Size and Quantity

Determine the size of transfer paper you need based on the size of the image you want to transfer. Transfer paper is typically available in standard paper sizes, such as A4 and Letter. Consider the quantity of paper you need, especially if you’re doing multiple transfers or experimenting with different images.

Surface Type

Transfer papers come with different surface types designed for specific applications. For example, there are transfer papers for light-colored fabrics, dark-colored fabrics, and hard surfaces like wood and metal. Choose the transfer paper with the appropriate surface type for your project.

Image Quality

High-quality transfer paper produces sharp and vibrant images. Look for transfer paper with a high resolution (measured in dots per inch, or DPI) to ensure excellent image quality.

Drying Time

Transfer papers have varying drying times depending on their composition. If you’re short on time, consider using transfer paper with a faster drying time. However, keep in mind that faster drying papers may require more heat during the transfer process.

Brand Reputation

Choose transfer paper from reputable brands that have a proven track record of producing high-quality products. Reading online reviews and researching different brands can help you make an informed decision.

Preparing the Surface for Transfer

Before transferring your image, it’s essential to prepare the surface to ensure optimal adhesion and a successful transfer. Here are the steps involved:

1. Cleaning the Surface

Start by thoroughly cleaning the surface to remove any dirt, grease, or debris that could interfere with the transfer. Use a lint-free cloth or paper towels with a mild cleaning agent, such as rubbing alcohol or a glass cleaner. Rinse the surface with water and allow it to dry completely.

2. Smoothing the Surface

If the surface you’re transferring to is rough or textured, it’s recommended to smooth it out to create a more even surface for the transfer. Sandpaper or a sanding block can be used to gently sand down the surface, removing any bumps or imperfections. Once sanded, wipe away any dust particles with a clean cloth.

3. Pre-Treating the Surface

For some transfer papers, pre-treating the surface with a specific medium can enhance the adhesion of the transfer. Here’s a table summarizing the pre-treatment requirements for common transfer paper types:

Transfer Paper Type Pre-Treatment
Iron-On Transfers Apply a thin layer of heat-resistant spray adhesive to the surface before ironing on the transfer.
Sublimation Transfers Use a sublimation spray coating or a special sublimation solution to prepare the surface.
Laser Printed Transfers No pre-treatment required.

Positioning the Transfer Paper

Precisely positioning the transfer paper is crucial for a successful print transfer. Follow these steps to ensure proper alignment:

1. Measure and Mark the Surface

Measure the area where you wish to transfer the image and mark its center. Transfer papers are typically slightly larger than the image size, so allow for a small margin around the markings.

2. Center the Transfer Paper

Align the transfer paper onto the surface, ensuring that the printed side faces upward. Position the center of the paper over the mark made in step 1. Secure the edges with tape or binder clips to prevent shifting.

3. Apply Moderate Pressure

Using your fingertips or a smoothing tool, apply gentle pressure to the transfer paper to remove any air bubbles or creases. Ensure even pressure is applied across the entirety of the surface.

4. Additional Tips for Perfect Alignment

For precise positioning, consider the following tips:

Tip Description
Use a Ruler or Gridlines Place a ruler or draw gridlines on the surface to guide the alignment of the paper.
Align to Existing Features If there are existing lines or shapes on the surface, align the transfer paper to match them for precise placement.
Check from Different Angles Step away from the surface and observe the alignment from different angles to ensure it is centered and straight.

Heat Application Methods

1. Iron-On Transfer

This is the most common method of transferring designs onto fabric. Use a household iron on the appropriate heat setting for the transfer paper. Place the transfer paper on the fabric with the design facing up and apply heat for the recommended time. Allow the transfer to cool before peeling off the backing paper.

2. Heat Press

A heat press is a professional-grade machine that provides evenly distributed heat and pressure for transferring designs. This method produces high-quality, long-lasting transfers. Follow the manufacturer’s instructions for the specific heat press and transfer paper being used.

3. Convection Oven

Convection ovens circulate hot air around the transfer, ensuring even heat distribution. Place the transfer paper on a metal tray and insert it into the oven. Heat the oven to the recommended temperature and bake for the specified time. Allow the transfer to cool completely before removing from the oven.

4. Heat Gun

Heat guns emit hot air, which can be used to transfer designs onto fabric. However, this method requires more skill and practice to achieve satisfactory results. Hold the heat gun at a distance of 6-12 inches from the transfer paper and move it continuously over the design. Apply gentle pressure to activate the adhesive.

5. Microwave Transfer

Microwaving is a convenient method for transferring small designs onto fabric. Place the transfer paper on a microwave-safe plate and cover it with a damp cloth. Microwave on high for the recommended time (usually 10-30 seconds). Allow the transfer to cool slightly before peeling off the backing paper. Note that this method may not be suitable for all types of fabrics or transfer papers.

Method Equipment Suitable Fabrics
Iron-On Household iron Cotton, polyester, blends
Heat Press Heat press machine Variety of fabrics
Convection Oven Convection oven Heat-resistant fabrics
Heat Gun Heat gun Smooth, non-porous fabrics
Microwave Microwave Small, microwave-safe fabrics

Cool Down and Removal

Let the Transfer Cool: Allow the transfer paper to cool completely after ironing. This will prevent the ink from smudging or smearing when removed.

Remove the Backing Paper: Once the transfer has cooled, carefully peel away the backing paper. Start from one corner and gently lift it away, avoiding tearing or stretching the transfer.

Use a Cold, Wet Cloth: If any adhesive residue remains on the fabric, dampen a clean cloth with cold water. Press it gently onto the transfer for a few seconds to loosen the adhesive. Avoid rubbing, as this could damage the transfer.

Check for Completeness: After removing the backing paper, inspect the transfer to ensure that it is fully adhered to the fabric. If any areas are missing or partially faded, you may need to re-iron or use a touch-up pen.

Wash and Dry: Allow the transfer to dry completely before washing or drying the fabric. Follow the care instructions for both the fabric and the transfer paper to ensure long-lasting results.

Post-Transfer Care

After transferring your design, proper care is essential to ensure the transfer’s longevity and prevent damage. Here’s a detailed guide to post-transfer care:

1. Allow Time for Drying

Give the transfer sufficient time to dry completely before handling it. Avoid touching or moving the transferred image, as this can smudge or ruin the design.

2. Protect from Heat

Keep the transfer away from excessive heat sources like direct sunlight, hair dryers, or irons. Heat can cause the transfer to warp, bubble, or fade.

3. Handle with Gloves

If possible, wear gloves when handling the transferred image. This will protect the design from oils or dirt on your fingers.

4. Store Properly

Store the transferred item flat and protected from dust or moisture. Consider using archival sleeves or acid-free paper to preserve the design.

5. Avoid Harsh Chemicals

Avoid exposing the transfer to harsh chemicals like bleach or detergents. These can damage the image and the surface it’s transferred to.

6. Clean Carefully

If cleaning is necessary, use a mild cleaning solution and gently wipe the transfer. Avoid using abrasive materials or harsh scrubbing.

7. Additional Considerations for Different Transfer Types

Different transfer types may require specific post-transfer care. Here’s a table with some common transfer types and their special considerations:

Type of Transfer

Removal Method

Light Transfer Paper

Peel away the backing paper and cool immediately.

Dark Transfer Paper

Peel away the backing paper, cool, and use a cold, wet cloth to remove adhesive residue.

Sublimation Transfer Paper

Let cool completely and use a heat gun or iron to activate the ink.

Transfer Type Special Considerations
Inkjet Transfers Allow ample time for drying before handling, use specific heat settings for the ink type, protect from moisture.
Laser Transfers Ensure the transfer surface is compatible with laser printing, allow cooling time after transfer, protect from heat.
Toner Transfers Use a thick transfer paper, ensure the image is on the right side of the transfer, follow specific heat and timing guidelines.

Troubleshooting Common Issues

Encountering problems while using transfer paper? Here are some common issues and their solutions:

1. Transfer Image Fading Off

Ensure firm pressure during ironing to ensure the toner adheres to the surface.

2. Transfer Image Blurring

Use a higher temperature and longer ironing time. Avoid moving the iron too much during transfer.

3. Transfer Paper Not Sticking

Apply more pressure when pressing with your iron and ensure the surface is clean and free from debris.

4. Image Transferring Upside Down

Place the transfer paper correctly, facing down on the fabric.

5. Iron Not Hot Enough

Check the temperature setting on your iron and adjust to the recommended heat level for the transfer paper.

6. Incorrect Iron Settings

Set your iron to “no steam” mode to avoid moistening the paper during transfer.

7. Dirty or Worn Iron

Clean the soleplate of your iron to remove any dirt or debris that may interfere with the transfer process.

8. Advanced Troubleshooting

a. Ink Smudging or Bleeding

Reduce the temperature and use a lighter touch when ironing. Alternatively, try a lower-pressure printing technique like laser printing or inkjet printing on heavyweight paper.

b. Bubbles or Wrinkles in the Transfer

Ensure the fabric is flat and taut before applying the transfer. Apply even pressure with your iron and avoid creating wrinkles or bubbles.

c. Transfer Paper Tearing or Curling

Handle the transfer paper carefully and avoid bending or tearing it. If the paper is curling, try placing it in a cool, humid environment for a few hours before using.

Advanced Techniques for Complex Designs

For highly intricate designs that require precision and multiple transfers, consider the following advanced techniques:

Multi-Layer Masking

Create separate transfer papers for each layer of your design. Align and tape each layer precisely to ensure perfect registration during multiple transfers.

Paint Masking

Use masking paint to cover areas that should not receive toner transfer. This technique allows for selective transfer and helps prevent unintended bleed-through.

Screen Printing Emulsion

Apply screen printing emulsion to the areas of your design that require toner transfer. This creates a resist layer, preventing toner from adhering to undesired areas.

Laser Cutting Stencils

Design and laser cut stencils from adhesive vinyl or heat-resistant materials. Place the stencils over the transfer paper to guide the toner application precisely.

Multiple Transfer Runs

Transfer complex designs in multiple passes, allowing each layer to cure before applying the next. This ensures proper adhesion and prevents smudging or misalignment.

Color Registration

For designs with multiple colors, create separate transfer papers for each color. Carefully align and secure the papers to achieve precise color registration during the transfer process.

Multi-Substrate Transfers

Transfer complex designs onto different substrates, such as textiles, ceramics, or wood. Use appropriate transfer methods and materials to ensure successful results on various surfaces.

Wet Application

For delicate or non-porous substrates, apply the transfer paper with water or a transfer solution. This helps the paper adhere temporarily, ensuring proper toner transfer before drying.

Digital Editing and Manipulation

Utilize digital image editing software to refine, manipulate, and prepare complex designs for transfer. Adjust sizing, color, and layers precisely to optimize the final transfer results.

Creative Applications and Innovations

Beyond traditional uses, transfer paper opens up a world of creative possibilities. Here are some innovative applications:

1. Custom Garment Designs:

Create unique clothing items by transferring intricate patterns, logos, or personal images onto fabrics.

2. Home Decor Transformations:

Enhance your home decor by transferring designs onto pillows, curtains, or furniture, giving them a personalized touch.

3. Personalized Accessories:

Design one-of-a-kind mugs, water bottles, or tote bags by transferring images or photos to create memorable keepsakes.

4. Wall Art and Canvas Painting:

Utilize transfer paper to create stunning wall art or canvas paintings by transferring high-quality images or designs.

5. Temporary Tattoos:

Create temporary tattoos by transferring water-slide decal paper designs onto skin, offering a fun and creative form of body art.

6. Scrapbooking and Journaling:

Bring scrapbook pages and journals to life by incorporating images and designs transferred from printed materials or digital sources.

7. Woodworking and Furniture Crafting:

Transfer intricate designs and patterns onto wooden surfaces to create custom-made furniture or decorative pieces.

8. Ceramic and Glassware Decoration:

Add a personal touch to ceramics or glassware by transferring designs and patterns to create unique and eye-catching pieces.

9. Metalworking and Jewelry Making:

Etch designs onto metal surfaces and create intricate jewelry pieces by utilizing transfer paper to transfer patterns and images.

10. Digital Image Transfer Techniques:

Explore advanced techniques such as sublimation printing, resin transfer, and heat transfer to transfer digital images and designs onto a wide range of surfaces, including fabrics, plastics, and ceramics.

Transfer Type Suitable Surfaces Drying Time
Laser Transfer Paper, fabrics, wood, metal Varies depending on surface
Inkjet Transfer Paper, fabrics, ceramics, glass 24-48 hours
Sublimation Transfer Fabrics, plastics, ceramics Immediate
Water-Slide Transfer Paper, skin, wood 1-2 hours

How to Use Transfer Paper

Transfer paper is a type of paper that allows you to transfer images and designs onto other surfaces. It is commonly used to decorate t-shirts, mugs, and other objects. There are two main types of transfer paper: laser transfer paper and inkjet transfer paper. Laser transfer paper is used with laser printers, while inkjet transfer paper is used with inkjet printers.

To use transfer paper, you will need the following materials:

  • Transfer paper
  • Printer
  • Scissors
  • Heat press or iron
  • Surface to transfer image to

Once you have gathered your materials, you can begin the transfer process.

  1. Print your image onto the transfer paper. Make sure to mirror the image if you are using laser transfer paper.
  2. Cut out the image.
  3. Place the image on the surface you want to transfer it to.
  4. Apply heat to the image using a heat press or iron. The amount of heat and time required will vary depending on the type of transfer paper and surface you are using.
  5. Remove the transfer paper and allow the image to cool.

People Also Ask

How do I choose the right transfer paper?

The type of transfer paper you choose will depend on the type of printer you have and the surface you are transferring the image to. Laser transfer paper is used with laser printers, while inkjet transfer paper is used with inkjet printers. You should also consider the type of surface you are transferring the image to. Some transfer papers are designed for use on specific surfaces, such as fabric or ceramic.

What is the best way to apply heat to transfer paper?

The best way to apply heat to transfer paper is to use a heat press. A heat press will evenly distribute heat across the image and help to prevent the image from fading or peeling. If you do not have a heat press, you can use an iron to apply heat. However, be careful not to overheat the image, as this can cause the image to fade or peel.

How do I remove transfer paper?

Once you have transferred the image to the surface, you can remove the transfer paper. To remove the transfer paper, simply peel it away from the surface. If the transfer paper is difficult to remove, you can use a damp cloth to help loosen the adhesive.

8 Easy Steps To Modge Podge Paper On Wood

10 Stunning Ways to Display Wedding Photos

Embark on a transformative journey as you delve into the realm of Mod Podge artistry. With its unparalleled versatility, Mod Podge empowers you to adorn ordinary wood surfaces with the vibrant hues and captivating patterns of paper. Whether you aspire to create a charming accent piece, revitalize a beloved heirloom, or simply express your creativity, this guide will unveil the secrets of mastering the art of Modge Podging paper on wood.

Before embarking on this enchanting endeavor, it is imperative to gather the essential materials. Procure a clean and dry wood surface, Mod Podge in your preferred finish (matte, glossy, or satin), a soft brush or foam applicator, and an array of decorative paper. The type of paper you select will determine the final aesthetic of your masterpiece. From vintage book pages to vibrant scrapbook paper, the possibilities are limitless. Once you have assembled your tools, prepare the wood surface by sanding it lightly and removing any dust or debris.

With your materials ready, it is time to unleash your creativity. Begin by applying a thin layer of Mod Podge to the wood surface. Gently lay the paper over the Mod Podge, ensuring that it is smooth and free of wrinkles. Use your soft brush or foam applicator to press the paper firmly into place, taking care not to tear it. Carefully remove any excess Mod Podge from the edges of the paper using a damp cloth. Allow the first coat of Mod Podge to dry completely. This process may take several hours or overnight, depending on the thickness of the Mod Podge and the humidity level. Once the first coat is dry, you can apply additional coats of Mod Podge as desired to enhance the durability and depth of the finish.

Step-by-Step Guide to Modge Podging Paper

1. Preparing the Paper and Wood

To achieve a flawless Modge Podge application, thorough preparation is essential. Begin by selecting the desired paper and wood surface. The paper should be cut to the exact dimensions of the wood, ensuring a snug fit without overhangs or gaps. Remember to choose Mod Podge specifically formulated for paper and wood adhesion to ensure optimal results.

Before applying the Mod Podge, lightly sand the wood surface using fine-grit sandpaper. This gentle abrasion creates a slightly roughened texture, enhancing the adhesion of the Mod Podge and paper. Once sanded, wipe the wood surface with a clean, damp cloth to remove any debris.

Next, apply a thin, even coat of Mod Podge to the wood surface using a soft brush. Allow the Mod Podge to dry partially until it becomes tacky to the touch. This tacky surface will provide the necessary adhesion for the paper when applied in the next step.

To ensure a seamless transfer of the paper onto the wood, carefully align the paper with the edges of the wood. Use a ruler or measuring tape for precise alignment if necessary. Once satisfied with the placement, gently smooth out the paper using your fingers or a clean, soft cloth. This will help eliminate air bubbles and ensure a flat, even surface.

Finish the process by applying a generous layer of Mod Podge over the paper. Use a sweeping motion with the brush, starting from the center and working outwards. The Mod Podge will seal the paper to the wood and protect it from damage. Allow the Mod Podge to dry completely before handling the project.

By following these detailed steps, you can achieve professional-looking results when Modge Podging paper onto wood. The key is to prepare the surfaces thoroughly, apply the Mod Podge at the correct consistency, and allow ample drying time. With patience and attention to detail, you can create beautiful and durable Mod Podge projects that will add a touch of personality to your home.

2. Sealing the Project

Once the Mod Podge has dried completely, you can enhance the durability of your project by applying a clear sealant. This step is especially important if the project will be exposed to moisture or wear and tear.

Choose a sealant specifically designed for the type of Mod Podge and the intended use of the project. Apply the sealant according to the manufacturer’s instructions, typically using a soft brush or cloth. Allow the sealant to dry completely before handling the project.

3. Troubleshooting

If you encounter any issues while Modge Podging paper onto wood, refer to the following troubleshooting tips:

Issue Solution
Air bubbles Carefully smooth out the paper or use a pin to release the air. Apply more Mod Podge if needed.
Wrinkles Apply more Mod Podge and smooth out the paper again. If necessary, use a heat gun or hair dryer on a low setting to gently warm the paper and make it more pliable.
Paper tearing Use a softer brush and apply less pressure when smoothing out the paper. You may also want to use a thinner layer of Mod Podge.
Mod Podge drying too quickly Apply the Mod Podge to a smaller area at a time and work quickly. You can also try adding a little water to the Mod Podge to slow down the drying time.

Materials You’ll Need for Paper Modge Podge

To successfully modge podge paper onto wood, you’ll need the following materials:

Tracing Paper or Waxed Paper

Tracing paper or waxed paper will serve as a protective barrier between the paper and the modge podge, making it easier to smooth out the paper and remove air bubbles.

Tips:

* Use a piece of tracing paper or waxed paper that is slightly larger than the piece of paper you’re modge podging.
* If you’re using tracing paper, make sure to trace the design onto the tracing paper first.
* If you’re using waxed paper, you can simply place it over the design.

Foam Brush

A foam brush is the best way to apply the modge podge. It will help to evenly distribute the glue and prevent streaks or brush marks.

Tips:

* Use a soft, wide foam brush.
* Apply a thin layer of modge podge to the wood surface and to the back of the paper.
* Use gentle, even strokes to avoid tearing the paper.

Painter’s Tape

Painter’s tape will help to hold the paper in place while it dries. It’s important to use a low-tack painter’s tape to avoid damaging the paper or the wood.

Tips:

* Apply painter’s tape around the edges of the paper.
* Smooth the tape down to ensure a secure hold.
* Once the modge podge is completely dry, remove the painter’s tape.

Material Purpose
Tracing Paper or Waxed Paper Protective barrier to prevent tearing and air bubbles
Foam Brush Evenly distribute modge podge without streaks or brush marks
Painter’s Tape Hold paper in place while drying, avoid damage to paper or wood

Preparing Your Paper and Wood Surface

Choosing the Right Paper

  • Consider the paper’s thickness and weight: Heavier papers can be more difficult to adhere, while thinner papers may tear more easily.
  • Select a paper with a desired texture: Smooth papers provide a flat surface, while textured papers can add interest.
  • Choose a paper with a compatible color and pattern: The paper’s appearance should complement the wood’s finish and overall aesthetic.

Preparing the Wood Surface

  • Sand the wood smooth: Remove any splinters or rough edges to create a flat surface for the paper.
  • Clean the wood with a damp cloth: Wipe away any dirt or debris that could interfere with the adhesion of the Mod Podge.
  • Apply a primer (optional): Primer helps seal the wood and improve the adhesion of the Mod Podge.

Applying Mod Podge to the Paper

  1. Spread a thin layer of Mod Podge over the paper’s surface: Use a brush or a foam sponge to apply an even coat.
  2. Allow the Mod Podge to become slightly tacky: Wait for a few minutes until the Mod Podge has become translucent and slightly sticky.
  3. Carefully place the paper onto the wood surface: Align the paper and press it down gently, working from the center outwards to avoid air bubbles.
  4. Smooth out the paper: Use your fingers, a roller, or a squeegee to press down on the paper, removing any wrinkles or air bubbles.
  5. Wait for the Mod Podge to dry completely: Allow the Mod Podge to dry for several hours or overnight before applying any further coats or decorations.

Materials You’ll Need

– Modge Podge
– Foam brush
– Paper or fabric
– Wood surface

Step-by-Step Instructions

1. Prepare your surface: Ensure your wood surface is clean and dry.

2. Apply a thin layer of Modge Podge to the wood: Use a foam brush to spread a thin, even coat over the area where you’ll be applying the paper or fabric.

3. Place the paper or fabric on the wood: Carefully align the paper or fabric and press it firmly onto the Modge Podge. Smooth out any wrinkles or bubbles.

4. Apply another layer of Modge Podge: Brush a thin layer of Modge Podge over the top of the paper or fabric, sealing it to the wood.

5. Remove excess Modge Podge: Use a damp cloth to gently wipe away any excess Modge Podge that has squeezed out from the edges or bubbles.

Removing Bubbles and Excess Modge Podge

To remove bubbles and excess Modge Podge, a few additional steps are required:

  1. Pierce bubbles: If any bubbles occur, carefully pierce them with a needle or pin.
  2. Push out air bubbles: Gently press the trapped air out from the edges towards the center using a soft cloth or your fingers.
  3. Wipe away excess Modge Podge: Use a damp cloth to dab away any excess Modge Podge that has accumulated around the edges or bubbles. Repeat this process until the surface is smooth and clean.

Tip: Allow the Modge Podge to dry completely before moving or handling the wood surface to prevent smudging or damage.

Troubleshooting Common Modge Podge Paper Issues

Bubbles:

  • Cause: Air entrapment during application.
  • Solution: Use a brayer or roller to firmly press out bubbles. Smoothing isn’t possible? Puncture bubbles and dab with a cloth.

Wrinkles:

  • Cause: Paper applied too thinly or not adequately soaked in Modge Podge.
  • Solution: Apply more Modge Podge and smooth with a brush or sponge. For tiny wrinkles, use a hairdryer to heat the paper gently and stretch it.

Buckling or Warping:

  • Cause: Paper is too thick or the wood is not properly sealed.
  • Solution: Use thinner paper, seal the wood with an acrylic medium, or apply a thicker layer of Modge Podge to create a stronger bond.

Lifting Edges:

  • Cause: Not enough Modge Podge applied or applied unevenly.
  • Solution: Apply an extra layer of Modge Podge around the edges, especially the corners, and press down firmly.

Streaking or Yellowing:

  • Cause: Impurities in the Modge Podge or insufficient drying time.
  • Solution: Use clear Modge Podge, apply thin layers, and allow ample drying time.

Dull Finish:

  • Cause: Insufficient sealant or improper application.
  • Solution: Apply a clear, water-based sealant after the Modge Podge has dried and cure for the recommended time.

Chipping or Flaking:

  • Cause: Not enough Modge Podge or poor adhesion.
  • Solution: Ensure proper surface preparation, clean the surface thoroughly, and apply multiple layers of Modge Podge for a strong bond.

Discoloration:

  • Cause: Paper is too porous or not properly sealed.
  • Solution: Seal the paper before applying Modge Podge and choose paper with a low absorbency.

Adhesion Issues:

  • Cause: Insufficient Modge Podge or poor surface preparation.
  • Solution: Clean the surface thoroughly, sand if necessary, and apply a generous amount of Modge Podge to ensure proper adhesion.

How To Modge Podge Paper On Wood

Modge Podge is a versatile craft adhesive that can be used to adhere paper to wood. It is a water-based adhesive that dries clear, so it will not yellow or discolor the paper over time. Modge Podge is also non-toxic, so it is safe to use around children and pets.

To modge podge paper on wood, you will need the following supplies:

  • Modge Podge
  • Paper
  • Wood
  • Paintbrush
  • Scissors

Instructions:

  1. Cut the paper to the desired size.
  2. Apply a thin layer of Modge Podge to the wood.
  3. Place the paper on the wood and smooth out any wrinkles.
  4. Apply a thin layer of Modge Podge to the top of the paper.
  5. Allow the Modge Podge to dry completely.
  6. People Also Ask About How To Modge Podge Paper On Wood

    Can I use regular glue to modge podge paper on wood?

    No, you should not use regular glue to modge podge paper on wood. Regular glue is not as strong as Modge Podge and it will not dry clear. This means that the paper may yellow or discolor over time.

    How long does it take for Modge Podge to dry?

    Modge Podge dries to the touch in about 15 minutes. However, it is best to allow it to dry completely for 24 hours before using the item.

    Can I modge podge paper on painted wood?

    Yes, you can modge podge paper on painted wood. However, it is important to make sure that the paint is completely dry before applying the Modge Podge. Otherwise, the Modge Podge may not adhere properly.

5 Best-Selling Laser Cut Items to Watch Out for in 2024

10 Stunning Ways to Display Wedding Photos

Featured Image: https://tse1.mm.bing.net/th?q=$title$

In the ever-evolving world of digital fabrication, laser cutting technology has emerged as a game-changer. Its precision, versatility, and speed have revolutionized the creation of intricate and bespoke products. As we delve into 2024, the demand for laser-cut items continues to soar, with certain categories dominating the market.

Custom jewelry, home décor, and personalized gifts are among the top-selling laser cut items of 2024. Intricate and delicate jewelry designs, such as filigree pendants and charm bracelets, showcase the unparalleled precision of laser cutting. Personalized home décor pieces, including customized coasters, wall art, and candle holders, add a unique and stylish touch to any living space. Laser-engraved gifts, featuring custom messages or designs, hold sentimental value and make thoughtful keepsakes.

In the fashion industry, laser cut garments and accessories are gaining popularity. Delicate lace patterns, intricate embroidery, and perforated designs elevate clothing items and accessories, creating unique and eye-catching pieces. From flowy dresses to statement earrings, laser cutting enables designers to push the boundaries of creativity and create truly original designs. Additionally, laser-cut industrial components and prototypes continue to drive innovation in various sectors, from engineering to medical devices. The precision and efficiency of laser cutting facilitate the creation of complex shapes and high-tolerance parts.

Signs and Plaques: Personalized and Ornate

Laser-cut signs and plaques have become increasingly popular in recent years, and this trend is expected to continue in 2024. Laser cutting allows for intricate and precise designs that can be customized to meet the needs of any customer. Some of the most popular laser-cut signs and plaques include:

Personalized Signs

Laser-cut personalized signs are a great way to add a personal touch to your home or business. They can be made from a variety of materials, including wood, metal, and acrylic. Personalized signs can be used for a variety of purposes, such as:

  • Welcome signs
  • Name signs
  • Address signs
  • Business signs
  • Event signs

Laser-cut personalized signs are available in a variety of styles, from rustic to modern. They can be engraved with any text or design, making them a truly unique and personalized gift. In 2024, personalized signs are expected to be especially popular for weddings, birthdays, and other special occasions.

Ornate Plaques

Laser-cut ornate plaques are a beautiful and elegant way to commemorate a special event or person. They can be made from a variety of materials, including wood, metal, and glass. Ornate plaques can be engraved with any text or design, making them a truly unique and personal keepsake.

The popularity of laser-cut ornate plaques is expected to continue in 2024. They are a popular choice for:

  • Awards
  • Recognition plaques
  • Memorial plaques
  • Milestone plaques
  • Home décor
Best Selling Laser Cut Items 2024
Personalized Signs
Ornate Plaques
Decorative Panels
Home Accessories
Toys and Games

Jewelry and Accessories: Delicate and Eye-Catching

Laser-cut jewelry and accessories are set to take the fashion world by storm in 2024. These intricate pieces offer endless possibilities for design and personalization, making them unique and meaningful additions to any wardrobe.

Earrings: Statement-Making Studs and Dangles

From delicate studs to eye-catching dangles, laser-cut earrings offer a wide range of styles to suit every taste. Intricate patterns, geometric shapes, and playful designs add a touch of sophistication and individuality to any outfit.

Necklaces: Layered and Delicate

Laser-cut necklaces are the perfect way to add a touch of elegance and shimmer to your look. Delicate chains, intricate pendants, and layered designs create a timeless and effortlessly chic statement.

Brooches and Pins: Tiny Works of Art

Brooches and pins are making a comeback in 2024, thanks to laser cutting. These miniature works of art can be adorned with intricate designs, colorful accents, and exquisite details. They are a unique and versatile way to add a touch of personality and style to your clothing, bags, and scarves.

Stationery and Paper Goods: Intangible Elegance

Customizable Business Cards

Laser-cut business cards are a sophisticated way to make a lasting impression. Delicately engraved logos, designs, and intricate details create a tactile experience that sets them apart from traditional cards.

Intricate Invitations

Invitations adorned with laser-cut embellishments add a touch of elegance and sophistication to any special occasion. From delicate floral patterns to intricate lace designs, each invitation becomes a personalized keepsake.

Personalized Stationery

Personalized stationery elevates letter writing and correspondence. Laser-cut letterheads, envelopes, and notepads enhance visual appeal, making even simple messages feel special.

Ornate Notebooks

Laser-cut notebooks combine practicality with aesthetics. Intricate covers featuring geometric patterns, landscapes, or even personalized names add a unique flair to daily jottings and to-do lists.

Modern Greeting Cards

Laser-cut greeting cards offer a sophisticated alternative to traditional designs. Creative patterns, intricate cutouts, and vibrant colors create unique and memorable cards.

Delicate Bookmarks

Laser-cut bookmarks are a bibliophile’s delight. Intricate designs, flowing lines, and intricate lace patterns transform ordinary bookmarks into works of art.

Personalized Gift Tags

Laser-cut gift tags add a thoughtful touch to presents. Elegant shapes, intricate designs, and personalized names make each gift feel extra special.

Decorative Paper Lanterns

Laser-cut paper lanterns create a mesmerizing ambiance. Intricate cutouts cast intricate shadows, transforming light into captivating displays. Available in various sizes and patterns, they evoke a sense of wonder.

Size Diameter Intricacy
Small 12 inches Low
Medium 18 inches Medium
Large 24 inches High

Best-Selling Laser Cut Items of 2024

Laser cutting is a versatile manufacturing process that can be used to create a wide variety of products, from intricate jewelry to industrial components. As the technology continues to evolve, new and innovative applications are being discovered all the time.

Here are some of the best-selling laser cut items of 2024:

  • Personalized jewelry: Laser cutting is a great way to create custom jewelry with unique designs. You can find laser-cut necklaces, bracelets, earrings, and rings in a variety of styles.
  • Home décor: Laser cutting can be used to create a variety of home décor items, such as lamps, candle holders, and wall art. These items can add a touch of sophistication to any home.
  • Industrial components: Laser cutting is also used to create a variety of industrial components, such as gears, brackets, and panels. These components are often used in machinery, electronics, and other industrial applications.
  • Medical devices: Laser cutting is used to create a variety of medical devices, such as implants, surgical instruments, and diagnostic tools. These devices are often used in life-saving procedures.

People Also Ask About Best-Selling Laser Cut Items of 2024

What are the benefits of laser cutting?

Laser cutting offers a number of benefits over other manufacturing processes, including:

  • Precision: Laser cutting is a very precise process, allowing you to create intricate designs with high accuracy.
  • Speed: Laser cutting is a fast process, allowing you to produce large quantities of products in a short amount of time.
  • Versatility: Laser cutting can be used to create a wide variety of products, from simple to complex.
  • Affordability: Laser cutting is a relatively affordable process, making it a good option for businesses of all sizes.

What materials can be laser cut?

Laser cutting can be used to cut a variety of materials, including:

  • Metal
  • Wood
  • Plastic
  • Fabric
  • Paper

5 Ways to Prepare a Perfect Gift

10 Stunning Ways to Display Wedding Photos

Preparing a gift is an art form that, when done thoughtfully, conveys love, appreciation, and recognition. Whether it’s a birthday, anniversary, or simply a gesture of kindness, the act of gifting holds immense significance. Thoughtful preparation elevates the gift’s value, transforming it into an unforgettable token of your affection. Let’s delve into the intricacies of preparing a gift that will leave a lasting impression.

The journey of preparing a gift begins with selecting the perfect present. This requires careful consideration of the recipient’s preferences, personality, and style. Take some time to observe their interests, hobbies, and daily routine. A well-chosen gift demonstrates that you pay attention to the details that make them unique. Once you have a gift in mind, personalizing it adds an extra touch of thoughtfulness. It could be a monogrammed item, a handwritten note, or a special wrapping that reflects their personality.

The presentation of a gift holds equal importance as its selection. The wrapping should be visually appealing and complement the present inside. Choose high-quality wrapping paper and ribbons that evoke a sense of luxury and attention to detail. Consider adding a personalized gift tag or a sprig of fresh flowers to elevate the presentation further. When it comes to gift-giving, it’s the little details that make all the difference. By taking the time to prepare a gift meticulously, you not only convey your appreciation but also create a lasting keepsake that will be cherished for years to come.

How To Prepare A Gift

Preparing a gift is an art form that can be both thoughtful and rewarding. Whether you’re giving a gift for a birthday, holiday, or special occasion, there are a few key things to keep in mind to make sure your gift is well-received.

First, consider the recipient’s interests and hobbies. What do they like to do? What are they passionate about? If you’re not sure what to get, you can always ask them directly or do a little research online.

Once you’ve chosen a gift, it’s important to wrap it nicely. This shows that you put thought and care into the gift, and it will make the recipient feel special. There are many different ways to wrap a gift, so get creative and have fun with it.

Finally, don’t forget to include a personal touch. This could be a handwritten note, a photo, or a small memento. This will make the gift even more meaningful and show the recipient that you care.

People also ask

How do I choose the right gift?

Consider the recipient’s interests and hobbies. What do they like to do? What are they passionate about? If you’re not sure what to get, you can always ask them directly or do a little research online.

How do I wrap a gift nicely?

There are many different ways to wrap a gift, so get creative and have fun with it. You can use wrapping paper, tissue paper, ribbons, bows, and other embellishments. If you’re not sure how to wrap a gift, there are plenty of tutorials available online.

What should I include with my gift?

A personal touch is always appreciated. This could be a handwritten note, a photo, or a small memento. This will make the gift even more meaningful and show the recipient that you care.

5 Easy Ways To Adhere A Photo To Wood

$title$
How to Adhere a Photo to Wood

Preserving memories through physical photographs offers a tangible way to hold on to cherished moments. However, finding creative ways to display these photos can present a challenge. Adhering photos to wood is an innovative approach that adds warmth and character to any space. The natural texture of the wood complements the vibrancy of the photos, creating eye-catching and unique displays.

Before embarking on this project, it is essential to gather the necessary materials and prepare the wood surface. Medium-density fiberboard (MDF) or plywood provides an excellent base for adhering photos. Sanding the surface lightly helps create a smooth and even base for the adhesive. Additionally, choosing the right adhesive is crucial for long-lasting results. Photo-mounting adhesives specifically designed for adhering photos to various surfaces offer the best performance.

Once the wood surface is prepared and the adhesive selected, carefully apply the adhesive to the back of the photo. Avoid using too much adhesive, as it can cause the photo to wrinkle or bubble. Align the photo with the wood surface and press it down firmly, ensuring that all edges are securely adhered. Smooth out any air bubbles or wrinkles using a rolling pin or a squeegee. Allow the adhesive to dry completely before displaying your photo collage. The resulting display will showcase your memories in a unique and stylish way, adding a touch of warmth and personality to your home decor.

Choosing the Right Wood

The type of wood you select for your project will significantly impact the adhesion of the photo. Here are some factors to consider:

Grain Direction: The grain direction refers to the alignment of the wood fibers. Adhering a photo to wood with the grain will provide better adhesion than against the grain. This is because the glue will penetrate the wood more easily along the grain lines.

Wood Density: Denser woods, such as oak or maple, offer greater surface area for the glue to grab onto, resulting in stronger adhesion. Less dense woods, like pine or balsa, have a more porous structure and require more glue to achieve a secure bond.

Wood Moisture Content: The moisture content of the wood can affect the adhesion of the photo. Ideally, the wood should be dry and seasoned. Wet or damp wood can cause the glue to weaken or prevent it from bonding properly.

Wood Type Grain Direction Density Moisture Content
Oak Straight High Dry
Maple Straight High Dry
Pine Variable Low Dry
Balsa Straight Very Low Dry

Selecting the Appropriate Adhesive

When choosing an adhesive for adhering photos to wood, consider the following factors:

  • Bond strength: The adhesive should provide a strong and lasting bond between the photo and wood.
  • Drying time: Choose an adhesive with a drying time that allows ample time for positioning and adjustments.
  • Finish: Consider the desired finish of the adhered photo. Some adhesives leave a noticeable residue or discoloration.
  • Compatibility with wood: Ensure that the adhesive is compatible with the type of wood you are using. Some adhesives may damage certain wood finishes.
  • Flexibility: Wood expands and contracts with changes in temperature and humidity. Choose an adhesive that remains flexible to prevent cracking or peeling.

Here is a table summarizing some of the most common types of adhesives for adhering photos to wood:

Adhesive Type Bond Strength Drying Time Finish Compatibility Flexibility
Wood Glue Strong Short Clear Wood Low
Contact Cement Very Strong Fast Permanent Wood, Metal, Plastic High
Double-Sided Tape Moderate Immediate Invisible Most Surfaces High
Decoupage Medium Moderate to Strong Variable Matte or Glossy Wood, Paper, Fabric Low
Gel Medium Strong Medium Transparent Wood, Canvas, Paper High

Preparing the Wood Surface

Thoroughly clean the wood surface to remove any dirt, dust, or grease. Use a soft cloth dampened with a mild cleaner or denatured alcohol. Allow the surface to dry completely before proceeding.

Sand the surface of the wood lightly with fine-grit sandpaper to create a slightly rough texture. This will help the adhesive bond better to the wood. Remove any sanding dust with a clean cloth.

If the wood is porous, such as unfinished plywood or softwoods, apply a thin layer of wood conditioner or primer to seal the pores. This will prevent the adhesive from being absorbed too quickly, ensuring a strong bond.

If the wood is oily or has been treated with a sealant, such as varnish or polyurethane, it is important to remove the sealant before adhering the photo. Use a commercial sealant remover or fine-grit sandpaper to remove the sealant from the surface.

Note: For best results, use a high-quality wood adhesive specifically designed for bonding photos to wood.

Wood Type Preparation Method
Unvarnished Wood Clean, sand, and apply wood conditioner
Oiled Wood Clean and remove sealant
Sealed Wood Remove sealant and sand
Plywood Clean, sand, and apply wood conditioner
Softwoods Clean, sand, and apply wood conditioner

Cleaning the Photo

When you’re working with a precious or irreplaceable photo, it’s essential to handle it with the utmost care. Before adhering it to wood, thoroughly clean the photo to remove any dust, dirt, or fingerprints that could interfere with the adhesion process.

Materials you’ll need:

Item Usage
Soft-bristled brush Gently remove loose dirt and dust
Microfiber cloth Wipe away fingerprints and smudges
Distilled water Dissolve any remaining residue
Isopropyl alcohol (optional) For stubborn stains or adhesive residue

How to clean the photo:

  1. Start with a dry brush. Use a soft-bristled brush to gently remove any loose dirt or dust from the surface of the photo. Be careful not to apply too much pressure, as you could damage the photo.
  2. Wipe with a microfiber cloth. Once you’ve removed the loose dirt, wipe the photo down with a clean, dry microfiber cloth. This will help to remove any fingerprints or smudges.
  3. Dissolve any remaining residue. If there is any remaining residue on the photo, you can dissolve it with a cotton swab dipped in distilled water. Gently rub the cotton swab over the residue in a circular motion.
  4. Remove stubborn stains with isopropyl alcohol. If you encounter any stubborn stains or adhesive residue, you can try removing them with isopropyl alcohol. Apply a small amount of isopropyl alcohol to a cotton swab and gently rub it over the stain or residue. Be sure to test the alcohol on an inconspicuous area of the photo first to ensure that it does not damage the surface.

Applying the Adhesive

The type of adhesive you choose will depend on the type of wood and photo you’re working with. For most applications, a water-based adhesive such as Mod Podge or Elmer’s Glue will work well. If you’re using a particularly porous wood, you may want to use a thicker adhesive such as epoxy or wood glue.

To apply the adhesive, first spread a thin layer over the surface of the wood where you want to place the photo. Then, carefully place the photo on top of the adhesive and press down gently to remove any air bubbles.

If you’re using a water-based adhesive, you can use a damp cloth to wipe away any excess glue that seeps out from around the edges of the photo. If you’re using a thicker adhesive, you may need to use a putty knife or other tool to remove the excess glue.

5. Drying the Photo

Once the adhesive has been applied, allow the photo to dry completely before moving it. The drying time will vary depending on the type of adhesive you’re using, but most adhesives will dry within a few hours.

While the photo is drying, it’s important to keep it in a safe place where it will not be disturbed. You may want to weigh the photo down with a heavy object to help it stay flat.

Here is a table summarizing the different drying times for different types of adhesives:

Adhesive Type Drying Time
Water-based adhesive 1-2 hours
Epoxy 24 hours
Wood glue 12-24 hours

Positioning the Photo

Marking the Center of the Photo and Wood

To align the photo precisely, mark the center points of both the photo and the wood surface. Use a ruler or measuring tape and a pencil to draw a small dot at the exact center.

Measuring and Marking the Photo Placement

Measure the distance from the edges of the wood to the sides of the photo. Transfer these measurements to the photo, again marking the points with small dots. This will help you determine the exact position of the photo on the wood.

Using a Grid or Template for Alignment

For larger photos or complex designs, consider using a grid or template to assist with positioning. Create a grid of intersecting lines on the wood or photo to guide your placement. Alternatively, you can use a template made from cardboard or tracing paper with the photo’s outline traced on it.

Double-Checking the Placement

Before applying any adhesive, double-check the photo’s placement. Hold it up to the wood and align the marked points and lines. Make any necessary adjustments until the photo is positioned as desired.

Using Temporary Tape for Positioning

To ensure the photo remains in place while you apply the adhesive, use small pieces of temporary tape. Apply the tape to the corners or edges of the photo and gently press it onto the wood. This will prevent the photo from shifting during the adhesion process.

Fine-Tuning the Alignment

After applying the temporary tape, carefully adjust the photo’s alignment as needed. Use a ruler or your eye to check for any discrepancies and make minor adjustments until the photo is perfectly centered and aligned on the wood.

Securing the Photo with Pressure

Mount the photo on the wood using a press to apply even pressure and ensure a secure bond. Here’s a step-by-step guide to using a press:

Materials:

Material Quantity
Mounting Press 1
Photo 1
Wood panel 1
Wax paper or parchment paper 2 sheets

Instructions:

  1. Place the photo face down on one sheet of wax paper.
  2. Center the photo on the wood panel.
  3. Place the second sheet of wax paper over the photo.
  4. Insert the wood panel between the press plates.
  5. Apply even pressure to the press.
  6. Hold for 5-10 minutes.
  7. Remove the photo and inspect the bond.

If necessary, repeat steps 4-6 with additional pressure or time to ensure a secure attachment.

Using a press provides consistent and reliable pressure, resulting in a professional-looking bond between the photo and the wood. This method is ideal for large-scale or commercial photo mounting projects.

Removing Any Excess Adhesive

1. Allow the Adhesive to Cure Partially

Before attempting to remove any excess adhesive, it’s important to give it a chance to cure partially. This will make the adhesive less sticky and easier to handle.

2. Use a Scraper Tool

A sharp scraper tool can be used to gently scrape away any excess adhesive from the surface of the wood. Be careful not to apply too much pressure, as this could damage the wood.

3. Use a Cleaning Solution

A mild cleaning solution, such as rubbing alcohol or acetone, can be used to dissolve any remaining adhesive residue. Apply the solution to a clean cloth and gently wipe away the adhesive.

4. Use Heat

Heat can help to soften the adhesive, making it easier to remove. Use a heat gun or a hair dryer to apply heat to the adhesive. Be careful not to overheat the wood, as this could damage it.

5. Use an Adhesive Remover

If the other methods don’t work, you can try using a commercial adhesive remover. Follow the instructions on the product label carefully. Be sure to test the remover on a small, inconspicuous area first to make sure it doesn’t damage the wood.

6. Use a Sanding Block

A fine-grit sanding block can be used to sand away any remaining adhesive residue. Be careful not to sand too aggressively, as this could damage the wood.

7. Use a Vacuum Cleaner

A vacuum cleaner can be used to remove any dust or debris that has accumulated from the previous steps.

8. Cleaning with Wood Cleaner Solution

Material Usage
Wood Cleaner
Solution
Apply the wood cleaner solution to a clean cloth and gently wipe the surface of the wood to clean the surface.

Sealing the Photo for Protection

After adhering the photo to the wood, it’s essential to seal it to protect it from moisture, fading, and damage. Here are the steps involved in sealing the photo:

Sanding the Photo

Lightly sand the surface of the photo with fine-grit sandpaper to create a smooth surface for the sealant to adhere to.

Applying a Primer

Apply a thin layer of photo primer to the photo to create a barrier between the photo and the sealant. Allow the primer to dry completely.

Choosing a Sealant

Select a suitable sealant for the intended use and environment of the photo. Options include clear acrylic sealant, UV-resistant sealant, or epoxy resin.

Applying the Sealant

Apply the sealant in thin, even layers using a brush or foam applicator. Allow each layer to dry before applying the next one.

Curing the Sealant

Follow the manufacturer’s instructions for curing the sealant. This may involve drying it at a specific temperature or exposing it to sunlight.

Multiple Layers

For added protection, apply multiple layers of sealant. Sand lightly between each layer to ensure a smooth finish.

Estimated Drying Time

| Sealant Type | Estimated Drying Time |
|—|—|
| Clear Acrylic Sealant | 1 hour |
| UV-Resistant Sealant | 1-2 hours |
| Epoxy Resin | 24-72 hours |

Materials

Glue: Use wood glue specifically designed for photographs, such as Acid-Free Photo Mount Adhesive. It is acid-free, preventing the photo from yellowing over time.

Mod Podge: A versatile adhesive that can be used on wood and provides a glossy finish when dried.

Spray Adhesive: Fast-drying adhesive that creates a strong bond. However, avoid using too much, as it can wrinkle the photo.

Double-Sided Tape: Acid-free, photo-safe tape that provides a strong bond without damaging the photo.

Photo Transfer Medium: A liquid applied to the photo before ironing it onto the wood, creating a permanent and durable bond.

Wood: Use a smooth, sanded surface for best adhesion. Raw wood requires sealing with a primer before applying the photo.

Tips for Long-Lasting Adhesion

1. Prepare the Wood Surface

Sand the wood surface to smooth it and remove any dirt or debris. Apply a coat of primer to raw wood to prevent moisture absorption from the photo.

2. Choose the Right Adhesive

Consider the type of wood, photo, and desired finish when selecting the adhesive.

3. Apply the Adhesive Evenly

Use a thin, even layer of adhesive to prevent wrinkles or bubbles.

4. Align the Photo Carefully

Place the photo on the wood before the adhesive dries to ensure proper alignment.

5. Press Firmly

Use a roller, press, or even books to apply pressure and ensure good contact between the photo and wood.

6. Allow Ample Drying Time

Follow the adhesive’s instructions for drying time. Avoid handling the piece until it’s completely dry.

7. Protect the Photo

Apply a clear sealant or varnish to the surface of the photo to protect it from moisture and UV damage.

8. Use Acid-Free Materials

Ensure all materials used, including glue, tape, and paper, are acid-free to prevent photo deterioration.

9. Test on a Scrap Piece

Before applying adhesive to the final piece, test on a scrap piece of wood to ensure the adhesive is suitable.

10. Consider the Photo’s Thickness and Finish

thicker photos or those with glossy finishes may require more adhesive or a different method, such as photo transfer medium.

How To Adhere A Photo To Wood

Adhering a photo to wood is a simple and effective way to create a unique and personal piece of art. With a few simple steps, you can create a beautiful and lasting keepsake.

**Materials:**

  • Wood surface
  • Photo
  • Mod Podge or other decoupage medium
  • Brush
  • Scissors
  • Optional: sandpaper

**Instructions:**

  1. Prepare the wood surface. If the wood surface is unfinished, you may need to sand it lightly to create a smooth surface. Wipe away any dust or debris.
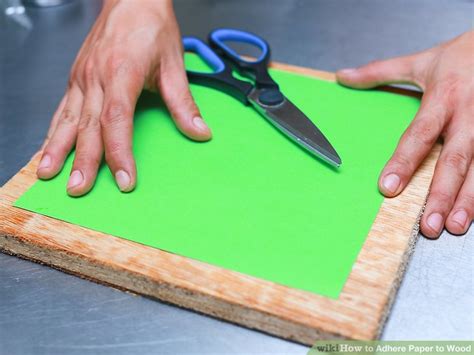
  2. Trim the photo. Cut the photo to the desired size and shape.
  3. Apply a thin layer of Mod Podge to the wood surface. Use a brush to apply an even layer, being careful not to apply too much.
  4. Place the photo on the wood surface. Carefully align the photo and press it down firmly.
  5. Apply another layer of Mod Podge to the photo. This will help to seal the photo and protect it from moisture.
  6. Let dry. Allow the Mod Podge to dry completely. This may take several hours or overnight.

People Also Ask

How do I protect the photo from yellowing?

To protect the photo from yellowing, you can apply a UV protectant spray after the Mod Podge has dried.

Can I adhere photos to any type of wood?

Yes, you can adhere photos to any type of wood. However, some woods, such as pine, may require a primer to help the Mod Podge adhere better.

Can I use other materials to adhere photos to wood?

Yes, you can use other materials, such as glue or varnish, to adhere photos to wood. However, Mod Podge is a popular choice because it is easy to use and creates a strong bond.