
Step into the virtual lanes and prepare for a bowling bonanza! Wii Bowling, a beloved Wii classic, offers an exhilarating bowling experience that can transform your living room into a virtual bowling alley. But what’s the secret to knocking down every pin with precision and ease? Join us as we embark on a detailed guide to master the art of bowling strikes on Wii Bowling, ensuring that every throw sends pins flying with thunderous abandon.
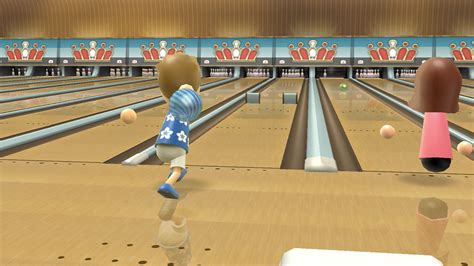
Before unleashing your bowling prowess, let’s establish the fundamentals. Wii Bowling requires a combination of timing, accuracy, and a strategic approach. Just like in real bowling, your success depends on understanding the mechanics of your throw. Begin by positioning your Mii on the launch pad and adjusting your distance from the foul line. As you swing your arm back, hold the Wii Remote horizontally and mimic a natural bowling motion. The timing of your swing is crucial: release the ball at the sweet spot, when the white marker on the screen aligns with the center of the bowling ball. This precise timing ensures optimal power and trajectory for your shot.
Beyond the basics, mastering Wii Bowling requires a keen eye for strategy. Each lane has its own unique characteristics, and understanding these variations can significantly improve your strike rate. The “oily” lanes, for instance, create slicker surfaces that make the ball curve more dramatically, while the “dry” lanes offer straighter paths. Experiment with different bowling ball types to find the one that best suits your playing style and the lane conditions. From the heavier, more powerful “Striker” to the lighter, more maneuverable “Curveball,” each ball offers distinct advantages and drawbacks. By adapting your strategy to the lane and ball selection, you’ll maximize your chances of leaving no pin standing.
Perfect Your Stance and Grip
Stance
For the optimal Wii Bowling stance, stand with your feet shoulder-width apart, toes facing slightly outward, knees bent slightly. Position yourself about 5-7 feet from the Wii bowling ball, with the ball centered in front of you. Ensure your body is balanced and comfortable, as proper posture will enhance your accuracy and power.
Maintaining a stable base throughout the throwing motion is crucial. Avoid shifting your feet or leaning excessively, as this can disrupt your aim and consistency. Remember to keep your core engaged and your eyes focused on the target arrows on the screen.
| Stance Key Points |
| Feet shoulder-width apart, knees slightly bent |
| Toes facing outward |
| 5-7 feet from the ball |
| Body balanced and comfortable |
Grip
The grip you choose will significantly impact your ball’s trajectory and spin. Experiment with different grips to find the one that feels most comfortable and allows for the smoothest release:
- Standard Grip: Wrap your thumb inside the ball with your fingers spread around the outside. This grip provides a balanced release with minimal spin.
- Hook Grip: Insert your thumb into the ball with your middle finger on top and your index finger on the side. This grip creates more hook, allowing you to curve the ball around obstacles.
- Power Grip: Grip the ball with your thumb and two fingers (usually your middle and ring fingers) inside the holes. This grip generates maximum power but may compromise your accuracy slightly.
Aim with Precision
Aiming correctly is crucial for a successful strike. It requires a steady hand and good eye coordination. Here are some tips to improve your precision:
Position Your Wii Remote Properly
Ensure the Wii Remote is held horizontally, with the A button facing towards you. Keep it parallel to the floor and level with your eyes.
Use the Targeting Arrow
When you aim, the targeting arrow will appear on the screen. Move the Wii Remote left or right to adjust the arrow’s position. Aim towards the pins that you want to hit. You can also use the “Look Around” feature by tilting the Wii Remote up or down to get a better view.
Consider Wind Conditions
The Wii Bowling game simulates wind conditions that can affect the trajectory of the ball. Observe the wind indicators on the screen and adjust your aim accordingly. If the wind is blowing left, aim slightly to the right, and vice versa.
Practice Regularly
Precision aiming requires practice. The more you play, the better you will become at judging the correct aiming point. Familiarize yourself with the different lane conditions and bowling balls to improve your accuracy.
Control Your Spin and Curve
Spin and Curve Types
Wii Bowling offers various spin and curve options, including:
| Type |
Effect |
| Forward Spin |
Causes the ball to roll forward with a topspin, resulting in more distance and hook potential. |
| Backward Spin |
Makes the ball roll backward with a backspin, increasing skid distance and reducing hook potential. |
| Left/Right Spin |
Causes the ball to curve left or right, depending on the direction of spin. |
Controlling Spin and Curve
To control spin and curve effectively, follow these steps:
- Hold the Wii Remote Properly: Grip the remote with your dominant hand and position the "A" button facing the direction you want the ball to travel.
- Tilt the Remote: Tilt the remote forward for forward spin, backward for backward spin, and left or right for left or right spin. The angle of tilt determines the amount of spin applied.
- Adjust Wrist Movement: As you swing the remote, flick your wrist at the release point to create additional spin and curve. Flicking your wrist up for forward spin, down for backward spin, and to the side for left or right spin.
- Practice and Experiment: Experiment with different spin and curve combinations to determine what works best for you. Practice consistently to improve your accuracy and control.
Master the Timing
Timing is critical in Wii Bowling. Aiming is important, but if you don’t hit the ball at the right time, it won’t matter how accurate you are. Notice where the ball is on the screen as you swing the Remote. There are the following moments to watch for:
- The “Sweet Spot”: This is the moment when the ball crosses the line in front of the pins. It is marked by a blue arrow on the screen.
- The “Pullback”: This is the moment when the ball is at its highest point. It is marked by a yellow arrow on the screen.
- The “Swing”: This is the moment when the ball is at its lowest point. It is marked by a red arrow on the screen.
- The “Release”: This is the moment when you let go of the B Button. It is marked by a green arrow on the screen.
To get a strike every time, you need to release the B Button at the “Release” moment. If you release it too early, the ball will be short of the pins. If you release it too late, the ball will be over the pins. The timing takes practice, but with a little patience, it can be mastered.
Here are some tips for mastering the timing:
- Watch the screen carefully and time your release with the “Release” moment.
- Practice bowling on different lanes with different pin settings. This will help you get used to the different timing.
- Don’t be afraid to experiment with different release points.
With practice, you will be able to master the timing and get a strike every time in Wii Bowling. The following table summarizes the tips discussed in this section:
| Tip |
Description |
| Watch the screen carefully |
Pay attention to the position of the ball and the timing marks on the screen. |
| Practice bowling on different lanes |
Get used to the different timing required for different lane conditions and pin settings. |
| Experiment with different release points |
Find the release point that feels most comfortable and consistent for you. |
Leverage the Power Ups
Wii Bowling offers a variety of power-ups that can significantly enhance your bowling performance. Here’s a detailed guide to make the most of these special abilities:
Triple Mushroom: Expand Your Strike Zone
This mushroom triples the size of your bowling ball, making it easier to hit pins and secure strikes. It’s particularly useful on narrow lanes or when targeting distant pins.
Bomb Mushroom: Clear the Pin Deck
The bomb mushroom detonates upon impact, knocking down all pins it touches. It’s ideal for clearing stubborn pins that are blocking your path to a strike. Aim carefully to maximize its effectiveness.
Banana Split: Redirect and Pinball Pins
The banana split splits your bowling ball into three smaller balls that bounce and pinball around the pin deck. This can create unexpected angles and increase the chances of knocking down elusive pins.
Spin Mushroom: Precision Control and Accuracy
The spin mushroom grants your bowling ball a powerful spin that can be used to curve it around obstacles and target specific pins. It takes practice to master, but it can be a game-changer once you get the hang of it.
Golden Mushroom: Supercharge Your Performance
The golden mushroom is the most potent power-up in the game. It doubles the speed and accuracy of your bowling ball, making it virtually unstoppable. Save this power-up for crucial moments when you need to secure a strike or finish off a spare.
| Power-Up |
Effect |
| Triple Mushroom |
Enlarges bowling ball, increasing strike zone |
| Bomb Mushroom |
Detonates on impact, clearing pin deck |
| Banana Split |
Splits bowling ball into smaller balls, pinballing and redirecting |
| Spin Mushroom |
Grants precision control and accuracy, allowing for curved shots |
| Golden Mushroom |
Supercharges bowling ball with increased speed and accuracy |
Use the Wii Remote Effectively
1. Hold the Remote Correctly
Position the Remote vertically, with the A button facing up and the strap secure around your wrist. Grip the Remote comfortably, allowing your thumb to rest naturally on the A button.
2. Focus on Aiming
Before releasing the ball, focus on aligning the Remote with the pins. Aim for the front pin in the middle of the triangle. Remember, accuracy is crucial for successful strikes.
3. Use the D-Pad for Adjustments
If necessary, use the D-pad to fine-tune your aim. The left and right arrows adjust the ball’s position, while the up and down arrows change the camera angle.
4. Calibrate Regularly
To ensure accurate motion tracking, calibrate the Wii Remote before playing. Go to the Wii Menu, select “Wii Options,” and then “Wii Remote Settings.” Follow the on-screen instructions to calibrate.
5. Motion Timing is Essential
Time the release of the Remote precisely to achieve the desired trajectory. A smooth, slightly downward motion with a quick upward flick at the end results in a powerful throw.
6. Practice and Experiment
Mastering Wii bowling requires practice. Experiment with different throws, such as straight shots, hooks, and curveballs. Try varying the speed and spin to determine what works best for you. Consider the following table for reference:
| Throw Type |
Motion |
Effect |
| Straight |
Straight forward motion |
Lands directly on the front pin |
| Hook |
Curve the Remote inward on release |
Swings around the front pin, hitting the back pins |
| Curveball |
Curve the Remote outward on release |
Swings around the back pins, hitting the front pin |
Study the Lane Patterns
The Wii bowling game employs several distinct lane patterns, each of which can significantly impact the ball’s trajectory. Understanding these patterns is crucial for consistently achieving strikes.
7. Gutter Feedback
The gutter feedback setting provides valuable information about your ball’s placement. The white arrow indicates the precise location where the ball was released, while the colored triangles represent the angle at which the ball entered the gutter.
| Triangle Color |
Angle |
Adjustment |
| Red |
<15° |
Move slightly to the right (for right-handed bowlers) or left (for left-handed bowlers) and try a straighter shot. |
| Yellow |
15°-30° |
Move further to the side and aim for the corresponding arrow to correct the angle. |
| Blue |
>30° |
Move significantly to the side and aim for a much straighter shot. |
By carefully analyzing the gutter feedback, you can identify your release point errors and adjust your stance and swing accordingly.
Practice and Practice Again
Practice with Different Bowling Balls
Try out various bowling balls to find one that fits your grip and throwing style. Experiment with the weight, size, and core material to determine which suits you best.
Aim for the Arrow
Notice the arrow on the lane? That’s your target. Aim slightly to the right of it (for right-handed bowlers) or left of it (for left-handed bowlers) to compensate for the hook.
Master the Approach
Your approach is crucial. Take four steps towards the lane, with your final step being a slide. This allows you to transfer your momentum effectively and create a consistent release.
Perfect Your Swing
The swing is another key element. Start with your bowling arm extended behind you, then bring it forward and release the ball at the bottom of the swing. The proper release will allow the ball to hook effectively.
Experiment with Different Lanes
Bowling lanes vary in oil patterns. Practice on several lanes to get a feel for different surfaces and adjust your technique accordingly.
Analyze Your Results
After each throw, observe where the ball hits the pins. This feedback will help you refine your aim, adjust your hook, and improve your overall consistency.
Avoid Distractions
Focus on your game. Don’t let noise or other distractions interfere with your concentration. Stay relaxed and maintain your focus on the task at hand.
Practice Consistently
The key to success is practice. Dedicate time to consistent practice sessions. Regular practice will help you develop muscle memory, refine your technique, and significantly improve your chances of getting a strike every time.
Consider the Split System
Split System in Bowling, where the ball leaves one or more pins standing after hitting the headpin and knocking it down. They are categorized into the following types:
7-10 Splits: Two pins, the 7 and the 10, stand off to the sides.
4-6-7-10 Splits: Three or four pins remain standing, forming a combination of the 4, 6, 7, and 10 pins.
3-6-7-10 Splits: Similar to the 4-6-7-10 split, but without the 4 pin.
2-4-6-7-10 Splits: This is one of the most challenging splits, with five pins scattered in a wide area.
To overcome these splits, aim for the pocket and use the following aiming points:
| Split Type |
Aiming Point |
| 7-10 Splits |
Between the 7 and 10 pins |
| 4-6-7-10 Splits |
Slightly behind the 7 pin, toward the 10 pin |
| 3-6-7-10 Splits |
Between the 3 and 6 pins |
| 2-4-6-7-10 Splits |
Slightly behind the 4 pin, aiming for the center of the pins |
Remember, these aiming points are just guidelines. Adjust your aim based on the ball’s speed and the location of the pins. With practice and the right techniques, you can master the Split System and improve your chances of getting strikes on Wii Bowling.
Enjoy the Bowling Extravaganza
Wii bowling has captured the hearts of gamers worldwide, offering an exhilarating and realistic bowling experience in the comfort of their homes. However, perfecting the art of bowling strikes requires a combination of skill, technique, and a little bit of luck. Here’s a comprehensive guide to help you achieve a perfect game every time.
1. Choose the Right Setup
Selecting the appropriate ball weight and grip size is crucial. The ball should be heavy enough to carry through the pins without wobbling, yet light enough to control the spin. Additionally, the grip should fit comfortably in your hand, promoting a secure and consistent release.
2. Master the Approach
The approach determines the momentum and direction of your ball. Start with short, practice swings to find your rhythm and balance. Take four steps forward, planting your feet firmly on the markers for stability. Keep your eyes focused on the target arrow throughout the approach.
3. Fine-Tune Your Aim
The target arrow indicates the ideal point of impact for a strike. Align the arrow with the center of the head pin and ensure that your ball is rolling straight toward it. If your ball consistently veers left or right, adjust your aim or the angle of your approach.
4. Develop a Consistent Release
A smooth, controlled release is essential for accuracy and power. As you swing back, keep your thumb inserted and your fingers relaxed. Release the ball at the bottom of the swing, creating a slight hook or curve.
5. Add Spin and Power
Spin provides additional power and control to your ball. As you release it, try to impart a clockwise or counterclockwise rotation by angling your wrist and fingers. This spin causes the ball to curve and hit the pins at a more advantageous angle.
6. Practice, Practice, Practice
The key to success is consistent practice. Play as many games as possible to develop muscle memory, refine your technique, and build confidence. Analyze your results and make adjustments as needed.
7. Watch the Pros
Observe professional bowlers to learn their techniques, strategies, and mental approach. Study their form, ball selection, and aiming methods. Emulating the best can help you improve your own game.
8. Consider Using a Bowling Glove
A bowling glove provides additional grip and support, allowing you to control the ball more precisely. It also absorbs moisture, preventing the ball from slipping out of your hand.
9. Choose the Right Alley
The type of bowling alley can affect your game. Some lanes may be oiled less, leading to faster ball speeds and increased hook potential. Experiment with different alleys to determine which conditions suit your style.
10. The Psychology of Bowling
In bowling, mental focus and confidence play a vital role. Stay relaxed, concentrate on the present shot, and don’t get discouraged by occasional misses. Visualizing a perfect game can boost your belief and improve your chances of success.
How To Get A Strike Every Time On Wii Bowling
Wii Bowling is a fun and challenging game that can be enjoyed by people of all ages. However, getting a strike every time can be difficult, especially if you’re not familiar with the game. Here are a few tips to help you get a strike every time:
- Use the right bowling ball. There are different bowling balls available in Wii Bowling, each with its own unique properties. The heavier the bowling ball, the more power it will have. However, heavier bowling balls are also more difficult to control. For beginners, it’s best to use a lighter bowling ball until you get the hang of the game.
- Aim for the center of the pins. When you’re bowling, it’s important to aim for the center of the pins. This will give you the best chance of knocking down all of the pins and getting a strike.
- Put some spin on the ball. Spinning the ball will help it to hook and knock down more pins. To spin the ball, simply twist your wrist as you release it. The direction of the spin will determine which way the ball hooks.
- Practice makes perfect. The best way to improve your bowling skills is to practice. The more you play, the better you’ll become at aiming and controlling the ball. So get out there and start practicing!
People Also Ask
How do I get a perfect score in Wii Bowling?
To get a perfect score in Wii Bowling, you need to get a strike on every frame. This means knocking down all ten pins with your first ball. It can be difficult to do, but it’s not impossible. With practice, you can learn to get a strike every time.
What is the best way to bowl a curveball in Wii Bowling?
To bowl a curveball in Wii Bowling, simply twist your wrist as you release the ball. The direction of the spin will determine which way the ball hooks. For example, if you want the ball to hook to the left, twist your wrist to the right as you release it.
How do I unlock all the characters in Wii Bowling?
To unlock all the characters in Wii Bowling, you need to complete certain challenges. For example, to unlock Toad, you need to get a strike with every character on the first frame. To unlock Waluigi, you need to get a perfect score.
