Top 5 Best Cars in Hill Climb Racing for Ultimate Victory

Top 5 Best Cars in Hill Climb Racing for Ultimate Victory
hill climb racing cars

Hill Climb Racing is a physics-based racing game where players drive various vehicles up challenging hills. As you progress through the game, you’ll unlock new tracks, vehicles, and upgrades. But which car is the best in Hill Climb Racing without a title? There are many great cars to choose from and what may be best for one track may not be best for another track. We’ll take a look at some of the best cars in the game and see how they stack up against each other.

One of the most popular cars in Hill Climb Racing is the Jeep. The Jeep is a great all-around car that can handle both on- and off-road tracks. It has good acceleration, top speed, and handling. Another popular car is the Monster Truck. The Monster Truck is a great choice for off-road tracks. It has huge tires that can easily roll over obstacles and it has a lot of power to get you up steep hills. However, the Monster Truck is not as good on on-road tracks due to its slow speed and handling.

If you’re looking for a car that is good on both on- and off-road tracks, then the Dune Buggy is a good choice. The Dune Buggy is a lightweight car that has good acceleration and top speed. It also has good handling and can easily navigate obstacles. However, the Dune Buggy is not as powerful as some of the other cars in the game and it can struggle on some of the steeper hills.

Maximize Vertical Velocity: The Importance of Vehicle Weight and Power-to-Weight Ratio

In hill climb racing, the objective is to ascend a steep slope as quickly as possible. To achieve this, it is crucial to optimize the vehicle’s vertical velocity. Two key factors that influence vertical velocity are vehicle weight and power-to-weight ratio.

Vehicle Weight

Lighter vehicles are generally advantageous in hill climb racing because they require less force to accelerate and less energy to overcome gravity. However, excessive weight reduction can compromise the vehicle’s structural integrity and handling characteristics.

Power-to-Weight Ratio

The power-to-weight ratio (P/W) is the measure of a vehicle’s ability to accelerate relative to its weight. A higher P/W ratio indicates greater acceleration capability. In hill climb racing, a high P/W ratio is essential for overcoming the forces of gravity and gaining elevation.

Factors Influencing Power-to-Weight Ratio

The following factors influence the power-to-weight ratio:

Factor Effect on P/W Ratio
Engine Power Increases P/W ratio
Vehicle Weight Decreases P/W ratio
Driveline Efficiency Increases effective P/W ratio
Aerodynamic Drag Reduces P/W ratio at high speeds
Rolling Resistance Reduces P/W ratio at low speeds

The X-Factor in Vehicle Selection: Driver Skill and Adaptation

In hill climb racing, the choice of vehicle is paramount. However, the most important factor that often gets overlooked is the driver. An experienced driver can overcome the limitations of an inferior vehicle, while a novice can struggle even with the best car.

Skill is not just about driving fast. It encompasses a wide range of abilities, including:

  • Situational awareness
  • Reaction time
  • Anticipation
  • Car control

Adaptation is equally important. The ability to adjust driving style to different conditions and courses is crucial. Drivers need to be able to assess obstacles, terrain, and weather conditions and adjust their approach accordingly.

The best hill climb racing cars are those that can adapt to the driver’s style and skill level. They offer a balance of power, handling, and reliability, allowing drivers to push their limits without sacrificing safety.

10 Key Considerations for Driver Skill and Adaptation

Factor Explanation
Steering Precision The car’s ability to respond to steering inputs accurately and with minimal delay.
Suspension Setup The way the suspension system absorbs bumps and maintains contact with the road surface.
Braking Performance The car’s ability to slow down quickly and effectively, with minimal fade or instability.
Power-to-Weight Ratio The ratio of the car’s horsepower to its curb weight, which determines acceleration and top speed.
Aerodynamics The car’s ability to reduce drag and improve stability at high speeds.
Tire Grip The ability of the tires to maintain traction and prevent slipping, especially on loose or uneven surfaces.
Suspension Travel The amount of movement available in the suspension system, which helps the car absorb bumps and maintain stability on rough terrain.
Weight Distribution The distribution of the car’s weight between the front and rear axles, which affects handling and stability.
Cockpit Ergonomics The design of the driver’s seat, pedals, and steering wheel to ensure a comfortable and supportive driving position.
Safety Features The car’s ability to protect the driver in the event of an accident, including features such as roll bars, safety harnesses, and airbags.

What is the Best Car in Hill Climb Racing?

Hill Climb Racing is a popular mobile game where players compete to climb as far up a hill as possible with their vehicles. There are many different cars to choose from in the game, each with its own unique strengths and weaknesses. So, what is the best car in Hill Climb Racing?

The answer to this question depends on a number of factors, including the player’s driving style and the terrain they are driving on. However, some cars are generally considered to be better than others. Here are a few of the most popular choices:

  • Monster Truck: The Monster Truck is a great all-around car that is well-suited for most tracks. It has good speed, handling, and durability.
  • Rally Car: The Rally Car is a good choice for players who prefer to drive quickly. It has excellent speed and handling, but it is not as durable as some other cars.
  • Supercar: The Supercar is the fastest car in the game. It has amazing speed and handling, but it is also very fragile.

People Also Ask

What is the best car for beginners in Hill Climb Racing?

The Monster Truck is a good choice for beginners because it is easy to control and has good speed and durability.

What is the best car for advanced players in Hill Climb Racing?

The Supercar is the best choice for advanced players because it has the best speed and handling. However, it is also very fragile, so it is not recommended for beginners.

What are some other good cars in Hill Climb Racing?

Some other good cars in Hill Climb Racing include the Race Car, the Buggy, and the Jeep.

4 Steps to Effortlessly Change Your Fortnite Character

Top 5 Best Cars in Hill Climb Racing for Ultimate Victory
How to Change Character Fortnite

Changing your character in Fortnite is a great way to customize your gameplay experience and show off your personal style. Whether you’re a seasoned veteran or a new player, there are plenty of different ways to change your character’s appearance and make them truly your own. In this article, we’ll walk you through the different steps on how to change your character in Fortnite, including how to choose a new skin, change your character’s name, and more. We’ll also provide some tips on how to make the most of your character customization options and create a unique and memorable Fortnite experience.

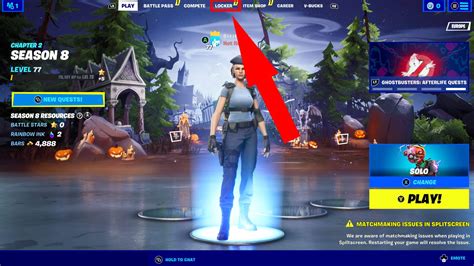
The first step in changing your character in Fortnite is to choose a new skin. Skins are the most common way to customize your character’s appearance, and there are hundreds of different skins to choose from, ranging from common skins that are available to all players to rare skins that can only be obtained through special events or purchases. To change your skin, simply go to the Locker tab in the main menu and select the skin you want to use. You can also preview skins in the Locker before you purchase them, so you can make sure you’re happy with the way your character will look.

In addition to changing your skin, you can also change your character’s name, banner, and other cosmetic items. To change your character’s name, go to the Profile tab in the main menu and select the “Edit Profile” option. From here, you can enter a new name for your character. You can also change your character’s banner by selecting the “Edit Banner” option in the Profile tab. Banners are a great way to show off your favorite Fortnite achievements or simply express your personal style. Finally, you can also change your character’s other cosmetic items, such as their back bling, pickaxe, and glider, by selecting the “Edit Locker” option in the Locker tab.

Customize Your Avatar

Your default avatar is a customizable blank slate that you can personalize to reflect your unique style. Here are some tips on how to customize your avatar:

Choose Your Skin

Your skin is the most important part of your avatar, as it represents the character you’ll be playing as in-game. There are a wide variety of skins to choose from, including both male and female characters of all different races and ethnicities. You can also choose from a variety of clothing options, hairstyles, and accessories to create a truly unique look for your avatar.

To choose your skin, simply click on the “Customize” button in the main menu and then select the “Skin” tab. From here, you can browse through all of the available skins and select the one that you like the best. You can also use the search bar to find a specific skin if you know the name of it.

Once you’ve selected a skin, you can further customize it by choosing different clothing options, hairstyles, and accessories. To do this, simply click on the “Clothing,” “Hairstyles,” or “Accessories” tabs in the Customize menu. From here, you can browse through all of the available options and select the ones that you like the best.

Clothing Type Description
Tops Shirts, hoodies, jackets, and other upper-body clothing
Bottoms Pants, skirts, shorts, and other lower-body clothing
Shoes Sneakers, boots, sandals, and other footwear
Hats Caps, beanies, helmets, and other headwear
Back Bling Backpacks, wings, and other accessories that attach to your character’s back

Select a New Character

Once you’ve decided to switch up your Fortnite persona, the next step is selecting a new character. Epic Games offers a wide variety of characters to choose from, each with their own unique appearance, abilities, and backstories. To find the perfect character for you, consider the following factors:

  1. **Appearance:** Do you want to play as a classic Fortnite character like Jonesy or Ramirez, or would you rather choose a more unique or whimsical character like Cuddle Team Leader or Peely? Consider your personal style and preferences when making your decision.
  2. **Abilities:** Some Fortnite characters have special abilities that can give you an advantage in combat. For example, Mako can increase his speed and jump height, while Lynx can deploy a shield to protect herself and her teammates. If you’re looking for a character that can give you a strategic edge, consider choosing one with special abilities that suit your playstyle.
  3. **Backstory:** Each Fortnite character has their own unique backstory that adds depth and personality to the game. If you’re interested in exploring the lore of Fortnite, consider choosing a character with a backstory that resonates with you. You can learn more about each character’s backstory by reading their bios in the Fortnite in-game shop.

To preview a character before purchasing, simply select them in the in-game shop and click the “Preview” button. This will allow you to see how the character looks in-game and try out their special abilities (if they have any).

Factor Consideration
Appearance Personal style and preferences
Abilities Playstyle and strategic advantages
Backstory Interest in Fortnite lore and character depth

Unlock New Skins

Unlocking new skins in Fortnite is a great way to customize your character and make them stand out from the crowd. There are a few different ways to unlock skins, including:

  1. Purchasing them in the Item Shop. The Item Shop is an in-game store where you can purchase a variety of skins, pickaxes, emotes, and other cosmetic items. The Item Shop rotates daily, so be sure to check back often for new items.
  2. Earning them through the Battle Pass. The Battle Pass is a seasonal pass that gives you access to a variety of rewards, including skins, pickaxes, and emotes. To earn rewards, you need to level up your Battle Pass by completing challenges and quests.
  3. Unlocking them through special events. Epic Games sometimes hosts special events that allow you to unlock exclusive skins. These events can be anything from in-game tournaments to community challenges.

In addition to these methods, you can also unlock skins by completing challenges and quests. These challenges and quests can be found in the Quests tab of the main menu. Some challenges and quests will reward you with skins, while others will reward you with Battle Stars that you can use to purchase skins in the Item Shop.

Edit Existing Characters

Unlocking New Styles

To unlock new styles, you need to complete quests or challenges associated with the Outfits. These quests can vary in difficulty, from simple tasks like eliminating opponents to more complex goals like winning matches or surviving for a certain amount of time.

Changing Skins

Once you have unlocked a new style, you can change your skin by accessing the Outfit tab in the Locker. Locate the Outfit you want to wear, select it, and click the “Use” button. Your character will now appear in the selected skin.

Customizing Appearance

You can further customize your character’s appearance by modifying their Back Bling, Pickaxe, Glider, and Wrap. These cosmetic items can be unlocked through gameplay, purchased from the Item Shop, or acquired through special events. To equip a cosmetic item, select it from its respective tab in the Locker and click the “Equip” button.

Cosmetic Item Tab in Locker
Back Bling Back Bling
Pickaxe Pickaxe
Glider Glider
Wrap Wrap

Change Character’s Appearance

Fortnite allows players to customize their characters’ appearances, including their outfits, accessories, and emotes. Here’s a step-by-step guide on how to change your character’s appearance:

Change Your Character’s Outfit

1. Open the Fortnite game and navigate to the “Locker” tab.
2. Click on the “Character” icon in the left-hand menu.
3. Select the “Outfits” sub-tab.
4. Choose the outfit you want your character to wear and click the “Equip” button.

Change Your Character’s Accessories

1. Open the “Locker” tab and navigate to the “Character” icon.
2. Select the “Accessories” sub-tab.
3. Choose the accessories you want your character to wear and click the “Equip” button.

Change Your Character’s Emotes

1. Open the “Locker” tab and navigate to the “Character” icon.
2. Select the “Emotes” sub-tab.
3. Choose the emotes you want your character to use and click the “Equip” button.

Change Your Character’s Loading Screen

1. Open the “Settings” menu in the game.
2. Navigate to the “Account and Privacy” tab.
3. Select the “Loading Screen” option and choose the loading screen you want to use.

Change Your Character’s Music

1. Open the “Settings” menu in the game.
2. Navigate to the “Audio” tab.
3. Select the “Music” option and choose the music you want to play in the game.

Appearance Option Steps
Outfits
  1. Open the Fortnite game and navigate to the “Locker” tab.
  2. Click on the “Character” icon in the left-hand menu.
  3. Select the “Outfits” sub-tab.
  4. Choose the outfit you want your character to wear and click the “Equip” button.
Accessories
  1. Open the “Locker” tab and navigate to the “Character” icon.
  2. Select the “Accessories” sub-tab.
  3. Choose the accessories you want your character to wear and click the “Equip” button.

Default Character Options

When you first start playing Fortnite, you’ll be given a choice of eight default characters to play as. These characters are all free to use, and they come with a variety of different skins and accessories.

To change your character, simply go to the “Lobby” tab in the main menu. From there, select the “Character” tab and then choose the character you want to play as.

Here is a table of the eight default characters in Fortnite:

Character Description
Jonesy A male character with a blue shirt and jeans.
Sarah A female character with a pink shirt and jeans.
Wild Card A male character with a red mask and a black suit.
Raven A female character with a black mask and a black suit.
Ramirez A female character with a green shirt and jeans.
Sledgehammer A male character with a blue shirt and jeans.
Enforcer A female character with a black shirt and jeans.
Skull Trooper A male character with a white mask and a black suit.

In addition to the eight default characters, there are also a number of other characters that you can unlock by completing challenges, purchasing them from the in-game store, or earning them through special events.

Mythic Character Selection

Mythic characters are the rarest and most powerful characters in Fortnite. They have unique abilities and can only be obtained through Mythic Quests.

To change your character to a Mythic character, you must first complete the Mythic Quest associated with that character. Once you have completed the quest, you will be able to select that character from the character selection menu.

Mythic Character Quests

The following is a table of Mythic Character Quests and the characters that they unlock:

Quest Character
Save the World The Paradigm
Alter Ego The Origin
The Convergence The Foundation

Using Mythic Characters

Mythic characters have a number of unique abilities that can give you an advantage in battle. These abilities include:

  • Increased health and shield
  • Special weapons and abilities
  • Increased mobility

Mythic characters can be a powerful asset in Fortnite. If you are looking for an edge in battle, consider using one of these powerful characters.

Gender Alterations

Changing your character’s gender is as simple as visiting the Item Shop and making the desired purchase. Various skins offer different gender options, allowing you to customize your avatar’s appearance according to your preferences.

Race Alterations

In Fortnite, there are three primary races from which players can choose: Caucasian, Asian, and African American. Each race features distinct physical characteristics and skin tones, enabling players to create characters that reflect their desired aesthetic.

Caucasian

Caucasian characters typically have fair skin, light-colored eyes, and straight or wavy hair. They represent the most common racial appearance in the game.

Asian

Asian characters are characterized by their smooth skin, dark eyes, and straight black hair. They often feature East Asian facial features.

African American

African American characters possess darker skin tones, brown eyes, and curly or tightly coiled hair. They embody the diverse range of African American ethnicities.

Race Physical Characteristics
Caucasian Fair skin, light eyes, straight or wavy hair
Asian Smooth skin, dark eyes, straight black hair
African American Dark skin tones, brown eyes, curly or tightly coiled hair

Character Customization Strategies

Unlock a diverse range of characters in Fortnite, each with unique abilities and cosmetics. Dive into the vast selection and choose the one that resonates with your playstyle and personality.

Outfits

Express yourself through an array of vibrant outfits. These skins alter your character’s appearance, giving you a customized look on the battlefield.

Back Blings

Complement your outfit with a stylish back bling. These accessories add a touch of flair and can range from backpacks to wings.

Pickaxes

Harness the power of harvesting with a unique pickaxe. Choose from various themes and designs to match your character’s style while gathering resources.

Gliders

Soar through the air with a personalized glider. These aerial vehicles offer a thrilling escape from combat and allow you to customize your descent.

Contrails

Blaze a trail as you glide through the sky. Contrails leave colorful streaks behind your glider, adding a vibrant touch to your presence.

Emotes

Express your emotions with interactive emotes. These animations allow you to communicate with allies or taunt your opponents, adding a social element to the battlefield.

Wraps

Give your weapons and vehicles a makeover with wraps. Apply customized designs to transform your gear and stand out on the battlefield.

Sprays

Leave your mark on the environment with sprays. These graffiti-like images can be placed on walls and surfaces, providing a creative way to assert dominance or simply spread joy.

Additional Customization Options

Explore additional customization options to fine-tune your character’s appearance. Adjust facial features, hair color, and body type to create a truly personalized experience.

Enhance Gameplay with Unique Characters

Fortnite allows you to switch between various characters, each with their own unique abilities and appearances. By unlocking and customizing different characters, you can significantly enhance your gameplay experience and increase your chances of victory.

Unlocking Characters

To unlock new characters, you can purchase them using V-Bucks (Fortnite’s in-game currency) or earn them through battle passes or seasonal events.

Character Types

Fortnite characters can be categorized into three main types:

  • Default Characters: Basic characters available to all players.
  • Skin Characters: Cosmetic variations of default characters with no gameplay advantages.
  • Rare/Epic/Legendary Characters: Characters with unique abilities and emotes that provide gameplay benefits.

Customizing Characters

Once you have unlocked a character, you can customize their appearance using outfits, back blings, pickaxes, and gliders. These cosmetic items can further enhance your character’s individuality and overall gameplay experience.

Abilities and Emotes

Rare, Epic, and Legendary characters possess unique abilities that can give you an edge in battle. For example, some characters can heal teammates, build structures faster, or carry more loot.

Emotes are expressive animations that characters can perform. While they don’t affect gameplay, emotes are a fun way to express yourself and interact with other players.

Character Ability Types

The following table lists the different types of character abilities in Fortnite:

Ability Type Description
Healing Heals teammates or yourself
Building Builds structures faster or with unique materials
Mobility Increases movement speed or provides special movement abilities
Offense Deals damage to enemies or grants offensive bonuses
Support Provides buffs or support abilities to teammates

By carefully selecting and customizing your character, you can tailor Fortnite to your preferred playstyle and maximize your chances of success on the battlefield.

How To Change Character Fortnite

To change your character in Fortnite, you’ll need to follow these steps:

  1. Open the Fortnite game on your device.
  2. Click on the “Locker” tab in the top menu.
  3. Select the “Characters” tab.
  4. Choose the character you want to use.
  5. Click on the “Equip” button.

You can also change your character’s appearance by purchasing new skins and outfits from the in-game store.

People Also Ask

How do I change my character’s name in Fortnite?

You can’t change your character’s name in Fortnite.

How do I unlock new characters in Fortnite?

You can unlock new characters in Fortnite by completing challenges, purchasing them from the in-game store, or earning them through special events.

5 Best Fortnite Settings for Optimal Performance

Top 5 Best Cars in Hill Climb Racing for Ultimate Victory
$title$

In the realm of competitive gaming, Fortnite stands as a titan, captivating millions with its intense battles and endless possibilities. To dominate this virtual arena, players seek the edge, the secrets that transform average gamers into formidable opponents. Among these secrets lie the enigmatic Fortnite settings, a labyrinth of menus and options designed to enhance gameplay. This article embarks on an illuminating journey, unraveling the mysteries surrounding the best Fortnite settings that unlock peak performance and elevate your skills to new heights.

Firstly, let us address the significance of visual clarity and frame rate in Fortnite’s fast-paced environment. The lower the graphics settings, the less strain you place on your system, resulting in smoother gameplay and reduced input lag. Therefore, disable unnecessary visual enhancements, such as shadow quality and ambient occlusion, to gain a competitive advantage. Additionally, consider optimizing your resolution and view distance to strike a balance between visual fidelity and performance. Remember, every millisecond counts in the heat of battle, and a fluid frame rate provides an undeniable edge.

Beyond visual settings, there’s a plethora of gameplay options that can significantly impact your performance in Fortnite. Bindings, for instance, are paramount, as they allow you to execute actions quickly and efficiently. Experiment with different key bindings to find the setup that aligns with your natural movements and enhances your responsiveness. Moreover, explore the advanced settings, such as sensitivity multipliers, building sensitivity, and editing sensitivity, fine-tuning them to match your unique playstyle. By optimizing these settings, you gain precision and control, enabling you to outplay your opponents with lightning-fast edits and accurate shots. Ultimately, unlocking the full potential of your gameplay hinges on meticulous attention to detail, and the right Fortnite settings will empower you to unleash your true potential and conquer the virtual battlefield.

Optimizing Performance for Smooth Gameplay

Ensuring optimal performance in Fortnite is crucial for a seamless and enjoyable gaming experience. Here are some essential settings to maximize your performance:

Display Mode

Selecting the appropriate display mode can significantly impact your performance. Consider the following options based on your system capabilities:

  • Full Screen: This mode allocates all available system resources to Fortnite, offering the highest potential performance.
  • Full Screen (Windowed): Similar to full screen, but allows you to switch between applications without minimizing the game.
  • Windowed: Runs Fortnite in a resizable window, allowing for multitasking but compromising performance slightly.

For optimal performance, choose Full Screen mode. However, if multitasking is essential, Full Screen (Windowed) mode provides a suitable balance.

Additionally, adjusting your in-game resolution can further optimize performance. Lower resolutions (e.g., 1600×900) generally yield higher frame rates than higher resolutions (e.g., 4K).

Graphics Quality

Graphics quality settings directly impact the visual fidelity and performance of Fortnite. While higher settings offer more detailed graphics, they also consume more system resources. Here are some key tips for optimizing graphics quality:

Setting Recommended Value
Resolution 1600×900 or lower for performance
Shadows Low or Off
Anti-Aliasing Low or Off
View Distance Near or Medium
Motion Blur Off

By adjusting these settings to lower values, you can improve performance while maintaining acceptable visual quality.

Enhancing Visuals for Immersive Experience

Visual settings play a crucial role in shaping the overall gaming experience in Fortnite. Optimizing these settings can significantly enhance immersion and provide a competitive edge. Here’s a detailed guide to the best Fortnite visual settings for an immersive and thrilling gaming experience.

2. Advanced Display Options

Advanced display options allow players to fine-tune the visual experience beyond the basic settings. Here are some key considerations:

  • Motion Blur: Motion blur can create a cinematic effect but can also reduce visibility in fast-paced combat. Disabling it can improve target acquisition and response time.
  • Anti-Aliasing: Anti-aliasing smooths out jagged edges on objects, but it can also impact performance. TAA (Temporal Anti-Aliasing) provides a good balance between image quality and performance.
  • Shadow Quality: Shadows enhance depth and realism but can be resource-intensive. Optimizing shadow quality settings can improve performance without compromising visual quality.
  • Texture Filtering: Texture filtering determines the sharpness and detail of textures. Anisotropic Filtering (AF) is recommended for improved texture quality.
  • Effects Quality: Effects quality controls the visual quality of explosions, smoke, and other particle effects. Lowering this setting can improve performance without significantly reducing visual impact.
  • View Distance: View distance determines the maximum distance at which objects are rendered. Increasing view distance can improve situational awareness but can reduce performance.
Setting Recommended Value
Motion Blur Off
Anti-Aliasing TAA (High)
Shadow Quality Medium
Texture Filtering Anisotropic Filtering (16x)
Effects Quality Medium
View Distance Epic (competitive mode)

Customizing Controls for Precision Aiming

Unlocking the full potential of your aim requires fine-tuning your control settings. Here are some crucial adjustments to consider:

Sensitivity

Finding the optimal sensitivity balance is key. Experiment with different values, adjusting both your X and Y axis. Too high sensitivity can lead to overshooting targets, while too low sensitivity hinders quick reactions. Consider starting with a moderate sensitivity and gradually adjust until you find the sweet spot where you can balance precision with fluidity.

Aim Assist Strength

Aim assist partially compensates for controller limitations by adjusting your aim slightly towards a target. While beneficial for close-range engagements, it can interfere with precision aiming at longer distances. Experiment with different aim assist strengths or consider switching to legacy aim assist for better control.

Advanced Aim Options

For advanced players, there are further customizable options that can enhance precision. Here’s a table summarizing the key settings:

Setting Description
Scoped Aim Sensitivity Multiplier Adjusts the sensitivity when using scoped weapons.
Aim Acceleration Controls how quickly your aim speed increases when you move the analog stick.
Sprint ADS Transition Time Determines the delay when transitioning between sprinting and aiming down sights.
Legacy Look Controls Changes the camera movement to match previous Fortnite versions, potentially improving precision.

Experiment with these advanced options to fine-tune your aim to match your unique playstyle and preferences.

Maximizing Audio for Directional Awareness

Understanding Audio Cues

Fortnite’s intricate soundscape provides vital cues for situational awareness. Footsteps, gunshots, and building activity can all reveal enemy positions if interpreted correctly.

Optimizing Audio Settings

In the audio settings, prioritize "Visualize Sound Effects" to create visual cues on the screen, indicating the direction of sounds. Additionally, enable "Audio Presets" and select "Footsteps Boost" to amplify the volume of enemy footsteps.

Headset Considerations

A quality gaming headset is essential for accurate directional audio. Look for headsets with a frequency response range tailored for gaming and a built-in microphone for clear communication.

Specific Audio Settings

Setting Recommended Value
Master Volume 100%
Sound Effects Volume 100%
Voice Chat Volume 50-75%
Dynamic Range Night
Headset Format Stereo

Eliminating Background Noise

Close any unnecessary applications or background processes that may generate noise. Consider using headphones with active noise cancellation to further reduce distractions.

Adjusting Sensitivity for Fast Reactions

To achieve optimal reaction times, it’s crucial to adjust your sensitivity settings. Here’s a detailed guide:

1. Determine Your Base Sensitivity

Start with a low sensitivity and gradually increase it until you find a level that allows for comfortable and accurate aiming. Experiment with different values until you strike a balance between precision and quick reactions.

2. Adjust Vertical and Horizontal Sensitivity Ratio

This setting determines the difference in sensitivity between vertical and horizontal movements. Most players prefer a 1:1 ratio, where both directions are equally sensitive. However, you may want to adjust this ratio based on your preferences and playstyle.

3. Consider Aim Acceleration

Aim acceleration can enhance precision by increasing sensitivity as your mouse moves faster. How much acceleration is applied depends on your settings. If you experience overshooting or difficulty controlling your aim, try reducing acceleration.

4. Optimize Aim Assist Settings

Adjust aim assist settings based on your comfort level. Aim assist can help you track targets and stay on their movement. Use a moderate setting to benefit from the assistance without it feeling overwhelming.

5. Use Custom DPI and in-Game Sensitivity

For advanced customization, you can adjust both your mouse’s DPI (dots per linear inch) and the in-game sensitivity. A higher DPI allows for faster movement across the screen, while the in-game sensitivity fine-tunes the response to your mouse movements. Here’s a table summarizing the recommended DPI and in-game sensitivity combinations:

DPI In-Game Sensitivity
400 4-7
800 2-4
1200 1.5-3
1600 1-2
2400 0.5-1.5

Setting Up Crosshairs for Accurate Shots

Crosshairs play a crucial role in your aim in Fortnite. Here’s how to optimize them for greater precision:

Reticle Opacity:

Set the opacity to 100% to make the reticle clearly visible, especially in intense engagements.

Dot Size:

Adjust the dot size to match your preference and monitor resolution. For precise shots, use a smaller dot; for general gameplay, a larger one works better.

Crosshair Color:

Choose a color that stands out against the environment and doesn’t blend in with allies or enemies. Consider using a bright green or pink.

Crosshair Outline:

Enable the outline to give the reticle a more distinct shape and improve visibility in cluttered areas.

Bloom Effect:

Disable the bloom effect to remove the gradual fading of the reticle edges, making it easier to focus on the target.

Custom Reticles:

Take advantage of in-game presets or create custom reticles using the following settings:

Setting Value
Reticle Style Dot
Reticle Opacity 100%
Dot Size 2-3
Outline Opacity 50-80%
Outline Thickness 1-2
Bloom Effect Disabled

Configuring Key Bindings for Efficient Gameplay

Effective Fortnite keybindings can significantly enhance your gameplay. Here’s a detailed guide to optimizing your bindings:

1. Movement and Basic Interactions

  • Movement: WASD is the standard for forward, backward, left, and right movement.
  • Jump: Spacebar is a reliable choice for jumping.
  • Crouch: Ctrl is commonly used to crouch.
  • Reload: R is the default button for reloading.
  • Interact: E is typically used for interacting with objects.

2. Building and Editing Structures

  • Build Mode: F1 toggles between building and combat mode.
  • Wall: Mouse Button 4 (side button) is often preferred for quick wall placement.
  • Floor: Mouse Button 5 (side button) is a good choice for floor placement.
  • Ramp: Q or F are common bindings for building ramps.
  • Edit: E is the standard key for entering edit mode.
  • Confirm Edit: F is typically used to confirm edits.

3. Weapon Selection and Management

  • Next/Previous Weapon: Mouse Wheel Up/Down is convenient for weapon switching.
  • Cycle Weapons: Tab allows you to scroll through all weapons.
  • Weapon Slot 1-5: 1-5 keys are used to select specific weapon slots.
  • Drop Weapon: G is the default key for dropping weapons.

4. Inventory Management

  • Inventory: Tab opens the inventory menu.
  • Item Slots: 1-5 keys correspond to specific item slots in your inventory.
  • Heal: Typically bound to F or X.
  • Shield Potions: Mouse Wheel Down or Up can be used for quick use.

5. Communication and Socialization

  • Voice Chat: G is the default key for voice chat.
  • Text Chat: Enter opens the chat window.
  • Emotes: F2-F4 are used to perform emotes.
  • Ping: Mouse Button 3 (middle button) sends a ping to your teammates.

6. Vehicle Controls

  • Enter Vehicle: E is the standard key for entering vehicles.
  • Drive: W/S for forward and backward motion, and A/D for steering.
  • Handbrake: Spacebar or B for applying the handbrake.
  • Exit Vehicle: E is also used for exiting vehicles.

7. Advanced Keybindings for Competitive Play

Wall Edit Techniques

  • Wall Jump: Bind a key like C to select the wall, and another key like F to confirm the edit and immediately jump.
  • Instant Wall: Bind a key like Mouse Button 4 to quickly place a wall and immediately confirm the edit.
  • 90 Degree Turns: Bind a key like T to quickly place a wall, edit it to form a 90-degree angle, and confirm the edit.

Other Advanced Techniques

  • Piece Control: Bind keys for quickly selecting and editing certain pieces in a structure, e.g., Roof, Wall, Floor.
  • Mongraal Classic: Bind multiple key combinations for complex edit and building techniques developed by pro player Mongraal.
  • Rebind Sprint: Consider rebinding the sprint key to a more easily accessible location, such as A or D.

Utilizing Advanced Settings for Competitive Edge

In addition to the essential settings covered earlier, there are several advanced settings that can provide a competitive edge:

Graphics Rendering

Render Distance: Adjust the distance at which objects are rendered. Higher settings improve visual clarity but can impact performance. It is recommended to set this to “Epic” or “High” for competitive play.

Motion Blur: Smooths out movement. It is generally turned off in competitive play as it may introduce visual noise and interfere with precise aiming.

Advanced Visual Settings

Shadow Quality: Configures the quality and detail of shadows. It is recommended to set this to “Medium” or “Low” to reduce GPU load and improve visibility.

Post Processing: Adjusts the visual effects applied to the game world. It is recommended to disable most post-processing options, such as Anti-Aliasing and Depth of Field, to minimize visual clutter and improve performance.

Resolution Scaling: Scales the game’s resolution to achieve a desired performance level. It is generally recommended to use 100% resolution for optimal visual quality and input accuracy.

Performance Settings

Anti-Aliasing Quality: Configures the method used to smooth jagged edges. It is recommended to use “NVIDIA Image Scaling” or “AMD FidelityFX Super Resolution” for a balance between performance and visual quality.

PhysX: Enables physics simulation. Setting this to “Low” reduces CPU load and improves performance, while “Medium” provides a slightly smoother experience at the cost of some performance.

Texture Streaming: Adjusts the way textures are loaded into memory. It is recommended to set this to “High” to reduce texture pop-in and maintain visual consistency, especially on SSDs.

Dynamic Shadows: Controls the rendering of dynamic shadows. Setting this to “Off” provides a significant performance boost, while “Medium” or “High” may improve visual depth and realism.

Ambient Occlusion: Creates indirect lighting effects. It is recommended to disable this setting to reduce GPU load and improve performance.

Additional Advanced Settings to Optimize

Setting Recommended Value for Competitive Play
V-Sync Off
Fullscreen On
Input Method DirectX 12
Resolution 1920×1080 or 1600×900
Refresh Rate 144Hz or higher

These advanced settings provide granular control over various aspects of Fortnite’s graphics and performance. By tweaking these settings, players can customize their game experience to suit their preferences and optimize it for competitive play.

The Ultimate Fortnite Settings Guide

In the competitive world of Fortnite, every advantage counts. Whether you’re a seasoned pro or just starting out, having the optimal settings can make all the difference. Here are the best Fortnite settings to help you maximize your performance:

Display Settings

– Monitor Refresh Rate: Aim for a refresh rate of at least 144Hz or higher to minimize motion blur and input delay.
– Resolution: Play at your monitor’s native resolution for sharpest image quality.
– Brightness: Adjust to suit your personal preference and lighting conditions.
– Field of View (FOV): Increase FOV to around 110 for wider peripheral vision.

Graphics Settings

– Rendering Mode: Choose DirectX 12 for improved performance and stability.
– Shadows: Set to Low or Off to reduce graphical clutter and improve visibility.
– Anti-Aliasing: Enable FXAA for smoother edges, but consider disabling it if it impacts performance.
– View Distance: Set to Epic for maximum draw distance.
– Texture Quality: Set to Epic for the highest visual fidelity.
– Effects Quality: Set to Low or Medium to reduce visual distractions.

Input Settings

– Mouse Sensitivity: Find a sensitivity that feels comfortable and precise. Aim for around 0.08 to 0.10 for a balance of accuracy and reactivity.
– Keyboard Keybinds: Customize your keybinds to suit your preferred gameplay style.
– Controller Sensitivity: Adjust to your liking, but consider using higher sensitivities for faster turns.
– Building Sensitivity: Set to High to quickly construct structures.

Audio Settings

– Sound Quality: Set to Epic for optimal audio quality and better sound cues.
– Master Volume: Adjust to suit your hearing.
– Voice Chat: Enable to communicate with teammates.

People Also Ask

What are the best frame rate settings for Fortnite?

Aim for a consistent 144 FPS or higher for a smooth and responsive gameplay experience.

What are the best keyboard settings for Fortnite?

Customize keybinds to suit your preferred gameplay style. Consider using ergonomic keyboards for improved comfort and performance.

What are the best controller settings for Fortnite?

Adjust controller sensitivity to your liking, but consider using higher sensitivities for faster turns. Enable advanced controller settings for more granular control.

best max input frames multiversus

In the realm of competitive gaming, MultiVersus has emerged as a captivating title that tests the limits of players’ skills. One of the critical aspects of maximizing performance in this game is optimizing the game’s input settings. Input frames, which determine the delay between a button press and its corresponding action on-screen, play a significant role in determining a player’s responsiveness and efficiency. For those seeking to elevate their gameplay to the next level, mastering the art of maximizing input frames in MultiVersus is crucial.

The concept of input frames is relatively straightforward. Each time a player presses a button on their controller, the game requires a certain number of frames to process that input and execute the desired action. Minimizing this input delay can provide players with a distinct advantage, allowing them to react more quickly to opponents’ moves and execute combos with greater precision. However, achieving the optimal input frame settings requires careful consideration of various factors, such as the player’s input device, monitor refresh rate, and system latency.

To effectively minimize input frames in MultiVersus, it is essential to start by assessing your gaming setup. The type of input device used can significantly impact input delay. For example, wired controllers generally offer lower input lag than wireless controllers due to the absence of signal interference. Additionally, high refresh rate monitors, such as those with 240Hz or 360Hz refresh rates, can further reduce input lag by displaying frames more frequently. Once you have optimized your hardware configuration, you can delve into the game’s settings to fine-tune your input frames. By adjusting settings such as “Input Buffer Size” and “Input Buffer Time,” you can minimize the game’s input delay and unlock your full potential in MultiVersus.

Maximizing Frames for Optimal Gameplay

Understanding Frame Data

Understanding frame data is the key to optimizing gameplay in MultiVersus. Each attack, ability, and movement in the game has a specific number of frames associated with it, which determine its speed and recovery time. By understanding these frames, players can make informed decisions about their actions and maximize their efficiency.

Startup Frames:

The number of frames it takes for an attack or ability to become active. Lower startup frames mean faster attacks, while higher startup frames indicate slower, more deliberate moves.

Active Frames:

The number of frames during which an attack or ability can hit an opponent. Longer active frames provide more opportunities to connect, while shorter active frames require more precision.

Recovery Frames:

The number of frames after an attack or ability ends before the user can perform another action. Longer recovery frames leave players more vulnerable to counterattacks, while shorter recovery frames allow for quicker follow-ups.

Hitbox/Hurtbox Frames:

The frames when a character’s hitbox or hurtbox is active. Hitboxes are the areas that can damage opponents, while hurtboxes are the areas that can be damaged. Understanding the timing of these frames is essential for effective attack placement and defense.

Frame Type Description
Startup Frames Time before an attack or ability becomes active.
Active Frames Time during which an attack or ability can hit an opponent.
Recovery Frames Time after an attack or ability before the user can perform another action.
Hitbox/Hurtbox Frames Time when a character’s hitbox or hurtbox is active.

Understanding Frame Data and Animation Cancelling

Understanding Frame Data

In MultiVersus, every move has frame data associated with it. Frame data refers to the number of frames it takes for a move to complete, from the moment it is activated to the moment it finishes recovering. Understanding frame data is crucial for optimizing your gameplay, as it allows you to determine the best time to attack, defend, or punish your opponents.

Animation Cancelling

Animation cancelling is a technique that allows you to interrupt the recovery animation of certain moves by inputting another move or action. This can be used to chain moves together more quickly, reduce the time your character is vulnerable, and create combos that would not be possible otherwise. Animation cancelling is a complex technique that requires practice, but it can greatly enhance your gameplay once mastered.

Move Animation Cancel Window (Frames)
Jab 1 4-7
Neutral Attack 2-5
Side Attack 3-6

The table above shows the animation cancel windows for some common moves in MultiVersus. The animation cancel window refers to the number of frames after the move is activated where you can input another move or action to cancel the recovery animation.

To perform an animation cancel, you simply need to input the desired move or action during the animation cancel window for the move you are trying to cancel. For example, you can cancel the recovery animation of Jab 1 by inputting Neutral Attack during the 4-7 frame window after Jab 1 is activated.

Animation cancelling is a powerful technique that can be used to gain a competitive edge in MultiVersus. By practicing and mastering this technique, you can create new combos, improve your recovery options, and ultimately become a better player.

Advanced Techniques for Increasing Input Frames

Optimal Timing for Inputting Attacks

To maximize input frames, players should strive to Input attacks as close as possible to the end of their cooldown. This window, known as the “buffer zone,” allows for a wider range of potential frames during which an attack can be registered. By timing inputs precisely within this buffer zone, players can effectively increase the number of input frames available.

Input Frame Management in Combos

In combos, players can extend chains by managing input frames strategically. By inputting the next attack slightly early, players can “stack” input frames and initiate the follow-up attack sooner than normal. This technique, known as “input buffering,” allows for seamless transitions between moves and can significantly extend combo potential.

Frame Trapping

Frame trapping involves setting up a sequence of attacks that forces the opponent to react within a certain window. By Inputting attacks sequentially just before their buffer zones expire, players can create a situation where their opponent is forced to either block or dodge immediately. Frame trapping allows for consistent pressure and can lead to favorable positioning or damage accumulation.

Technique Description
Buffer Zoning Inputting attacks near the end of their cooldown to maximize input frames
Input Buffering Inputting follow-up attacks slightly early to stack frames and extend combos
Frame Trapping Setting up a sequence of attacks that forces the opponent to react within a specific frame window

Utilizing Input Buffering for Faster Responses

Input buffering in MultiVersus offers an advantage by storing player inputs for a brief period, even when the character is performing other actions. This allows for quicker responses and smoother transitions between inputs.

Implementing Input Buffering

To implement input buffering, hold down the desired input direction or attack button. Once the current action has ended, the buffered input will be executed automatically. For instance, you can hold the attack button while jumping to trigger an aerial attack immediately upon landing.

Managing Buffered Inputs

It’s crucial to manage buffered inputs effectively. If you buffer too many inputs, you may end up overshooting your target or performing unwanted actions. To avoid this, release the input button once you’ve queued the desired move.

Benefits of Input Buffering

Input buffering provides several benefits in MultiVersus:

  • Faster Responses: Executes inputs sooner, enabling quicker reactions.
  • Smoother Transitions: Allows for seamless transitions between actions, enhancing the flow of gameplay.
  • Improved Accuracy: Buffers inputs during complex maneuvers, preventing missed inputs due to timing errors.

To maximize the benefits of input buffering, practice holding and releasing inputs at the appropriate moments. With consistent implementation, you can significantly enhance your gameplay and outmaneuver opponents.

Adjusting Frame Settings for Specific Characters

The optimal frame settings for each character in MultiVersus vary depending on their specific abilities and playstyles. Here are some general tips for adjusting frame settings for specific characters:

1. Consider the character’s role: Tanks like Superman benefit from a higher maximum input buffer to absorb damage and protect their team, while Supports like Velma may prioritize faster inputs to quickly apply debuffs and heals.

2. Assess the character’s combos: Characters with lengthy combos may benefit from a higher maximum input buffer to ensure that all of their inputs are registered. Conversely, characters with shorter, more precise combos may prefer a lower buffer to optimize their response times.

3. Check the character’s moveset: Some moves, such as Shaggy’s “Zoinks!” move, have a long animation with a narrow input window. For these moves, a higher maximum input buffer will ensure that they are executed consistently.

4. Account for the character’s playstyle: Aggressive characters like Finn may benefit from lower input delays to quickly execute their attacks. Defensive characters like Garnet may prefer a higher delay to more accurately time their shields and parries.

5. Experiment with different settings: The optimal frame settings for each character and player will vary. It is recommended to experiment with different settings to find what works best for individual playstyles and characters. The following table provides a breakdown of the maximum input buffer values for each character:

Character Maximum Input Buffer (Frames)
Batman 5
Bugs Bunny 4
Finn 3
Garnet 6
Harley Quinn 4
Iron Giant 7

The Impact of Frames on Combo Potential

In MultiVersus, frames play a crucial role in determining the potential for combos and the viability of different characters. The number of frames between each action, known as input frames, affects the fluidity and damage output of combos.

The lower the input frames, the faster a character can execute combos. This allows for more complex and damaging sequences, especially for characters with high attack speed and low recovery frames.

Number of Input Frames for Moves
Move Input Frames
Neutral Attack 5-10

Tilts 10-15

Smash Attacks 15-20

Specials 15-25

Characters with low input frames, such as Taz and Finn, have an advantage in executing quick and damaging combos. They can easily chain together multiple attacks, creating a barrage of damage that can overwhelm opponents.

On the other hand, characters with high input frames, such as Iron Giant and LeBron James, struggle to keep up with the pace of fast-paced combos. Their slower attacks and longer recovery frames make them more vulnerable to interruptions and punish

Optimizing Frame Advantage for Punishes

Understanding Frame Advantage

In MultiVersus, “frames” represent the time it takes for an action to occur or recover from. Frame advantage refers to the difference in frames between your recovery time and your opponent’s.

Maximizing Punish Windows

To optimize frame advantage, it’s crucial to maximize your punish windows. This involves:

  • Anticipating your opponent’s moves
  • Using fast and disjointed attacks
  • Reducing your own recovery time

Advanced Punish Techniques

Besides basic frame advantage optimization, advanced techniques include:

True Combos

Multiple attacks that connect consecutively without giving your opponent a chance to act.

Flawless Punishes

Punishes that hit your opponent on their aerial landing or recovery frames, giving you the maximum frame advantage possible.

Counteracting Opponent’s Frame Traps

Identify the Frame Traps

Recognize the specific sequences of attacks or moves that your opponent consistently uses to create frame traps.

Delay Rolling

Instead of rolling out of a knockdown immediately, delay it slightly to avoid getting caught in the opponent’s trap.

Teching

Press the Tech button (default is Square on PS4/Xbox One) as soon as you are knocked down to avoid being put into a frame trap.

Using Armor Moves

Some characters have moves that give them armor, making them immune to frame traps during the duration.

Dashing

Dashing can be used to evade incoming traps or to create space between your character and the opponent’s frame traps.

Jumping

Jumping over low attacks or to the other side of the opponent can help escape from certain frame traps.

Spot Dodging

Spot dodging (forward + double tap of X/A on PS4/Xbox One) can be used to quickly evade frame traps at close range.

Air Dodging

Air dodging (up + X/A on PS4/Xbox One) allows you to dodge any incoming attacks while in the air, including frame traps.

Option Advantages Disadvantages
Delay Rolling Can evade traps that rely on immediate rollouts Leaves you vulnerable for a longer period
Teching Prevents trap setups after a knockdown Requires precise timing and can be countered by armor moves
Armor Moves Provides immunity to frame traps Can be limited in duration or have a high cooldown

Combining Frame Techniques for Superiority

Maximizing your input frames in MultiVersus is crucial for gaining an edge over opponents. Here are some effective techniques to combine for superior gameplay:

Dash Canceling

Interrupting your dash with an attack or other action cancels its recovery animation, allowing you to perform quicker follow-up moves.

Jump Canceling

Canceling a jump with an aerial attack or other action reduces landing lag and allows you to extend combos or avoid ground attacks.

Aerial Stalling

Slowing down your aerial descent with specific character moves or abilities enables you to control your positioning in the air for better attack timing.

Projectile Zoning

Using projectiles to create a safe distance and control the pace of the match gives you an advantage in neutral situations.

Teching

Pressing a specific button combination while being knocked down reduces stun frames and allows you to recover faster.

Wave Dashing

Combining a wavedash with a dash or jump cancel allows you to cover long distances quickly and unpredictably.

Last Hit Cancelling

Canceling the last hit of a combo with a special move or perk can extend damage or create new opportunities.

Crouching Dash Attack

Crouching during a dash attack increases its priority and can catch opponents off-guard.

Wavedash Jump

Combining a wavedash with a jump can quickly move you in place or gain extra height for aerial attacks.

Frame Trapping

Baiting opponents with a specific attack sequence, then following up with a move that recovers quickly, traps them in a loop of disadvantage.

Technique Effect
Dash Cancel Reduced recovery animation, quicker follow-up moves
Jump Cancel Reduced landing lag, extended combos, avoidance of ground attacks
Aerial Stalling Controlled positioning in the air, better attack timing

Best Max Input Frames in MultiVersus

In MultiVersus, max input frames refer to the maximum number of frames after initiating an input before the game registers it as a move. Understanding max input frames is crucial for optimizing character performance and executing combos effectively. Here are some of the best max input frames for various moves and characters:

  • Wonder Woman’s Lasso of Truth: 10 frames
  • Superman’s Heat Vision: 12 frames
  • Harley Quinn’s Puddin’ Punch: 14 frames
  • Shaggy’s Zoinks!: 16 frames
  • Finn the Human’s Spin Attack: 18 frames

By leveraging max input frames, players can optimize their inputs and execute moves with increased precision and speed. This can result in improved combo efficiency, faster reaction times, and a competitive edge in matches.

People Also Ask

What is the best character for max input frames?

No single character is objectively the best for max input frames. However, characters like Wonder Woman, Superman, and Harley Quinn have consistently strong max input frames on their key moves.

How can I improve my max input frames?

Practice is key to improving max input frames. Regularly performing moves and experimenting with different timings will help you develop muscle memory and reduce input delay.

Is it possible to reduce max input frames?

No, max input frames are fixed values determined by the game’s programming. However, using fast controllers and optimizing your setup can minimize overall input delay and improve responsiveness.

7 Best PS5 Settings for MW3

Top 5 Best Cars in Hill Climb Racing for Ultimate Victory

Unveiling the Optimal PS5 Settings for an Unmatched Modern Warfare 3 Experience: Welcome to the realm of first-person shooters, where precision and customization reign supreme. As you embark on the battlefield in Modern Warfare 3 on your PlayStation 5, optimizing your settings is paramount to unlocking your true potential. This comprehensive guide will delve into the essential PS5 settings that will transform your gameplay, elevating you to the ranks of the elite. Get ready to witness the resurgence of your Modern Warfare 3 dominance, as we meticulously craft a tailored experience that will redefine your gaming prowess.

First and foremost, let’s address the crucial aspect of controller sensitivity. Modern Warfare 3’s fast-paced, adrenaline-pumping combat demands precise aiming and quick reflexes. Experiment with various sensitivity settings until you find the sweet spot that allows you to seamlessly track targets and execute pinpoint shots. Additionally, consider adjusting the aim assist settings to complement your playstyle. Whether you prefer a more traditional approach or a helping hand with target acquisition, fine-tuning these parameters will significantly enhance your accuracy.

Next, let’s venture into the realm of visual customization. Modern Warfare 3’s stunning graphics can be further enhanced by adjusting the PS5’s visual settings. Start by enabling HDR support if your display allows for it. This feature unlocks a wider color gamut, resulting in more vibrant and lifelike visuals. Furthermore, consider tweaking the brightness and contrast levels to achieve the optimal balance for your gaming environment. Whether you prefer a darker, more atmospheric experience or a brighter, sharper display, finding the right visual settings will immerse you deeper into the game’s breathtaking landscapes.

Optimization for Performance

To achieve the best possible performance in MW3 on your PS5, we recommend the following settings:

Display Settings

Set the game’s resolution to 1080p. While the PS5 supports 4K gaming, MW3 is not optimized for higher resolutions. Sticking with 1080p will save on processing power and allow you to achieve a smoother gameplay experience. Additionally, disable any HDR or ray-tracing effects. These features are demanding and can impact performance.

Other Performance-Enhancing Settings

  • Turn off motion blur and depth of field effects. These visual enhancements can introduce input lag and affect gameplay.
  • Reduce the number of active players in a match to 6v6 or 8v8. Larger player counts can strain the PS5’s hardware and lead to performance issues.
  • Prioritize frame rate over graphics quality in the game’s settings. This will ensure that the game runs as smoothly as possible, even at the expense of visual fidelity.
Setting Value
Resolution 1080p
HDR Disabled
Ray-Tracing Disabled
Motion Blur Disabled
Depth of Field Disabled
Player Count 6v6 or 8v8
Graphics Quality Prioritize Frame Rate

Adjusting Graphics for Clarity

Optimizing the graphics settings of Call of Duty: Modern Warfare 3 on the PlayStation 5 can significantly enhance clarity and visibility, providing a more immersive and competitive gameplay experience. Here’s a comprehensive guide to help you fine-tune your graphics settings:

Display Settings

Field of View (FOV): Adjust the FOV to widen your peripheral vision, allowing you to see more of the battlefield. Higher FOV values increase the field of view, but can distort objects at the edges of the screen. Experiment with different FOV settings to find the sweet spot that balances visibility and comfort.

Motion Blur: Disable motion blur to eliminate any blurriness or ghosting effects during fast-paced movement. This setting enhances clarity and responsiveness, making it easier to track moving targets.

Graphics Settings

Resolution: Select the highest resolution supported by your display, typically 4K, if possible. Higher resolutions provide sharper visuals and improved clarity.

Anti-Aliasing: Enable anti-aliasing to smooth out jagged edges and reduce aliasing artifacts. Higher anti-aliasing modes provide better image quality, but can also impact performance.

Texture Detail: Set this to “High” or “Very High” to enhance the quality and detail of textures on weapons, characters, and the environment.

Model Detail: This setting affects the level of detail and complexity of models in the game. Choose “High” or “Very High” for more detailed models and improved clarity.

Particle Quality: Adjust this to “Medium” or “High” to enhance the quality of particle effects, such as explosions and smoke, providing better visibility in hectic combat situations.

Depth of Field: Disable depth of field to focus on the entire scene, reducing the blur effect in the background. This setting improves overall clarity and makes it easier to see enemies at various distances.

Sharpening Filter: Enable this filter to enhance the sharpness and detail of the image, making it appear more crisp and defined.

HDR: If your display supports HDR, enable it to expand the color range and contrast ratio, resulting in more vibrant and realistic colors.

Custom Settings

For further customization, consider adjusting the following settings based on your preferences:

Setting Recommended
Render Resolution 1080p (if performance is an issue)
Dynamic Resolution Scaling Disabled
Film Grain 0
Lens Flare Disabled

Unlocking Hidden Settings for a Competitive Edge

1. Dynamic Resolution Scaling

Enable Dynamic Resolution Scaling to automatically adjust the game’s resolution to maintain a fluid frame rate. This ensures a smooth gaming experience, especially during intense firefights.

2. Motion Blur

Disable Motion Blur to reduce visual clutter and improve visibility. By removing the blurring effect, you can track enemies more effectively and respond to threats faster.

3. Field of View (FOV)

Increase the Field of View (FOV) to expand your peripheral vision. A wider FOV allows you to see more of your surroundings, giving you a better situational awareness.

4. HDR White Point

Adjust the HDR White Point to optimize the game’s contrast and brightness levels. Experiment with different settings to find the one that produces the most vibrant and detailed visuals.

5. FidelityFX CAS

Enable FidelityFX CAS to enhance image quality without sacrificing performance. This technique reduces aliasing and improves overall sharpness, resulting in a more refined visual experience.

6. Texture Filtering

Set Texture Filtering to “Anisotropic” to improve the detail and sharpness of textures. This setting enhances the clarity of objects at various distances, making them appear more realistic.

7. Anti-Aliasing

Enable Anti-Aliasing to smooth out jagged edges on objects. This technique reduces visual artifacts and creates a more pleasing visual experience.

8. FidelityFX Sharpening

Adjust FidelityFX Sharpening to enhance image clarity and definition. Use a low sharpening value to avoid oversharpening, which can result in a noisy image.

9. V-Sync

Enable V-Sync to synchronize the game’s frame rate with the refresh rate of your display. This prevents screen tearing, ensuring a smooth and consistent visual experience.

10. Advanced Settings

Setting Description
Volumetric Fog Quality Adjusts the quality of volumetric fog, affecting its density and visibility.
Dynamic Cache Spot Controls the size of the game’s dynamic cache, impacting the efficiency of asset loading and performance.
SSAO Quality Determines the quality of screen space ambient occlusion, enhancing the depth and realism of shadows.

Best PS5 Settings for MW3

Modern Warfare 3 (MW3) may not be the latest entry in the Call of Duty franchise, but it continues to be a popular choice among first-person shooter fans. As a PS5 owner, you can now experience MW3 in all its glory by making sure you’re using the best settings for the console.

One of the first things you’ll want to do is enable the “120Hz Mode” option in the PS5’s settings. This will allow the game to run at 120 frames per second (FPS), which reduces latency and makes the overall gameplay experience much smoother.

You’ll also want to adjust the “Field of View” (FOV) setting to your preference. A higher FOV gives you a wider field of vision, which can be helpful in spotting enemies. However, a lower FOV can make aiming more precise. Experiment with different FOV settings to find what works best for you.

Finally, you’ll want to tweak the “Motion Blur” setting. Motion blur can make the game look more realistic, but it can also make it harder to track enemies. If you’re having trouble staying on target, try disabling motion blur or reducing its intensity.

People Also Ask

What are the best PS5 graphics settings for MW3?

The best PS5 graphics settings for MW3 are:

  • Resolution: 4K (if your TV supports it)
  • HDR: On
  • Ray Tracing: Off
  • Anti-Aliasing: TAA
  • Texture Filtering: Anisotropic 16x

What are the best PS5 controller settings for MW3?

The best PS5 controller settings for MW3 are:

  • Sensitivity: 6-8
  • Aim Assist: Standard
  • Aim Response Curve Type: Linear
  • Dead Zone: 0
  • Vibration: Off

5 Best Call of Duty Mobile Settings for Smooth Gameplay

Top 5 Best Cars in Hill Climb Racing for Ultimate Victory

Unleash your dominance in the battleground of Call of Duty: Mobile by optimizing your gameplay settings for an unparalleled experience. In this comprehensive guide, we delve into the intricate details of the game’s settings and provide expert recommendations to fine-tune your performance. Whether you’re an aspiring strategist or a seasoned sharpshooter, this article will empower you with the knowledge to maximize your potential and secure victory.

First and foremost, consider your device’s capabilities and personal preferences when adjusting settings. If your device supports high refresh rates, enabling them can significantly enhance fluidity and responsiveness, giving you an edge over opponents with lower refresh rates. Additionally, customize your sensitivity settings to find the perfect balance between precision and speed, ensuring accurate aim and lightning-fast reflexes. Experiment with different control layouts to discover the one that suits your playstyle and optimizes your comfort and efficiency.

Furthermore, optimize your graphics settings to strike a delicate equilibrium between visual fidelity and performance. While higher graphics settings may enhance immersion, they can also impact your frame rate, potentially hindering your gameplay. Conversely, lower graphics settings can provide a smoother experience, especially on lower-end devices. Adjust your settings based on your device’s capabilities and your tolerance for visual compromises.

Button Customization for Ergonomic Controls

Tailor your in-game controls to fit your hand size and playing style for maximum comfort and efficiency. Customize the layout and size of buttons, including the fire button, movement stick, and other essential controls. Experiment with different placements to find what works best for you, optimizing your reaction time and accuracy.

4. Fine-Tune Aim Assist

For those using a controller, delve into the aim assist settings to enhance your aiming precision. Adjust the sensitivity and aim smoothing to find the perfect balance between responsiveness and stability. Experiment with different options, such as target lock and aim assist strength, to optimize your aiming accuracy and minimize overcorrection.

Aim Assist Setting Function
Aim Assist Strength Controls the amount of assistance provided when aiming at targets.
Target Lock Locks the crosshair onto the nearest target when activated.
Aim Smoothing Reduces the impact of sudden movements on aim accuracy.

Remember, the optimal settings may vary depending on your individual preferences and device. Take the time to experiment with different options and find what works best for your unique gameplay style.

Audio Settings for Immersive Sound Effects

Audio settings play a crucial role in enhancing the gameplay experience in Call of Duty: Mobile. By optimizing these settings, you can elevate your immersion and gain a competitive edge.

Volume Settings

Adjust the Master Volume and Sound Effects Volume to suit your personal preference. Ensure they are loud enough to provide a rich soundscape without being overpowering or distorting.

Audio Quality

Choose the High Quality setting for superior audio fidelity. This option delivers crystal-clear sound effects and ambient cues, making it easier to pinpoint enemy locations and respond to threats.

Audio Presets

Experiment with the predefined audio presets, such as Balanced, Bass Boost, or Vocal Boost, to find the one that best complements your device and headphones. Each preset offers a unique balance of sound frequencies, optimizing the audio experience for different listening environments.

Loudness Equalization

Enable Loudness Equalization to compensate for variations in audio volume levels across different sound effects and environments. This ensures a consistent and balanced soundscape, keeping you immersed in the action.

Audio Sensitivity

Adjust the Audio Sensitivity setting to fine-tune the responsiveness of your audio device. Decrease the sensitivity slightly if you find yourself experiencing audio distortion or clipping at high volumes, while increasing it may enhance the detail and clarity of sound effects.

Setting Description
Master Volume Overall volume of the game audio
Sound Effects Volume Volume of in-game sound effects, such as gunfire and footsteps
Audio Quality Fidelity of the audio output, ranging from Low to High Quality
Audio Presets Predefined sound profiles that optimize audio for different environments
Loudness Equalization Compensates for variations in audio volume levels
Audio Sensitivity Adjusts the responsiveness of the audio device

Best Settings for Call of Duty: Mobile

Optimizing your settings in Call of Duty: Mobile is crucial for maximizing your performance and enhancing your gameplay experience. Here are some recommended settings to consider:

  • Graphics: Medium to High (balances visual quality and performance)
  • Frame Rate: Max (for smoother gameplay)
  • Sensitivity: Adjust to your preference, but lower sensitivity provides more precision
  • Control Layout: Customize to suit your playstyle (e.g., claw grip, thumbs-up)
  • Audio: Enable 3D audio for enhanced directional awareness

People Also Ask

What is the best sensitivity for Call of Duty: Mobile?

The optimal sensitivity varies based on personal preference and device. Experiment with different settings to find what suits you best.

How can I improve my aim in Call of Duty: Mobile?

Practice regularly in multiplayer matches or training modes. Adjust your sensitivity settings and consider using a controller for more precise control.

What are the most important settings to adjust in Call of Duty: Mobile?

Graphics, frame rate, sensitivity, and control layout are the key settings to optimize for performance and gameplay experience.