
Within the ethereal expanse of Little Alchemy 2, the enigmatic planet Uranus awaits your alchemical mastery. As you embark on this cosmic journey, let curiosity guide your path and unlock the secrets to harnessing the power of this celestial wonder. Uranus, the seventh planet from our Sun, holds a mystique that has captivated astronomers for centuries, and now, it’s within your grasp to create it with your own hands.
To forge Uranus in the crucible of Little Alchemy 2, you must possess an unwavering determination and a keen understanding of the elements. Begin by conjuring the essence of primordial waters, represented by the symbol of Water. As the waters ripple and flow, introduce the icy breath of Winter, transforming the liquid depths into a crystalline expanse of Ice. This icy foundation will serve as the core of your celestial creation.
But to truly harness the power of Uranus, you must embrace the ethereal essence of the cosmos. Combine the boundless expanse of Space with the cosmic energy of Stars, weaving together a celestial tapestry. As these elements intertwine, a celestial symphony will unfold, and from the depths of your alchemical crucible, Uranus will emerge, imbued with the mysteries and wonders of the universe itself.
The Alchemist’s Guide to Uranus
Unlocking the secrets of Uranus in Little Alchemy 2 requires a meticulous approach. As the seventh planet from the Sun, Uranus holds a unique place in the solar system, and crafting it in the virtual realm demands a deep understanding of the alchemical process.
1. Embracing the Elements: The Foundation of Uranus
The creation of Uranus stems from a profound understanding of the fundamental elements that compose the cosmos. To embark on this alchemical journey, begin by combining the vastness of Space with the icy depths of Snow. This celestial union yields Neptune, a gaseous giant that serves as the stepping stone to Uranus.
Continuing on this path, merge Neptune with the ethereal presence of Void. This cosmic infusion transforms Neptune’s cerulean hues into the vibrant azure of Uranus, completing your alchemical endeavor.
The following table summarizes the transformative steps:
| Ingredients |
Result |
| Space + Snow |
Neptune |
| Neptune + Void |
Uranus |
Unveiling the Secrets of the Seventh Planet
Uranus, the enigmatic ice giant, awaits discovery in Little Alchemy 2, an enchanting realm where the elements dance and transform.
Creating Uranus in Little Alchemy 2
To forge Uranus in this virtual laboratory, embark on a cosmic adventure. First, combine Air with Water, symbolizing the primary components of Uranus’s icy atmosphere. Next, introduce Cold to solidify the watery depths into the planet’s frigid core.
Crafting the Core: A Frozen Heart
Cold plays a crucial role in Uranus’s existence. Begin by merging Ice with Ice, triggering a reaction that yields even colder Ice. This enhanced Ice, when combined with Water 2, freezes it instantaneously, creating the icy foundation of Uranus’s core.
| Combination |
Result |
| Ice + Ice |
Colder Ice |
| Colder Ice + Water 2 |
Frozen Core |
Elemental Alchemy: Creating Uranus
Within the realm of Little Alchemy 2, the enigmatic planet of Uranus can be conjured into existence through a harmonious fusion of celestial elements. This multifaceted world, renowned for its icy atmosphere and distinctive rings, awaits discovery as we embark on an alchemical journey to unravel its cosmic origins.
Combining the Elements
The path to Uranus begins with the convergence of four fundamental elements: Air, Water, Fire, and Earth. These primordial building blocks hold the key to unlocking the planet’s celestial essence.
Creating the Atmosphere
To capture the ethereal expanse of Uranus’s atmosphere, we must summon the power of Air and Water. By merging these elements, we create an elusive Cloud, a swirling vapor that mimics the planet’s gaseous envelope.
Forging the Rings
The most captivating feature of Uranus is its distinctive system of rings. To replicate this celestial spectacle, we must harness the transformative power of Heat and Earth. Combining these elements in a fiery embrace yields Rock, the solid foundation upon which the rings will orbit.
| Element |
Combination |
Result |
| Air + Water |
Cloud |
| Cloud + Fire |
Steam |
| Steam + Earth |
Rock |
| Rock + Air |
Uranus |
Transmutation through Combined Elements
In Little Alchemy 2, the path to creating Uranus follows a specific sequence of elemental combinations. By experimenting with different combinations, players can unlock the secrets to crafting this distant planet.
Step 1: Creating Air and Water
The journey begins with the fundamental elements of Air and Water. Air can be obtained by combining Fire with Earth, while Water is created by merging Earth with Fire.
Step 2: Forming Oxygen
Next, Air is combined with Earth to yield Oxygen, an essential component for Uranus. This combination represents the interaction between the planet’s atmosphere and its rocky core.
Step 3: Crafting Uranus
The final step involves combining Oxygen with Ice. Ice is a rare element obtained by merging Water with Cold. When Oxygen and Ice are combined, the result is Uranus, a celestial marvel orbiting the distant reaches of our solar system.
| Element |
Combination |
| Air |
Fire + Earth |
| Water |
Earth + Fire |
| Oxygen |
Air + Earth |
| Ice |
Water + Cold |
| Uranus |
Oxygen + Ice |
A Cosmic Confluence: Ingredients for Uranus
In the vast tapestry of Little Alchemy 2, celestial wonders await creation, including the enigmatic planet Uranus. To embark on this cosmic alchemy, we must gather the essential ingredients that will ignite the celestial spark.
Elements of the Aether
Uranus, nestled in the realm of outer planets, shares a fundamental composition with its gaseous companions. These elements, the building blocks of our solar system, are the foundation upon which Uranus’s ethereal form will take shape.
Hydrogen
The most abundant element in the universe, hydrogen serves as the primary constituent of Uranus’s gaseous atmosphere. Its presence brings lightness and fluidity to the planet, ensuring its graceful dance in the cosmic waltz.
Helium
Helium, the second most prevalent element in Uranus’s atmosphere, contributes to the planet’s unique hue. Its lighter-than-air nature adds to Uranus’s ethereal presence, making it both visually captivating and astronomically intriguing.
Methane
Methane, a hydrocarbon compound, is a defining characteristic of Uranus’s atmosphere. Its presence absorbs sunlight, lending Uranus its distinctive голубовато-зелёный (blue-green) color and contributing to its atmospheric complexity.
The Path to Planetary Genesis
1. Create Earth:
Begin by combining Fire and Water to form Earth.
2. Craft Wind:
Merge Fire and Air to create Wind.
3. Forge Ice:
Combine Water and Wind to produce Ice.
4. Shape Stone:
Fuse Fire and Earth to create Stone.
5. Summon a Star:
Combine Fire and Light to form a Star.
6. **Forge Uranus from Ice and Stone:**
a. Form a Moon:
Combine Earth and Water to form a Moon.
b. Create a Cloud:
Merge Fire and Water to create a Cloud.
c. Generate Space:
Combine Air and Earth to produce Space.
d. Craft Ice Clouds:
Fuse Ice and Clouds to form Ice Clouds.
e. Forge Icy Moons:
Combine Ice and Moons to generate Icy Moons.
f. Create a Giant Planet:
Merge Space and Icy Moons to form a Giant Planet.
g. Summon Uranus:
Fuse Stone and Giant Planet to manifest Uranus.
Alchemical Synergy: Earth, Water, and Air Unite
The Marriage of Elements
Little Alchemy 2 unfolds as a captivating tale of elemental alchemy, where the fusion of primal elements yields astounding creations. Unveiling the enigma of Uranus requires a harmonious blend of Earth, Water, and Air.
1. Embracing the Earth’s Essence
Clay, a quintessential Earth element, forms the foundation of this alchemical journey. Its earthy nature provides solidity and structure.
2. Unveiling Water’s Fluidity
Water, the element of fluidity and transformation, plays a crucial role. Its ethereal presence adds adaptability and dynamism to the mix.
3. Summoning the Breath of Air
Air, the embodiment of lightness and ethereal energies, brings an airy touch. Its inclusion elevates the creation, infusing it with agility and a sense of freedom.
4. Forging the Stellar Core
When Clay, Water, and Air intertwine, they forge the enigmatic stellar core known as the Solar System. This cosmic entity represents the foundation from which Uranus will emerge.
5. Harnessing the Celestial Energy
The Solar System acts as a celestial crucible, nurturing the nascent Uranus. It provides the energy and stability needed for its growth.
6. Awakening the Ice Giant
As the Solar System’s influence intensifies, Uranus emerges as an enigmatic Ice Giant. Its icy mantle and frigid atmosphere distinguish it from its fiery brethren.
7. Unveiling Uranus’s Enigmatic Depths
Uranus, the seventh planet from the Sun, holds a special allure in our solar system:
| Attribute |
Description |
| Eccentric Orbit |
Uranus orbits the Sun on a tilted axis, giving it a unique spin and seasonal variations. |
| Frigid Temperatures |
With an average temperature of -357°F, Uranus is one of the coldest planets in our solar system. |
| Abundant Moons |
Uranus boasts a retinue of 27 known moons, ranging in size from Miranda to the massive Oberon. |
| Ring System |
Though less prominent than Saturn’s, Uranus possesses a faint ring system composed of dust and ice particles. |
| Atmospheric Composition |
Uranus’s atmosphere is primarily composed of hydrogen, helium, and methane, giving it its distinctive blue-green hue. |
Celestial Convergence: Uranus Emerges
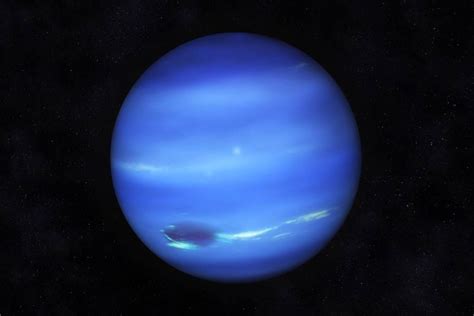
In the vast celestial tapestry, Uranus emerges as an enigmatic blue-green planet, shrouded in swirling clouds and encircled by an ethereal ring system. This distant world, named after the primordial Greek deity of the heavens, has captivated scientists and astronomers alike.
Ingredients for Alchemy
| Element |
Quantity |
| Nitrogen |
2 |
| Pure Oxygen |
3 |
| Water |
1 |
Step-by-Step Alchemy
- Begin with two molecules of Nitrogen.
- Add three molecules of Pure Oxygen to form Nitrogen Trioxide.
- Combine one molecule of Nitrogen Trioxide with one molecule of Water to form Nitrous Acid.
- React Nitrous Acid with two more molecules of Nitrogen Trioxide to form Dinitrogen Tetroxide.
- Electrolyze Dinitrogen Tetroxide to obtain Nitrogen Dioxide.
- Combine Nitrogen Dioxide with one molecule of Pure Oxygen to form Nitrogen Pentoxide.
- Finally, react Nitrogen Pentoxide with two molecules of Water to create Uranus.
Chemical Reactions
2 N + 3 O2 → N2O3
N2O3 + H2O → HNO2
HNO2 + 2 N2O3 → N2O4
N2O4 (electrolysis) → NO2
NO2 + O2 → NO3
NO3 + 2 H2O → Uranus
Properties of Uranus
- Composition: Primarily composed of hydrogen and helium, with traces of methane, ammonia, and water
- Atmosphere: A thick gaseous envelope with complex cloud layers
- Rings: A collection of dust and ice particles that extend outwards from the planet
- Moons: Uranus has 27 known moons, ranging in size from Miranda to Oberon
- Magnetic Field: Uranus has a unique magnetic field that is tilted 60 degrees from its axis of rotation
Cosmic Alchemy: Decoding the Recipe
Ingredients
To craft Uranus in Little Alchemy 2, you’ll need the following ingredients:
Procedure
Combine ice and gas in the cauldron to create Uranus.
Additional Combinations
Uranus can also be used as an ingredient to create the following items:
- Solar System (Uranus + Sun)
- Ice Giant (Uranus + Water)
- Gas Giant (Uranus + Fire)
Alchemy Table
| Combination |
Result |
| Ice + Gas |
Uranus |
| Uranus + Sun |
Solar System |
| Uranus + Water |
Ice Giant |
| Uranus + Fire |
Gas Giant |
Beyond the Origin: Exploring Celestial Horizons
Embarking on a cosmic adventure, we transcend the limitations of Earth and venture into the realm of celestial wonders. Little Alchemy 2, a captivating game of elemental manipulation, grants us the power to create the wonders of the universe, including the enigmatic planet Uranus.
The Creation of Uranus
To unveil the celestial secrets of Uranus, we must embark on a transformative journey, beginning with the amalgamation of:
- Air, the essence of the heavens
- Cold, the icy embrace of the cosmos
A Symphony of Elements
With these celestial building blocks in our possession, we initiate a harmonious dance of elements:
- Combine Air and Cold to summon forth the ethereal Gas
- Marry Gas with Water to create the enigmatic Ice
- Unite Ice with Wind to forge the elusive Cloud
- Finally, infuse Cloud with Air to give life to the ethereal Sky
The Celestial Colossus
Having traversed the elemental tapestry, we stand at the cusp of our celestial triumph. To complete our cosmic creation, we must:
- Summon forth two Titan-like entities: Planet and Ice
- Conjoin Planet with Ice to forge the icy core of Uranus
- Envelop the icy core with Gas to create the swirling atmosphere
- Drape the atmosphere with Clouds to form the distinctive markings
- Finally, embrace the celestial giant with Sky to complete the ethereal masterpiece that is Uranus
| Element |
Combination |
| Air |
Cold |
| Gas |
Water |
| Ice |
Wind |
| Cloud |
Air |
| Planet |
Ice |
How To Make Uranus In Little Alchemy 2
In Little Alchemy 2, Uranus is a planet that can be created by combining the elements of Ice and Gas. To do this, you will need to first create Ice by combining Water and Air. Once you have created Ice, you can then combine it with Gas to create Uranus.
People Also Ask
How do you make Gas in Little Alchemy 2?
Gas can be created by combining Fire and Air.
How do you make Water in Little Alchemy 2?
Water can be created by combining Earth and Air.
How do you make Air in Little Alchemy 2?
Air can be created by combining Fire and Water.

