Skip to content

flexco.com

Tag: date-stamp

5 Easy Steps to Change Date and Time in Photo Properties

5 Easy Steps to Change Date and Time in Photo Properties

5 Easy Steps to Change Date and Time in Photo Properties
Editing the date and time of a photograph is a valuable skill for photographers and digital content creators alike. Whether you need to adjust the timestamp to match the actual moment captured or correct an incorrect setting, modifying the photo properties is a straightforward process. By following these steps, you can easily change the date and time in photo properties, giving you greater control over the metadata associated with your images.

To begin, you’ll need to access the photo’s properties. This process varies depending on the operating system and software you’re using, but generally involves right-clicking on the file and selecting “Properties” or “Get Info.” Once you have accessed the properties window, you should be able to locate the date and time fields. These fields may be labeled as “Date Taken” or “Creation Date,” and they typically display the date and time when the photo was captured or imported.

Next, simply click on the date and time fields to edit them. You can either type in the new date and time directly or use the calendar and time picker to select the desired values. Once you have made your changes, click on the “OK” or “Save” button to apply them. The photo’s properties will now be updated with the new date and time, giving you more accurate and consistent metadata for your digital images.

Accessing the Properties Menu

Accessing the Properties menu allows you to modify various attributes of an image file, including its date and time. The exact steps for accessing the Properties menu may slightly differ depending on the operating system and software you are using.

Windows

Operating System

Instructions for Accessing Properties Menu

Windows 10/11

  1. Right-click on the image file and select “Properties”.
  2. Navigate to the “Details” tab.
  3. Locate the “Date Taken” or “Date Modified” field, depending on the attribute you want to change.

Windows 7/8

  1. Right-click on the image file and select “Properties”.
  2. Click on the “Summary” tab.
  3. Locate the “Date Taken” field.

MacOS

Operating System

Instructions for Accessing Properties Menu

macOS Monterey/Ventura

  1. Control-click on the image file and select “Get Info”.
  2. Navigate to the “More Info” section.
  3. Locate the “Date Created” or “Date Modified” field, depending on the attribute you want to change.

macOS Catalina/Big Sur

  1. Control-click on the image file and select “Get Info”.
  2. Navigate to the “General” section.
  3. Locate the “Date Taken” field.

macOS Mojave/High Sierra

  1. Select the image file and press Command + I.
  2. Navigate to the “General” section.
  3. Locate the “Date Taken” field.

Utilizing Third-Party Software

If the built-in methods don’t meet your needs, consider utilizing third-party software specifically designed for manipulating photo metadata, including date and time. These specialized applications offer a wide range of features and advanced options that may cater to your specific requirements.

Here are some popular third-party software options for changing date and time in photo properties:

To effectively use third-party software, follow these general steps:

Step Action
1 Download and install the desired third-party software.
2 Open the photo you want to modify in the software.
3 Locate the section or tool that allows you to modify the date and time metadata.
4 Make the necessary changes and save the modified photo.

Remember to carefully check the software’s documentation and user guides for specific instructions and features. Some software may also offer additional options, such as synchronizing time across multiple photos, auto-correcting based on camera settings, and more.

Correcting Metadata via “Get Info”

For a more comprehensive metadata editing experience, right-click on the photo and select “Get Info” from the context menu. This will open an information window with multiple tabs, including the “Date & Time” tab. Here, you can manually set the capture date and time by adjusting the date and time fields directly.

Additionally, you can use the “Adjust Date & Time” button to perform more precise adjustments. Clicking this button will open a separate window that allows you to set the date and time in a calendar format. You can also choose to adjust the timezone and daylight savings settings.

Once you’ve made the necessary changes, simply click “OK” to save the updated metadata. It’s important to note that these changes are not permanent and can be reverted by repeating the same process.

Adjusting Time and Date Using “ExifTool”

“ExifTool” is a powerful command-line utility that can read and edit metadata from various file formats, including photos. It provides a straightforward way to modify the date and time information embedded in photo files. Follow these steps to use “ExifTool”:

Download and Install

1. Download “ExifTool” from its official website.
2. Install the software according to the instructions for your operating system.

Find the Correct ExifTool Path

1. Open a command prompt or terminal.
2. Type “exiftool” and press enter.
3. You should see a list of commands. If you get an error message, ensure the installation is correct or adjust your environment variables to include the ExifTool path.

Modify Date and Time

1. Navigate to the directory containing your photo files.
2. Use the following command to modify the date and time:

“`
exiftool “-DateTimeOriginal=2023:03:08 14:30:00” -overwrite_original [image_file_name]
“`

Replace “[image_file_name]” with the actual file name of your photo.

Additional Parameters

The “-DateTimeOriginal” parameter specifies the new date and time in the format “YYYY:MM:DD HH:MM:SS”. You can also use the following additional parameters:

Parameter Description
-DateTimeDigitized Date and time the photo was taken
-ModifyDate Date and time the photo was last modified
-CreateDate Date and time the photo was created (not supported by all file formats)

Setting Date and Time with “Pillow” Library

Python Imaging Library (Pillow) is a renowned image processing package that comes with a user-friendly interface. Through the exif module in Pillow, you can easily manipulate EXIF metadata, including the date and time attributes.

Steps:

1. Install Pillow:

In your terminal, run the command: pip install Pillow

2. Import the Pillow module:

In your Python script, import the Image class from Pillow: from PIL import Image

3. Open the Image:

Use the open() method to load the image file and store it in a variable, e.g., im = Image.open("image.jpg")

4. Get the EXIF Data:

Access the EXIF dictionary using exif = im.getexif(). If the image has no EXIF data, it returns None.

5. Modify the Date and Time Attributes:

To change the date and time, navigate to the ‘DateTimeOriginal’ and ‘DateTimeDigitized’ keys. The format is ‘YYYY:MM:DD HH:MM:SS’, e.g., exif['DateTimeOriginal'] = '2023:05:18 12:30:00'

6. Update the EXIF Data:

After modifying the EXIF dictionary, use im.setexif(exif) to update the metadata in the image.

7. Save the Image:

To apply the changes permanently, save the image with im.save("image.jpg")

Python Code # Description

from PIL import Image
im = Image.open("image.jpg")
exif = im.getexif()
exif['DateTimeOriginal'] = '2023:05:18 12:30:00'
exif['DateTimeDigitized'] = '2023:05:18 12:30:00'
im.setexif(exif)
im.save("image.jpg")

This code snippet demonstrates the entire process of modifying the date and time attributes of an image using the Pillow library.

Modifying Exif Data via “ImageMagick”

ImageMagick is an open-source software suite used for image processing. Here’s a detailed guide to using ImageMagick to change the date and time in photo properties:

1. Install ImageMagick

Install ImageMagick for your operating system from the official website.

2. Identify the Photo’s Original Date

Use the “ExifTool” command to extract the original date and time from the photo:

“`
exiftool -CreateDate “-:CreateDate” [path_to_photo]
“`

3. Convert Date to Unix Timestamp

Convert the original date to a Unix timestamp using an online converter or the following command:

“`
date -d “[original_date_and_time]” +”%s”
“`

4. Change Date and Time in ImageMagick

Use the “mogrify” command to change the date and time in the photo:

“`
mogrify -set creation-date “[unix_timestamp]” -set modify-date “[unix_timestamp]” [path_to_photo]
“`

5. Verify the Changes

Use “ExifTool” again to verify the new date and time in the photo:

“`
exiftool -CreateDate “-:CreateDate” [path_to_photo]
“`

6. Additional Notes

If you encounter any issues when using “exiftool”, ensure that it is properly installed and up-to-date. Additionally, some photos may have multiple date fields; you can specify the specific field you want to change using the “-DateTimeOriginal” or “-ModifyDate” options in the “mogrify” command. The following table summarizes the available syntax:

Option Description
-set creation-date Sets the photo’s creation date
-set modify-date Sets the photo’s modification date
-DateTimeOriginal Specifies the EXIF “Date/Time Original” field
-ModifyDate Specifies the EXIF “Modify Date” field

Correcting Time and Date with Windows

If your photos have incorrect timestamps, you can easily correct them using the Windows operating system. Here are the steps:

1. Open the Image File

Locate the image file you want to edit and double-click on it to open it in the Photos app.

2. Click on the “Info” Tab

Click on the “Info” tab located at the top of the Photos app window.

3. Find the “Date Taken” Section

Scroll down until you find the “Date Taken” section.

4. Click on the Date and Time

Click on the date and time next to “Date Taken” to edit it.

5. Enter the Correct Date and Time

Use the calendar and time picker to enter the correct date and time when the photo was taken.

6. Save the Changes

Click on the “Save” button to save the changes.

7. Advanced Options for Date and Time Correction

If the “Date Taken” section is not available or the timestamps are still incorrect, you can use the following advanced options:

Option Description
File Properties

Right-click on the image file, select “Properties,” and then navigate to the “Details” tab to edit the date and time.

Exif Metadata Editor

Download and install an Exif metadata editor software and use it to manually edit the timestamps in your photos.

Command Line Tools (Windows)

Use command line tools such as “exiftool” or “nk” to modify the date and time information in your photos through the command prompt.

Setting Time and Date with macOS

Adjusting the time and date in photo properties on macOS ensures accurate metadata and proper organization of your images. Here’s a step-by-step guide:

1. Locate the photo whose date and time you want to change.

2. Right-click on the photo and select “Get Info” from the context menu.

3. Click the “More Info” tab in the info panel.

4. Find the “Date/Time” section.

5. Click the “Modify Date” button.

6. Use the calendar and time picker to set the desired date and time.

7. Optionally, adjust the “Time Zone” and “Offset” fields to ensure accurate time zone conversion.

8. Once the date and time are set, make sure to click the “OK” button. This will apply your changes and modify the photo’s properties. Here’s a more detailed explanation of the options available in the “Date/Time” section:

Option Description
Date Created Displays the date and time when the photo was originally created.
Date Modified Displays the date and time when the photo was last modified or edited.
Date Captured Displays the date and time when the photo was taken, if available from the camera’s metadata.
Time Zone Specifies the time zone of the date and time being displayed.
Offset Adjusts the time by a specified number of hours or minutes.

Using the Metadata Panel in Lightroom

To change the date and time in photo properties using the Metadata Panel in Lightroom, follow these steps:

  1. Open the photo in Lightroom.
  2. Go to the Library module.
  3. Select the photo you want to edit.
  4. Click on the Metadata panel on the right-hand side of the window.
  5. Scroll down to the Date and Time section.
  6. Click on the calendar icon to change the date.
  7. Click on the clock icon to change the time.
  8. Enter the new date and time in the fields provided.
  9. To apply the changes, click on the Save button at the bottom of the Metadata panel.

Note: If the Date and Time section is not visible in the Metadata panel, click on the Metadata Presets menu and select Show Date and Time.

Field Description
Capture Date The date the photo was taken.
Capture Time The time the photo was taken.
Date/Time Original The original date and time the photo was taken.
Date/Time Digitized The date and time the photo was scanned or otherwise digitized.
Date/Time Modified The date and time the photo was last modified.
GPS Date The date the GPS information was recorded.
GPS Time The time the GPS information was recorded.

Preserving Original Metadata

When editing a photo’s date and time properties, preserving the original metadata is crucial to maintain its authenticity and integrity. Here are some guidelines:

  1. Use a Reputable Editing Tool: Opt for photo editing software that allows for non-destructive editing, preserving the original metadata.
  2. Create a Copy: Before making any changes, create a duplicate of the photo to avoid altering the original file.
  3. Check Metadata Compatibility: Ensure the editing tool supports reading and writing metadata formats compatible with your camera and photo storage system.
  4. Confirm Accuracy: Double-check the new date and time information to ensure its accuracy before saving.
  5. Consider Future Use: Remember that metadata can be used for future reference, such as tracking photo history or finding images with specific dates.
  6. Limit Changes: Avoid making unnecessary changes to metadata, as it could impact the photo’s authenticity and value.
  7. Use a Consistent Workflow: Establish a standard workflow for handling metadata to maintain consistency and avoid errors.
  8. Document Changes: Keep a record of any changes made to the photo’s metadata for future reference and transparency.
  9. Utilize Metadata Software: Consider using dedicated metadata editing software to manage and preserve photo metadata efficiently.
  10. Train Yourself: Familiarize yourself with metadata formats, editing techniques, and best practices to ensure proper handling of metadata.

How To Change Date And Time In Photo Properties

To change the date and time in the photo properties, follow these simple steps:

  1. Right-click the photo you want to change the date and time for and select “Properties.”
  2. In the “Properties” window, click on the “Details” tab.
  3. Find the “Date Taken” field and click on the calendar icon to select the new date.
  4. Click on the clock icon to select the new time.
  5. Click “OK” to save the changes.

People Also Ask About How To Change Date And Time In Photo Properties

How can I change the date and time on multiple photos at once?

You can use a program like ExifTool to change the date and time on multiple photos at once. This program is free and open source, and it can be used on both Windows and Mac computers.

Can I change the date and time on photos taken with my phone?

Yes, you can change the date and time on photos taken with your phone. To do this, you can use a photo editing app like Photoshop or GIMP. These apps allow you to change the metadata of your photos, including the date and time.

Why would I want to change the date and time on my photos?

There are several reasons why you might want to change the date and time on your photos. For example, you might want to:

  • Correct a mistake that you made when taking the photo.
  • Organize your photos by date and time.
  • Protect your privacy by removing the date and time from your photos.

Author sadminPosted on March 17, 2025Categories howtoTags change-date-and-time, date-stamp, photo-editing, photo-metadata, photo-properties, time-stamp

5 Easy Steps to Find Website Date of Publication

5 Easy Steps to Change Date and Time in Photo Properties

5 Easy Steps to Change Date and Time in Photo Properties
How To Find Website Date Of Publication

How To Find Website Date Of Publication

The publication date of a website can be important information for researchers, journalists, and anyone else who needs to know when a particular piece of content was first published. Unfortunately, there is no universal standard for displaying the publication date of a website, so it can be difficult to find this information. However, there are a few methods you can use to track this date down.

One way to find the publication date of a website is to look for a “last updated” date. This date will tell you when the website was last changed, but it may not be the same as the original publication date. If you can’t find a “last updated” date, you can try looking for a “copyright” date. This date will tell you when the website was first created and it is more likely to be the same as the publication date.

Utilizing Archive.org

Archive.org is a non-profit digital library that provides free access to millions of books, movies, and websites. It can be a valuable tool for finding the publication date of a website, even if the website itself no longer exists or has been updated since its original publication.

To use Archive.org to find the publication date of a website, follow these steps:

  1. Go to Archive.org and enter the URL of the website you are interested in into the search bar.
  2. Click on the “Browse History” link for the website.
  3. You will be presented with a list of all the archived versions of the website. The publication date of the website will be listed in the “Date” column.

Additional Information

In addition to the publication date, Archive.org also provides a number of other useful information about each archived website, including the following:

  • The date the website was last updated.
  • The size of the website.
  • The number of links on the website.
  • The type of content on the website.

This information can be helpful for understanding the history of a website and its content.

Column 1 Column 2
Date The date the website was published.
Last Updated The date the website was last updated.
Size The size of the website in bytes.
Links The number of links on the website.
Type The type of content on the website.

Checking Social Media Posts

Social media platforms like Facebook, Twitter, and Instagram often display the date and time a post was published. This information can be found in the post’s header or footer.

To check the date of publication on a Facebook post, look for the timestamp located below the post’s content. It will typically display the date and time the post was published, along with how long ago it was posted.

On Twitter, the date of publication can be found in the tweet’s header. It will typically display the date and time the tweet was published, along with the author’s name and profile picture.

On Instagram, the date of publication can be found in the post’s header. It will typically display the date and time the post was published, along with the author’s name and profile picture.

Here is a table summarizing the steps to find the date of publication on different social media platforms:

Social Media Platform Steps to Find Date of Publication
Facebook Look for the timestamp located below the post’s content.
Twitter Look for the date and time displayed in the tweet’s header.
Instagram Look for the date and time displayed in the post’s header.

Inspecting Page History

By accessing the page history, you can uncover past versions of the website. Here’s a step-by-step guide to inspect the page history using two common methods:

1. Wayback Machine

The Wayback Machine is an online archive that captures snapshots of websites periodically. Visit the Wayback Machine website (web.archive.org), enter the URL of the website you’re interested in, and select a specific date or range of dates to view the archived version of the page.

2. Google Cache

Google Cache stores a cached copy of websites that it deems relevant for search results. To access the cached version of a website, enter “cache:” followed by the URL of the website in the Google search bar (e.g., “cache:www.example.com”).

3. Browser-Specific Methods

Some web browsers offer built-in methods to inspect the page history:

Browser Steps
Chrome Right-click the page > Select “View page info” > Click “History” > Scroll down to “Original”
Firefox Right-click the page > Select “Page Info” > Click “History” > Scroll down to “Original”
Safari Click on the “Time Machine” icon in the browser’s toolbar > Select “Enter Time Machine” > Navigate to the desired date and time

4. Header Information

Certain websites include the publication date in the header information of the page. To access this information, right-click on the page and select “View page source” or “View source.” Search for the “Date” or “Last-Modified” headers to find the publication date.

5. Contacting the Website Owner

If you’re unable to find the publication date through the above methods, consider reaching out to the website owner. They can provide precise information about the date of publication and any updates made to the website.

Reviewing Page Content

When reviewing the page content, look for the following clues:

Timestamp Indications

* **Published/Posted Dates:** These may appear in the header, footer, or sidebar of the article.
* **Updated Dates:** If the page has been updated, the update date may be displayed along with the original date.

Temporal Keywords

* **Keywords in Titles or Captions:** Words like “new,” “current,” or “recent” may indicate that the content is up-to-date.
* **Season- or Time-Related References:** Mention of specific seasons, months, or years can help establish the publication timeline.

Author Biographies

* **Author Profiles:** Author bios often include information about when an author published content.
* **Byline Dates:** Some articles may include the date when the author wrote the piece.

Historical Context

* **References to Current Events:** If the article refers to specific events or news stories, you can use historical records to determine their dates.
* **Outdated Information:** If the page contains information that is now outdated, it can provide a lower bound for the publication date.

Content-Based Analysis

* **Currency of Information:** Content that is relevant or up-to-date may suggest a recent publication date.
* **Outdated References:** If the page references outdated technologies, statistics, or products, it may indicate an earlier publication date.

Citation Checker (Optional)

* **Cited Sources:** Some websites include hyperlinks to their sources, which can help you trace the publication date of cited articles.
* **Publication Metadata:** Tools like Google Scholar or Scopus can provide additional information about the publication history of articles that are referenced on the page.

Analyzing Publication Dates of Related Articles

When examining a website’s publication date, it’s often beneficial to analyze the publication dates of related articles. By comparing the dates of articles on similar topics, you can gain a better understanding of the website’s overall update frequency and the relevance of the information presented.

Here’s a step-by-step guide to analyzing publication dates of related articles:

  1. Identify relevant articles: Search for articles on the same topic or within the same category.
  2. Retrieve publication dates: Use the website’s built-in features or external tools to retrieve the publication dates of each article.
  3. Compile the dates: Create a spreadsheet or table to keep track of the publication dates.
  4. Calculate the average age: Determine the average age of the articles by calculating the mean of the publication dates.
  5. Analyze the distribution: Observe the distribution of publication dates to identify any patterns or outliers.
  6. Consider the website’s update frequency: Compare the average age of related articles to the website’s stated or observed update frequency.
  7. Assess the relevance of the information: Based on the publication dates, consider whether the website’s information is up-to-date and relevant for your research or decision-making.
  8. Use the dates to provide context: In your article or analysis, provide the publication dates of related articles to give readers a sense of the timeliness and relevance of the information presented.

By following these steps, you can effectively analyze the publication dates of related articles to enhance your understanding of a website’s information quality and update practices.

Using Google’s Cache

Google’s Cache is a useful tool for finding the publication date of a webpage, even if the original page is unavailable. To access the cache, simply type “cache:” followed by the URL of the webpage into Google’s search bar. For example, to access the cache of the homepage of CNN, you would type “cache:www.cnn.com” into the search bar.

Once you have accessed the cached version of the webpage, look for the “Cached” label at the top of the page. Next to the label, you will see the date and time that Google saved the cached version of the page. This is typically the date and time that the original page was published.

In some cases, the cached version of the webpage may not have the same content as the original page. This can happen if the original page has been updated or changed since Google saved the cached version. If you are unsure whether the cached version of the webpage is up-to-date, it is best to visit the original webpage.

Here is a table summarizing the steps for using Google’s Cache to find the publication date of a webpage:

Step Action
1 Type “cache:” followed by the URL of the webpage into Google’s search bar.
2 Look for the “Cached” label at the top of the page.
3 Note the date and time that Google saved the cached version of the page.

How to Find a Website’s Date of Publication

Determining the date of publication for a website can be crucial for various reasons, such as academic research, legal proceedings, or simply ensuring the accuracy of information. Here’s a comprehensive guide on how to find the date of publication for a website:

  • **Check the website’s footer:** Many websites include a copyright notice or publication date in their footer, typically located at the bottom of the page. This information can provide an exact or approximate date of publication.
  • **Use the Wayback Machine:** The Wayback Machine (archive.org) is a digital archive that allows users to view past versions of websites. By entering the website’s URL into the Wayback Machine, you can access archived snapshots and determine the date each version was captured.
  • **Inspect the page’s metadata:** Right-click on the webpage and select “View Page Info” or “Inspect Element.” In the resulting window, search for the “Date Modified” or “Last Modified” field. This will display the date on which the page was last updated.
  • **Check the website’s source code:** Right-click on the webpage and select “View Page Source.” Scroll through the HTML code and look for lines containing the terms “date published” or “last updated.” This can sometimes provide the exact date of publication.
  • **Contact the website owner:** If all else fails, you can directly contact the website owner or webmaster through the contact information provided on the website. They will likely be able to provide the date of publication.

People Also Ask About How to Find a Website’s Date of Publication

What is the difference between a publication date and an update date?

The publication date refers to the initial date when the website or webpage was first made available online. The update date, on the other hand, indicates the date on which the content was last modified or updated.

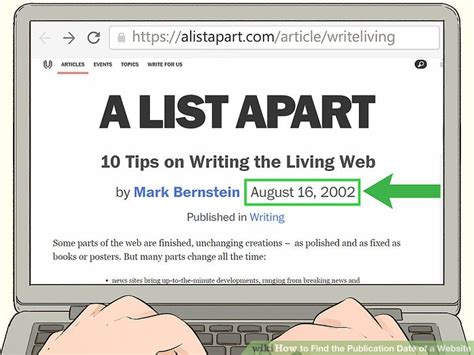
How can I find the date of publication for a specific article on a website?

To find the date of publication for a specific article, check the byline or author’s information at the top or bottom of the article. The date of publication is typically included there.

Is it important to know the date of publication for a website?

Yes, knowing the date of publication can be important to evaluate the currency and relevance of the information. It can also help in determining the credibility and trustworthiness of the website.

Author sadminPosted on January 21, 2025Categories howtoTags article-publication-date, blog-post-publication-date, date-of-publication, date-stamp, find-website-publication-date, google-search, inspect-source-code, metadata-viewers, publication-information, search-engine-results, time-stamp, url-analysis, web-page-date, website-metadata

Recent Posts

  • Mindfulness in Nature: A Comprehensive Guide to Practice Anywhere [Free PDF]
  • How to Black Out Text in PDF: A Comprehensive Guide
  • Optimize Your PDFs: The Ultimate Guide to HEIC to PDF Conversion
  • How to Convert Word to PDF on Mac: A Comprehensive Guide
  • Unlock the Power of Transformation: Exploring "Diary of an Oxygen Thief" in PDF

Recent Comments

  1. A WordPress Commenter on Hello world!
flexco.com Proudly powered by WordPress