
The 2025 Ford Explorer is a testament to the relentless pursuit of innovation. Meticulously engineered to redefine the boundaries of automotive excellence, this meticulously crafted SUV heralds a new era of unparalleled performance, cutting-edge technology, and unparalleled style. Prepare to embark on an extraordinary journey as we delve into the captivating details of the 2025 Ford Explorer, a vehicle destined to leave an indelible mark on the automotive landscape.
Beneath the Explorer’s sculpted exterior lies a powertrain teeming with unbridled potential. A choice of advanced powertrains, including a robust hybrid system and a thrilling all-electric variant, ensures that every drive is an exhilarating experience. The Explorer’s responsive handling and exceptional agility instill confidence on winding roads, while its advanced safety features provide peace of mind in every situation. Transitioning seamlessly from urban streets to rugged trails, this SUV embodies versatility like never before.
Inside the Explorer’s spacious cabin, a symphony of sophistication and functionality awaits. Premium materials, meticulous craftsmanship, and thoughtful design create an ambiance of refined comfort. An intuitive infotainment system seamlessly integrates with your digital world, while an expansive panoramic sunroof invites the beauty of the outdoors in. Whether navigating the city’s hustle and bustle or escaping to the tranquility of nature, the 2025 Ford Explorer elevates every journey into an unforgettable adventure. Its thoughtfully appointed interior seamlessly adapts to your needs, transforming into a mobile sanctuary or an adventurer’s haven at a moment’s notice.
Refined, Rugged, and Ready: The 2025 Ford Explorer
Unleashing a New Breed of SUV
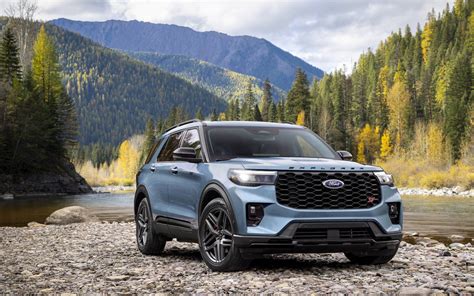
The 2025 Ford Explorer emerges from the automotive landscape as a testament to innovation, offering drivers an unparalleled blend of refinement, ruggedness, and versatility. With its sculpted contours, bold grille, and commanding stance, the Explorer exudes an aura of sophistication and adventure. Its spacious interior, adorned with premium materials and state-of-the-art technology, creates a sanctuary of comfort and connectivity. Whether navigating urban streets or traversing rugged terrain, the 2025 Explorer delivers an experience that combines unparalleled capability with refined luxury.
The Explorer’s sleek aerodynamic silhouette reduces drag and improves fuel efficiency. Its muscular fenders and rugged underbody protection convey a sense of purpose, while chrome accents and panoramic windows add touches of elegance. The advanced lighting system, featuring LED headlights and taillights, provides optimal visibility and adds to the vehicle’s striking presence.
Within its cavernous interior, the Explorer offers a symphony of premium materials and innovative technology. Supple leather upholstery caresses occupants, while soft-touch surfaces and ambient lighting create a warm and inviting atmosphere. The ergonomic dashboard is designed for intuitive operation, with a 12-inch touchscreen display serving as the command center for navigation, entertainment, and climate control.
Customization and Capability
The 2025 Explorer offers an array of customization options to suit every driver’s needs. Choose from a range of engine choices, including a powerful hybrid engine that delivers both performance and fuel efficiency. The Terrain Management System allows you to tailor the Explorer’s performance to any environment, from on-road cruising to off-road adventures.
| Engine Options |
| 3.5L EcoBoost V6 |
| 2.3L EcoBoost I-4 |
| 3.0L PowerStroke Turbo Diesel V6 |
| 3.5L Hybrid V6 |
With ample ground clearance and available all-wheel drive, the Explorer is ready to conquer any terrain. Its spacious cargo area and flexible seating configurations accommodate both passengers and gear effortlessly. And for those who seek the ultimate in adventure, the off-road-ready Timberline trim adds even more capability with its specialized suspension, aggressive tires, and skid plates.
Unveiling the Next Generation of Ford’s Flagship SUV
Introducing the 2025 Ford Explorer
The 2025 Ford Explorer marks a new era for the iconic SUV. With a redesigned exterior, upgraded interior, and advanced technology, the Explorer sets a new benchmark in its class.
A Redefined Exterior
The 2025 Explorer boasts a bold and modern exterior that commands attention. The redesigned grille, sleek headlights, and sculpted body lines create a dynamic and athletic stance. New alloy wheel options and expanded exterior color choices allow for personalized customization.
In addition to the standard exterior features, the 2025 Explorer also offers the following:
| Exterior Enhancements |
| Panoramic sunroof |
| Heated and cooled seats |
| Remote start and keyless entry |
| 360-degree camera system |
Power and Efficiency: Enhanced Performance under the Hood
Under the hood of the 2025 Ford Explorer, lies a suite of powertrain options designed to deliver exceptional performance and efficiency.
3. Enhanced Hybrid Powertrain: Unmatched Fuel Efficiency and Power
The 2025 Explorer’s hybrid powertrain pairs a 3.3-liter V6 engine with an electric motor to create an unmatched driving experience. This advanced system delivers:
- Improved Fuel Economy: The hybrid powertrain achieves an impressive fuel efficiency rating, allowing you to drive longer distances on a single tank.
- Effortless Acceleration: The combination of gasoline and electric power delivers seamless acceleration, providing ample torque for quick overtaking and merging.
- Reduced Emissions: By utilizing an electric motor, the hybrid powertrain significantly reduces exhaust emissions, contributing to a cleaner environment.
The following table provides a detailed comparison of the 2025 Explorer’s powertrain options:
| Powertrain |
Engine |
Fuel Economy (MPG) |
0-60 mph (Seconds) |
| 3.0L EcoBoost V6 |
3.0L EcoBoost V6 |
20 City / 27 Hwy |
5.5 |
| 2.3L EcoBoost I-4 |
2.3L EcoBoost I-4 |
23 City / 30 Hwy |
6.1 |
| Hybrid |
3.3L V6 + Electric Motor |
26 City / 35 Hwy |
5.8 |
Advanced Technologies: Enhancing Safety and Convenience
Advanced Driver-Assist Systems (ADAS)
The 2025 Ford Explorer is equipped with a comprehensive suite of ADAS features, including lane-departure warning, adaptive cruise control, and automatic emergency braking. These systems work together to enhance safety by monitoring the vehicle’s surroundings and intervening if necessary to prevent accidents.
Infotainment Connectivity
The Explorer boasts a cutting-edge infotainment system that seamlessly integrates with smartphones and other mobile devices. The system features a large touchscreen display, voice control, and Apple CarPlay/Android Auto connectivity. This connectivity ensures seamless access to navigation, music, messaging, and other apps.
360-Degree Camera
For enhanced visibility and maneuverability, the Explorer comes with a surround-view camera system. This system provides a 360-degree view of the vehicle’s surroundings, allowing drivers to easily navigate tight spaces, avoid obstacles, and park more safely.
4. Ford Co-Pilot360
Ford’s Co-Pilot360 system takes ADAS to the next level by providing a comprehensive suite of safety and convenience features. These include:
| Feature |
Description |
| Pre-Collision Assist with Automatic Emergency Braking |
Detects potential collisions and applies automatic braking if necessary to avoid or mitigate impact. |
| Blind Spot Information System (BLIS) |
Monitors blind spots and alerts drivers to vehicles approaching from behind. |
| Lane-Keeping System |
Keeps the vehicle centered in its lane and alerts drivers if they drift unintentionally. |
| Adaptive Cruise Control with Stop-and-Go |
Maintains a safe following distance from other vehicles and can bring the vehicle to a complete stop and resume driving in stop-and-go traffic. |
| Evasive Steering Assist |
Assists drivers in avoiding potential collisions by providing steering input to help maneuver around obstacles. |
Interior Evolution: Space, Comfort, and Intuitive Technology
Versatile Seating Arrangements:
The 2025 Ford Explorer offers flexible seating options to cater to diverse needs. With up to seven seats, you can comfortably accommodate your family or friends. The third row of seating provides ample legroom, ensuring a pleasant ride for all passengers.
Spacious Interior:
Step inside the Explorer and be greeted by a spacious cabin that doesn’t compromise on comfort. The panoramic sunroof floods the interior with natural light, creating an airy and inviting atmosphere. The ample headroom and legroom ensure a relaxed and stress-free journey for both the driver and passengers.
Premium Materials:
The Explorer’s interior has been meticulously crafted using premium materials that enhance the overall driving experience. Soft-touch surfaces and stylish accents create a luxurious and refined ambiance. The leather-wrapped steering wheel and heated front seats provide an unparalleled level of comfort and sophistication.
Intriguing Color Palette:
The 2025 Explorer offers a wide range of interior color options to suit your personal style. Choose from a vibrant palette of hues, including black, blue, gray, and tan. Each color is meticulously chosen to complement the premium materials and create a cohesive and visually appealing interior.
Intuitive Technology:
At the heart of the Explorer’s interior is a suite of intuitive and user-friendly technology features. The SYNC 4A infotainment system features a large touchscreen display, allowing for seamless navigation and control of entertainment, communication, and vehicle settings. The wireless charging pad keeps your devices powered up and within easy reach while you drive.
| Feature |
Description |
| Panoramic Sunroof |
Floods the interior with natural light, creating an airy ambiance |
| Premium Leather |
Enhances comfort and adds a luxurious touch |
| Advanced Infotainment |
Seamless navigation, entertainment, and vehicle control at your fingertips |
Design Excellence: Striking Aesthetics and Functional Form
Striking Aesthetics
The 2025 Ford Explorer captivates with its bold exterior design. Its sleek lines and muscular stance exude a sense of power and agility. The distinctive grille, featuring an intricate honeycomb pattern, adds a touch of sophistication to the overall aesthetic. The LED headlights and taillights provide exceptional illumination while enhancing the vehicle’s presence on the road.
Functional Form
Behind the eye-catching exterior, the 2025 Explorer is engineered for both style and functionality. The spacious cabin offers ample room for up to seven passengers, ensuring a comfortable ride for all occupants. The thoughtfully designed interior features premium materials and intuitive technology, creating a luxurious and user-friendly environment.
Versatile Seating
The Explorer boasts versatile seating options to accommodate a variety of needs. The second row features a bench seat with adjustable headrests for added comfort. The third row, accessible via a convenient fold-down mechanism, offers ample space for additional passengers or cargo.
Configurable Cargo Space
With the third row of seats folded down, the Explorer offers a generous 87.8 cubic feet of cargo space. The adjustable load floor and numerous storage compartments ensure that all your gear is secure and organized. The hands-free liftgate provides easy access to the cargo area, making loading and unloading effortless.
Advanced Technology
The 2025 Explorer is equipped with cutting-edge technology to enhance both safety and convenience. The SYNC 4A infotainment system offers seamless integration with smartphones and supports voice commands. Advanced driver-assistance systems, such as lane-keeping assist and adaptive cruise control, provide peace of mind during your journey.
Impressive Performance
Powering the 2025 Explorer is a choice of two efficient powertrains. The standard 2.3-liter EcoBoost engine delivers an optimal balance of power and fuel efficiency. For those seeking even greater performance, the 3.0-liter EcoBoost V6 provides ample torque and acceleration.
EcoBoost Power: Balancing Performance and Sustainability
The 2025 Ford Explorer features a range of EcoBoost engines that combine power and fuel efficiency. These engines utilize advanced turbocharging technology to enhance performance while reducing emissions.
EcoBoost Engine Options
The Explorer offers two EcoBoost engine options:
| Engine |
Horsepower |
Torque |
| 2.3-liter EcoBoost |
300 hp |
310 lb-ft |
| 3.0-liter EcoBoost |
365 hp |
400 lb-ft |
Performance and Efficiency
The 2.3-liter EcoBoost engine provides ample power for everyday driving, while the 3.0-liter EcoBoost delivers exhilarating performance for enthusiasts. Both engines offer impressive fuel economy, with the 2.3-liter averaging up to 21 mpg in the city and 28 mpg on the highway, and the 3.0-liter delivering 17 mpg in the city and 25 mpg on the highway.
Advanced Turbocharging Technology
The EcoBoost engines employ advanced turbocharging technology to maximize performance and fuel efficiency. The turbochargers compress intake air, increasing its density and allowing for more efficient combustion. This results in increased power and torque while reducing fuel consumption and emissions.
Benefits of EcoBoost
The benefits of Ford’s EcoBoost technology include:
- Improved performance and torque
- Reduced fuel consumption and emissions
- Smaller engine size with equal or better performance
Off-Road Prowess: Uncompromised Adventure Capabilities
The 2025 Ford Explorer embodies the spirit of adventure with unmatched off-road capabilities that empower you to conquer any terrain.
Intelligent Terrain Management System
The intuitive Terrain Management System seamlessly adjusts drive modes to optimize traction and handling on various surfaces, including normal, sport, eco, slippery, tow/haul, deep snow/sand, and trail.
Twin-Turbocharged V6 Engine
The mighty twin-turbocharged V6 engine delivers a surge of power and torque, effortlessly navigating rugged trails and towing heavy loads.
Advanced Suspension System
The sophisticated suspension system features independent front and rear suspensions with coil springs and monotube shocks, ensuring a smooth and controlled ride over challenging terrain.
Hill Descent Control
When descending steep slopes, Hill Descent Control automatically modulates the brakes to maintain a controlled speed, allowing you to focus on steering.
Crawl Control
In extreme off-road situations, Crawl Control takes over throttle and braking, allowing you to traverse daunting obstacles at a precise and steady pace.
Selectable Locking Rear Differential
The selectable locking rear differential distributes power evenly between the rear wheels, providing enhanced traction and stability on slippery or uneven surfaces.
All-Terrain Tires
Rugged all-terrain tires provide exceptional grip and traction on various terrains, from loose gravel to muddy trails.
Off-Road Monitoring System
A comprehensive off-road monitoring system displays real-time information such as pitch, roll, tire pressure, and more, empowering you with essential data during your adventures.
| Feature |
Description |
| Terrain Management System |
Optimizes drive modes for various surfaces |
| Twin-Turbocharged V6 Engine |
Provides ample power and torque for off-roading |
| Advanced Suspension System |
Ensures a smooth and controlled ride over challenging terrain |
| Hill Descent Control |
Modulates brakes for controlled descents |
| Crawl Control |
Maintains a steady pace over obstacles |
| Selectable Locking Rear Differential |
Distributes power evenly for enhanced traction |
| All-Terrain Tires |
Provides exceptional grip and traction on various surfaces |
| Off-Road Monitoring System |
Displays essential information during off-road adventures |
Towing and Payload: Versatile Performer for Your Needs
Tows Up to 5,600 Pounds
The 2025 Ford Explorer boasts an impressive towing capacity of up to 5,600 pounds, making it an ideal choice for hauling trailers, boats, and other heavy loads.
Hauls Up to 1,500 Pounds
In addition to its towing prowess, the Explorer can also accommodate a substantial payload of up to 1,500 pounds, allowing you to transport equipment, supplies, or cargo with ease.
Towing Features
- Tow Hitch Receiver
- Trailer Sway Control
- Hill Start Assist
- Blind Spot Monitoring with Trailer Coverage
Payload Capacity
The Explorer’s spacious cabin and flexible seating arrangements provide ample room for passengers and cargo. With the rear seats folded down, it offers a maximum cargo volume of over 87 cubic feet.
GVWR and Curb Weight Ratings
The Explorer’s gross vehicle weight rating (GVWR) varies depending on the trim level and options selected. It typically ranges from 6,230 to 6,530 pounds.
The curb weight of the Explorer also varies, but it generally falls within the range of 4,600 to 5,000 pounds.
| Trim Level |
GVWR (lbs) |
Curb Weight (lbs) |
| Base |
6,230 |
4,620 |
| XLT |
6,330 |
4,720 |
| Limited |
6,430 |
4,820 |
| ST |
6,530 |
4,920 |
Ford Explorer ST: Performance-Oriented Variant with Thrilling Dynamics
Thrilling Engine and Performance
At the heart of the Explorer ST lies a potent 3.0-liter EcoBoost V6 engine that delivers an exhilarating 400 horsepower and 415 lb-ft of torque. This twin-turbocharged powerhouse propels the SUV from 0 to 60 mph in a blistering 5.5 seconds, sending adrenaline coursing through the veins.
Sporty Handling and Agility
The Explorer ST boasts a sport-tuned suspension, upgraded brakes, and performance-biased all-wheel-drive system. These enhancements endow the SUV with remarkable handling capabilities, allowing it to corner with precision and maintain composure even on challenging roads.
Interior with Performance Flair
The Explorer ST’s cabin exudes a performance-oriented ambiance. Recaro sport seats provide exceptional support and bolstering, while a flat-bottom steering wheel and aluminum pedals contribute to the sporty driving experience.
Distinctive Exterior Styling
The Explorer ST stands out visually with its aggressive front fascia, blacked-out accents, and unique wheels. These subtle yet purposeful design elements lend an air of exclusivity and underscore its performance credentials.
Exclusive Color Options
The Explorer ST offers a captivating array of color options to cater to discerning drivers. These include the striking Rapid Red Metallic, Carbonized Gray Metallic, and Stealth Blue Metallic, adding a touch of personalization to the already remarkable package.
Technology Enhancements
The Explorer ST comes equipped with advanced technologies that enhance both performance and convenience. Adaptive cruise control with lane centering, a 360-degree camera, and a 10.1-inch touchscreen infotainment system ensure a premium driving experience.
Towing and Off-Road Capabilities
Despite its performance focus, the Explorer ST retains impressive towing and off-road capabilities. With a towing capacity of up to 5,600 pounds and the Terrain Management System, it can handle a variety of terrains with confidence.
Driver Assistance Technologies
The Explorer ST prioritizes safety with a comprehensive suite of driver assistance technologies. These include blind-spot monitoring, lane departure warning, and automatic emergency braking, providing peace of mind behind the wheel.
Warranty and Maintenance
The 2025 Ford Explorer ST comes with a comprehensive warranty package that includes a 3-year/36,000-mile bumper-to-bumper warranty, a 5-year/60,000-mile powertrain warranty, and complimentary maintenance for 2 years/24,000 miles.
Pricing and Availability
| Trim |
MSRP |
| Base |
$56,805 |
| ST |
$66,355 |
| ST-Line |
$47,840 |
2025 Ford Explorer: A Comprehensive Overview
The 2025 Ford Explorer is a highly anticipated SUV that promises to revolutionize the mid-size SUV segment. Featuring a bold new design, cutting-edge technology, and a refined interior, the Explorer is poised to set new benchmarks for performance, comfort, and safety.
The exterior of the 2025 Explorer has been redesigned with sharp angles, a sleek silhouette, and an athletic stance. The front fascia is dominated by a large grille and LED headlights that are integrated into the overall design. The side profile is highlighted by sculpted character lines and chrome accents, while the rear features a full-width LED taillight bar and a spoiler.
Inside, the 2025 Explorer boasts a modern and sophisticated cabin. The dashboard is equipped with a large touchscreen display, a digital instrument cluster, and a rotary gear selector. The interior is spacious and comfortable, with ample legroom and headroom for all passengers. The seats are upholstered in premium materials and offer excellent support.
People Also Ask
Is the 2025 Ford Explorer a hybrid?
Yes, the 2025 Ford Explorer is available as a hybrid model, offering improved fuel efficiency and reduced emissions.
What are the safety features of the 2025 Ford Explorer?
The 2025 Ford Explorer is equipped with a comprehensive suite of safety features, including lane departure warning, adaptive cruise control, blind spot monitoring, and automatic emergency braking.
When will the 2025 Ford Explorer be released?
The 2025 Ford Explorer is expected to be released in the latter half of 2024.
