5 Easy Steps to Cut a Perfect Glass Circle

5 Easy Steps to Cut a Perfect Glass Circle
$title$

Have you ever found yourself needing to cut a perfect glass circle, but don’t know where to start? Cutting a glass circle can seem like a daunting task, but with the right tools and techniques, it’s actually quite simple. In this article, we’ll walk you through the step-by-step process of how to cut a glass circle, so you can create beautiful and precise glass circles for your next project. First, we’ll discuss the tools and materials you’ll need, then we’ll move on to the cutting process itself. And finally, we’ll provide some tips and tricks for getting the best results.

To cut a glass circle, you will need the following tools and materials: a glass cutter, a circle cutter, a ruler or measuring tape, a marker or pencil, and a pair of safety glasses. Once you have all of your tools and materials gathered, you can begin the cutting process. First, mark the center of the glass circle on the glass surface using a marker or pencil. Next, position the circle cutter on the center mark and adjust the cutting wheel to the desired radius. Once the circle cutter is in place, hold the glass cutter perpendicular to the glass surface and apply gentle pressure as you rotate the circle cutter around the center mark. As you rotate the circle cutter, the cutting wheel will score the glass surface. Once the circle is scored, place the glass on a flat surface and gently tap the center of the circle with a hammer or mallet. The glass will break along the scored line, creating a perfect glass circle.

Here are a few tips and tricks for getting the best results when cutting glass circles: First, make sure to use a sharp glass cutter. A dull glass cutter will not score the glass surface properly, which can lead to uneven or jagged edges. Second, apply gentle pressure when rotating the circle cutter. Too much pressure can cause the glass to crack or break. Third, score the glass surface completely before tapping the center of the circle. If the glass is not scored completely, it may not break cleanly. Finally, wear safety glasses when cutting glass to protect your eyes from flying glass shards.

Safety First: Essential Precautions for Handling Glass

Working with glass, especially cutting it into precise circles, requires utmost care and adherence to safety precautions to prevent accidents and injuries. Here are some essential guidelines to ensure a safe work environment when handling glass:

Protective Gear

Safety Glasses

Always wear safety glasses when working with glass. Flying shards or splinters from accidental breakage can cause severe eye damage if not adequately protected. Choose glasses with impact-resistant lenses that meet ANSI Z87.1 safety standards.

Gloves

Wear sturdy gloves to protect your hands from cuts and abrasions. Leather or Kevlar-lined gloves provide excellent protection and dexterity while handling glass.

Clothing

Wear long sleeves, pants, and sturdy shoes to minimize exposure to glass fragments. Avoid loose clothing that could get caught on equipment or glass pieces.

Glass Handling Techniques

Safe Transportation

When moving glass, use dedicated glass racks or boxes lined with foam or other protective materials. Carry the glass vertically to prevent bending or stress on the edges.

Secure Work Surface

Work on a stable and flat surface to prevent the glass from slipping or moving. Secure the glass with clamps or weighted objects to ensure a firm grip during cutting.

Proper Cutting Techniques

Use the correct cutting tools for the type of glass and thickness being cut. Follow proper cutting techniques to avoid uneven breaks or shattering. Wear safety glasses and gloves at all times.

Emergency Preparedness

First Aid Kit

Keep a first aid kit nearby for immediate treatment of any cuts or injuries. Ensure it includes bandages, antiseptic wipes, and pain relievers.

Emergency Contacts

Have a list of emergency contacts, including medical professionals and a glass repair company, readily available in case of an accident or breakage.

Glass Disposal

Dispose of broken glass properly by wrapping it in thick newspaper or cardboard and clearly marking it as “Broken Glass” before discarding it.

The Circular Jig: A Tool for Precise Guidance

A circular jig is a specialized tool designed to guide the cutting process and ensure a precise circular shape. It consists of a table with a calibrated center point, a rotating arm, and a cutting head. The rotating arm is adjustable to accommodate different diameters, while the cutting head holds the glass cutter and provides a steady, controlled motion.

Using the Circular Jig

  1. Secure the glass: Place the glass on the jig’s table and align the center point with the desired circle’s center.
  2. Adjust the rotating arm: Set the rotating arm to the desired radius, ensuring it’s securely locked in place.
  3. Position the cutting head: Carefully place the cutting head on the rotating arm at the outer edge of the circle. Ensure the cutter blade is aligned perpendicular to the glass surface.
  4. Initiate the cut: Holding the jig firmly, start rotating the arm clockwise. Apply gentle, even pressure to the cutter as you guide it around the circle.
  5. Complete the cut: Continue rotating the arm until the cutter has completed a full circle. Use a straight edge or ruler to score the cut line further if necessary.

Tips for Using a Circular Jig

Table 1: Troubleshooting Guide for Circular Jig Cuts

Issue Cause Solution
Uneven cut Inconsistent pressure or speed Apply even pressure and maintain a steady rotation speed
Chipped edges Dull cutter blade Replace the cutter blade with a sharp one
Incomplete cut Insufficient pressure Increase the pressure applied to the cutter

Glass Cutting Basics: Understanding the Technique

Scoring the Glass

The scoring process is crucial for a clean and accurate cut. Use a high-quality glass cutter with a sharp wheel. Hold the cutter perpendicular to the glass and apply firm pressure as you score a single line along the desired cutting path. Avoid rocking the cutter or applying too much force, as this can damage the glass.

The score line should be deep enough to penetrate the surface of the glass without breaking through completely. If the score is too shallow, the glass may not break cleanly. Conversely, if the score is too deep, it can weaken the glass and increase the risk of shattering.

Supporting the Glass

Proper support is essential to prevent the glass from breaking prematurely. Place the glass on a flat, stable surface with the score line aligned with the edge. Use a glass cutter’s assistant or a dedicated glass cutting board to provide support and protect the glass from jarring.

Breaking the Glass

Once the glass is scored, it’s time to break it along the score line. Apply gentle pressure to the edge of the glass on either side of the score. Gradually increase the pressure until the glass snaps.

To avoid chipping or cracking, break the glass in one smooth motion. If the glass does not break cleanly, you may need to rescore the line or adjust the support.

Smoothing the Edges

After breaking the glass, it’s important to smooth the raw edges to prevent cuts or accidents. Use a glass grinder or a fine-grit sandpaper to carefully grind or sand the edges until they are smooth and free of sharp fragments.

Safety Precautions

Glass cutting can be hazardous. Wear protective gear such as safety glasses and gloves. Keep the work area clean and free of debris. Dispose of broken glass properly in a designated container.

Creative Inspiration: Exploring Unique Uses for Cut Glass Circles

10. Decorative Mirror Frames

Transform plain mirrors into artistic masterpieces by framing them with cut glass circles. Arrange the circles in intricate patterns or create a mosaic effect to add a touch of elegance and sophistication to any room. The clear transparency of glass allows the mirror’s reflective surface to shine through, enhancing the overall aesthetics.

9. Candle Holders and Lanterns

Illuminate your spaces with a warm and inviting glow. Cut glass circles can be used to create stunning candle holders and lanterns. Place a candle inside a glass circle and watch as the light dances and creates mesmerizing patterns on the surrounding surfaces. The glass’s transparency allows the candlelight to permeate through, creating a magical ambiance.

8. Wall Art and Sculptures

Elevate your home decor with unique glass circle wall art or sculptures. Arrange circles of different sizes and textures to create abstract compositions or depict captivating scenes. Suspend them from the ceiling or mount them on walls to add a touch of artistry and intrigue to your living spaces.

7. Coasters and Tabletop Accessories

Protect your surfaces in style with cut glass circle coasters. These elegant coasters not only prevent stains and scratches but also add a touch of sophistication to your table settings. You can also use glass circles to create coasters, napkin rings, or spoon rests, adding cohesion and a touch of glamour to your dining experience.

6. Jewelry and Accessories

Express your individuality with handcrafted glass circle jewelry. Create earrings, pendants, or bracelets by attaching glass circles to beads, chains, or leather cords. The clear transparency and smooth surface of glass make it a versatile material for creating unique and eye-catching accessories.

How To Cut A Glass Circle

Cutting a glass circle is a relatively simple process, but it does require some special tools and techniques. With the right tools and a little practice, you can easily cut glass circles of any size.

Here are the steps on how to cut a glass circle:

1. Gather your materials. You will need a glass cutter, a circle cutter, a straight edge, a marking pen, and a pair of safety glasses.
2. Clean the glass. Make sure the glass is clean and free of any dirt or debris.
3. Mark the center of the circle. Use the marking pen to mark the center of the circle on the glass.
4. Position the circle cutter. Place the circle cutter on the glass, with the center of the circle cutter aligned with the center of the circle.
5. Score the glass. Use the glass cutter to score a circle around the center of the glass. Make sure to apply even pressure and to keep the glass cutter perpendicular to the glass.
6. Break the glass. Once the glass is scored, you can break it by gently tapping it with a hammer or by using a glass breaker.
7. Smooth the edges. Use a glass grinder or a sanding block to smooth the edges of the glass circle.

People Also Ask About How To Cut A Glass Circle

What is the best way to cut a glass circle?

The best way to cut a glass circle is to use a circle cutter. A circle cutter is a specialized tool that is designed to cut circles in glass. Circle cutters come in a variety of sizes, so you can choose the one that is right for the size of the circle you need to cut.

Can I use a glass cutter to cut a circle?

Yes, you can use a glass cutter to cut a circle. However, it is important to note that glass cutters are not as precise as circle cutters. If you need to cut a very precise circle, it is best to use a circle cutter.

How do I break a glass circle?

Once you have scored the glass, you can break it by gently tapping it with a hammer or by using a glass breaker. If you are using a hammer, be sure to wear safety glasses and to tap the glass lightly. If you are using a glass breaker, follow the manufacturer’s instructions.

1. Catch Kyogre in Pokémon Emerald

5 Easy Steps to Cut a Perfect Glass Circle

Featured Image: $title$

Paragraph 1:

Are you ready to embark on an extraordinary underwater adventure in the depths of Pokemon Emerald? One of the most elusive and legendary Pokemon, Kyogre, awaits your capture. This majestic sea behemoth holds immense power that can reshape the very oceans. Embarking on this quest will test the limits of your determination and strategy. Get ready to dive into a thrilling encounter that will leave an unforgettable mark on your Pokemon journey.

Paragraph 2:

To commence your pursuit of Kyogre, you must first navigate to the Cave of Origin, located on Route 128. Once you enter the cave’s depths, a formidable battle awaits you against Team Aqua’s leader, Archie. Triumph over him, and the path to Kyogre will be revealed. However, be prepared for a formidable challenge; Kyogre’s immense strength and Legendary aura make it a formidable opponent. Only the most skilled Trainers with a keen eye for strategy can hope to emerge victorious.

Paragraph 3:

As the battle against Kyogre unfolds, consider employing Pokemon with Grass or Electric-type moves to exploit its weaknesses. Additionally, having a Pokemon with the ability "Pressure" can help wear down its defenses over time. Patience is crucial during this encounter; do not rush into reckless attacks, as Kyogre’s powerful Water-type moves can effortlessly sweep away your team. With a combination of strategy, skill, and a touch of luck, you will have the honor of adding the legendary Kyogre to your Pokemon Emerald collection, a testament to your unwavering determination and unparalleled mastery of the Pokemon world.

Encountering Kyogre

Kyogre is a legendary Water-type Pokémon that can be encountered in Pokémon Emerald. To find Kyogre, you will need to have completed the main storyline of the game and have obtained the Eon Ticket. Once you have the Eon Ticket, you can board the S.S. Tidal at the Lilycove City harbor. The S.S. Tidal will take you to a remote island where Kyogre is waiting.

When you first encounter Kyogre, it will be at level 70. Kyogre is a powerful Pokémon, so it is important to come prepared. You should have a strong team of Pokémon that are at least level 65 or higher. You should also have plenty of healing items and Revives, as Kyogre can be a challenging opponent.

Kyogre has a variety of powerful moves, including Water Pulse, Ice Beam, and Thunder. Kyogre also has the ability to use the move Origin Pulse, which is one of the most powerful moves in the game. To defeat Kyogre, you will need to use a variety of Pokémon and moves to take advantage of Kyogre’s weaknesses. You should also be careful to avoid Kyogre’s powerful attacks.

Once you have defeated Kyogre, it will be added to your team. Kyogre is a powerful addition to any team, and it can be used to help you defeat the Elite Four and become the Pokémon League Champion.

Preparing for Battle

1. Stock Up on Ultra Balls and Premier Balls:
Utilize Ultra Balls for their high catch rate. For enhanced chances, consider using Premier Balls after weakening Kyogre to a low HP.

2. Prioritize Status Moves and Special Attacks:

  • Paralysis (Thunder Wave or Body Slam): Significantly reduces Kyogre’s speed, making it easier to outspeed and catch.
  • Sleep (Sleep Powder or Hypnosis): Induces sleep, providing ample time to whittle down its HP.
  • Freeze (Ice Beam or Freeze-Dry): Traps Kyogre in ice, preventing it from moving or attacking.
  • Special Attacks (Water Pulse or Ice Beam): Exploit Kyogre’s higher Special Defense stat and deal significant damage.
  • Avoid Physical Attacks: Kyogre’s high Physical Defense makes physical attacks less effective.

3. Consider Coverage Moves:
Include moves that exploit Kyogre’s weaknesses, such as Grass, Electric, and Ice. These will deal greater damage and weaken it more quickly.

Understanding Kyogre’s Moveset

Kyogre wields a formidable arsenal of Water-type moves that can devastate opponents. Its signature move, Origin Pulse, is a powerful Water-type attack with a 100% accuracy and 85 base power. Additionally, Kyogre possesses a variety of other Water-type moves such as Surf, Hydro Pump, and Ice Beam. These attacks provide Kyogre with excellent coverage against most Pokémon types.

Analyzing Kyogre’s Weaknesses

Despite its immense power, Kyogre has several weaknesses that players can exploit in battle. Kyogre is particularly vulnerable to Grass-type attacks, which deal double damage against it. Electric-type moves also pose a significant threat to Kyogre, inflicting quadruple damage. Additionally, Kyogre has a weakness to Ice-type attacks, which deal double damage.

To effectively counter Kyogre, players should consider using Pokémon with Grass-type, Electric-type, or Ice-type moves. These Pokémon can exploit Kyogre’s weaknesses and deal significant damage to it in battle.

Type Effectiveness
Grass Double Damage
Electric Quadruple Damage
Ice Double Damage

Utilizing Effective Pokémon

For a successful capture of Kyogre, utilizing Pokémon with specific moves and abilities is crucial. Below is a breakdown of the most effective choices to enhance your chances:

Electric-Type Pokémon

Electric-type Pokémon deal super effective damage against Kyogre, making them ideal choices. Consider using Pokémon such as Manectric, Raichu, or Magnemite. Ensure their movesets include powerful Electric attacks like Thunderbolt or Thunder.

Grass-Type Pokémon

Grass-type Pokémon also have an advantage over Kyogre. Options like Shiftry, Breloom, and Tropius can effectively counter Kyogre’s Water and Ice moves. They should be equipped with Grass-type attacks such as Leaf Blade or Solar Beam.

Ice-Type Pokémon

Ice-type Pokémon can deal double damage to Kyogre, making them a viable choice. Jynx, Froslass, or Glalie are suitable options. Equip them with Ice-type moves like Ice Beam or Blizzard for maximum impact.

Pokémon with Status Effects

Pokémon that can inflict status effects can significantly weaken Kyogre. Consider using Pokémon like Starmie with Psychic or Bronzong with Sleep Powder to paralyze or put Kyogre to sleep.

Employing Status Effects

Applying status effects to Kyogre is a crucial element in taming it. These effects weaken it, creating a window of opportunity for capture. Several status effects prove highly effective against Kyogre, namely:

  • Paralysis: Impairs Kyogre’s speed, hampering its ability to attack.
  • Sleep: Renders Kyogre unconscious, providing ample time to catch it.
  • Freeze: Immobilizes Kyogre, halting its movements and making it easier to ensnare.

To inflict these status effects, use Pokemon equipped with appropriate moves. For instance, Stun Spore by Amoonguss or Vileplume can paralyze Kyogre, while Hypnosis by Hypno or Gengar can induce sleep. Additionally, Water Absorb, a passive ability by Pokemon like Ludicolo or Politoed, can protect against Kyogre’s Water Gun attack, a source of healing.

Pokemon Status Effect Moves
Amoonguss Paralysis Stun Spore
Vileplume Paralysis Stun Spore
Hypno Sleep Hypnosis
Gengar Sleep Hypnosis
Ludicolo Water Absorb
Politoed Water Absorb

Debuffing Kyogre

Once Kyogre’s shields are down, it’s time to start debuffing it. This will make it easier to catch when you finally throw the ball. There are several different ways to debuff Kyogre, including:

1. Using status effects: Many status effects can be used to debuff Kyogre, such as Paralysis, Sleep, and Frozen. These effects can prevent Kyogre from attacking or using certain moves, making it easier to catch.

2. Using moves that lower stats: Some moves can be used to lower Kyogre’s stats, such as Growl and Scary Face. This can make it easier to catch by reducing its attack power or speed.

3. Using items: There are also several items that can be used to debuff Kyogre, such as X Accuracy and X Speed. These items can increase your accuracy or speed, making it easier to catch Kyogre.

4. Using Taunt: Taunt is a move that prevents the target from using any moves that are not attacking moves. This can be very effective against Kyogre, as it will prevent it from using moves like Recover or Rest.

5. Using Encore: Encore is a move that forces the target to use the same move that it used the previous turn. This can be very effective against Kyogre if it is using a move that damages itself, such as Earthquake.

6. Using Scald: Scald is a Water-type move that has a 30% chance of burning the target. This can be very effective against Kyogre, as it will make it weaker to Water-type moves and make it more likely to faint. Additionally, Scald has a chance to lower Kyogre’s speed, further reducing its chances of escaping from a Poké Ball.

Effect Move Item
Paralysis Thunder Wave Paralyze Heal
Sleep Sing Sleep Powder
Frozen Ice Beam Ice Heal
Stat Reduction Growl X Defense
Accuracy Reduction Sand Attack X Accuracy
Speed Reduction Scary Face X Speed

Limiting Kyogre’s Healing

One of Kyogre’s most potent abilities is its innate ability to heal itself using the move “Rest”. This move restores Kyogre to full health while also removing any status conditions it may have. If left unchecked, Kyogre can effectively stall out and outlast any opponent in a battle of attrition. Therefore, preventing Kyogre from using Rest is crucial for subduing it in battle.

Using Status Effects

Inflicting status effects such as Paralysis, Sleep, or Freeze on Kyogre can prevent it from using Rest. These effects disrupt Kyogre’s turn order, increasing the probability of it using a different move or being taken out before it can attempt to heal itself.

Using Taunt and Encore

The moves “Taunt” and “Encore” can also be effective in preventing Kyogre from using Rest. Taunt prohibits the target from using status moves, while Encore forces the target to repeatedly use the last move it used. By Taunting Kyogre or Encoring it with a different move, you can effectively prevent it from using Rest altogether.

Using Choice Items

Choice items such as Choice Scarf, Choice Band, or Choice Specs lock the holder into using a single move for the rest of the battle. For Kyogre, this can be a double-edged sword. While a Choice item can increase Kyogre’s offensive capabilities, it also prevents it from using Rest. By equipping Kyogre with a Choice item, you can force it to use a different move, reducing the likelihood of it healing itself with Rest.

Using Protect and Detect

The moves “Protect” and “Detect” allow a Pokémon to endure a single attack each turn. By using these moves strategically, you can prevent Kyogre from using Rest while still damaging it. This can gradually whittle down Kyogre’s HP, making it more susceptible to being caught.

Using Toxic and Leech Seed

The moves “Toxic” and “Leech Seed” inflict damage over time. By inflicting these statuses on Kyogre, you can gradually reduce its HP while preventing it from healing itself with Rest. These moves are particularly effective when combined with other strategies, such as status effects or preventing Kyogre from using Rest altogether.

Using False Swipe

The move “False Swipe” is a unique move that always leaves the target Pokémon with 1 HP. By using False Swipe on Kyogre, you can ensure that it is weakened enough to be captured without fainting. This prevents Kyogre from using Rest because it cannot be used when a Pokémon is at full HP.

Maximizing Capture Probability

Once you’ve weakened Kyogre, it’s time to optimize your chances of capturing it. Follow these strategies to maximize your probability:

Master Balls

If you’re fortunate to have a Master Ball, don’t hesitate to use it. This prized item guarantees a capture, regardless of Kyogre’s current HP or status.

Dusk Balls

Dusk Balls are particularly effective during nighttime (in-game time between 8 pm and 4 am). Their capture rate bonus makes them a viable option in these hours.

Ultra Balls

Ultra Balls are generally the best choice for capturing Kyogre. They have a high capture rate and are easily accessible in the game.

Timer Balls

Timer Balls become more effective as the battle progresses. If you’ve been engaged in a lengthy battle with Kyogre, consider switching to Timer Balls.

Weakening Kyogre

The lower Kyogre’s HP, the higher your chances of capturing it. Use powerful moves to deplete its health without knocking it out.

Status Effects

Applying status effects like Sleep, Paralysis, or Freeze further increases your capture probability. Use status-inducing moves or items to incapacitate Kyogre.

Repeated Throws

Don’t give up if a single attempt fails. Keep throwing Poké Balls repeatedly to increase your cumulative chance of success.

Using Master Balls

The Master Ball is the only guaranteed way to catch Kyogre. It has a 100% catch rate, regardless of Kyogre’s health or status. However, Master Balls are extremely rare and valuable, so you should only use them if you are sure that you want to catch Kyogre.

How to Get a Master Ball

There are a few ways to get a Master Ball in Pokemon Emerald:

  • Talk to Steven Stone in Mossdeep City after beating the Elite Four. He will give you one Master Ball as a reward.
  • Find a Master Ball in the following locations:
  • Location How to Get It
    Route 132 Hidden in a tree
    Safari Zone Found in the Grand Marsh area
    Shoal Cave Found in a hidden room
    Southern Island Found on the beach

Once you have a Master Ball, you can use it to catch Kyogre by following these steps:

  1. Encounter Kyogre in the Seafloor Cavern.
  2. Weaken Kyogre until its health is low.
  3. Use the Master Ball on Kyogre.

Physical Refurbishment

Once Kyogre is securely captured, it’s crucial to provide for its immediate physical well-being. Begin by carefully removing it from the Poké Ball and placing it in a spacious environment where it has ample room to move around.

Ensure the environment is well-lit, well-ventilated, and free from potential hazards. Provide a suitable body of water, either a large aquarium or a pool, where Kyogre can swim and hydrate. Keep the water clean and at an optimal temperature.

Psychological Care

In addition to its physical needs, Kyogre also requires psychological attention. The capture process can be stressful for a legendary Pokémon, so it’s important to provide a calming and supportive environment.

Spend time with Kyogre, speaking to it in a gentle voice. Use slow, deliberate movements to avoid spooking it. Offer it treats or other forms of enrichment to build a positive association with you.

Training and Bonding

Once Kyogre has had time to adjust to its new surroundings, you can begin training it. Start with basic obedience commands and gradually introduce more advanced techniques. Be patient and reward Kyogre for its progress. This will help build a strong bond between you and your newly acquired companion.

Training will also provide Kyogre with mental stimulation and help it develop its full potential as a Pokémon.

Long-Term Care

As Kyogre grows and matures, its care requirements may change. Ensure its habitat is continuously being updated to accommodate its evolving size and needs. Provide a steady supply of high-quality food and water.

Regular veterinary checkups are essential to monitor Kyogre’s health and well-being. Keep its living environment clean and hygienic to prevent the spread of disease.

Potential Issues and Concerns

Issue Potential Solution
Kyogre not eating Ensure water is fresh, offer a variety of food, consult a veterinarian
Kyogre becoming aggressive Provide ample space, avoid provoking or startling it, seek professional training
Kyogre displaying unusual behavior Monitor behavior, consult a veterinarian, observe for signs of illness or injury

How To Catch Kyogre In Pokemon Emerald

Kyogre is a legendary Water-type Pokémon that can be found in the Cave of Origin in Pokémon Emerald. It is a powerful Pokémon that is difficult to catch, but it is possible with the right strategy.

To catch Kyogre, you will need to first weaken it. You can do this by battling it with your own Pokémon or by using items such as Dusk Balls or Timer Balls. Once Kyogre has been weakened, you can then try to catch it using a Master Ball or an Ultra Ball.

If you are using a Master Ball, you will be able to catch Kyogre instantly. However, if you are using an Ultra Ball, you will need to be more careful. You should use the Ultra Ball when Kyogre’s health is low and it is not struggling too much.

People Also Ask About How To Catch Kyogre In Pokemon Emerald

How do I get to the Cave of Origin?

To get to the Cave of Origin, you will need to first go to Pacifidlog Town. From there, you will need to take a boat to Dewford Town. Once you are in Dewford Town, you will need to go to the northeast corner of the town and enter the cave.

What level should my Pokémon be to catch Kyogre?

Your Pokémon should be at least level 60 to have a good chance of catching Kyogre. However, if you are using a Master Ball, you can catch Kyogre at any level.

What is the best way to catch Kyogre?

The best way to catch Kyogre is to use a Master Ball. However, if you do not have a Master Ball, you can use an Ultra Ball or a Dusk Ball. You should also weaken Kyogre before trying to catch it.

5 Easy Steps: Turn on Your Boiler Like a Pro

5 Easy Steps to Cut a Perfect Glass Circle

Imagine a chilly winter morning when you wake up to a freezing house. The thought of taking a hot shower or having a warm breakfast seems like a distant dream. This is where a boiler becomes your savior, providing warmth and comfort to your home. However, if you’re new to operating a boiler, the prospect of turning it on can be daunting. In this comprehensive guide, we will walk you through the steps to ignite your boiler effortlessly, ensuring a cozy and comfortable living space.

Before embarking on this journey, it’s crucial to familiarize yourself with the various types of boilers available. Each type has its unique characteristics and ignition procedure. Once you’ve identified the type of boiler in your home, you can follow the specific instructions tailored to it. Gas boilers, for instance, require a gas supply and an ignition source, while oil boilers necessitate an oil tank and a heating element. Understanding the specific requirements of your boiler will help you navigate the ignition process smoothly.

Safety should always be paramount when dealing with any gas or electrical appliance. Before proceeding, ensure that the area around the boiler is clear of any obstructions or flammable materials. If you’re feeling uncertain or uncomfortable at any stage, don’t hesitate to contact a qualified engineer for assistance. Their expertise will guarantee a safe and efficient boiler ignition, providing you with peace of mind and a warm, inviting home.

Understanding Your Boiler Controls

Mastering the intricacies of your boiler’s controls is paramount for efficient and trouble-free operation. Before turning on your boiler, familiarize yourself with the following components:

1. Power Switch: A simple on/off switch that provides electricity to the boiler.

2. Thermostat: Regulates the temperature of the water circulating through the heating system. Set the thermostat to your desired room temperature.

3. Pressure Gauge: Indicates the water pressure within the boiler. It should typically range between 1 and 2 bar. If the pressure drops too low, the boiler may overheat.

4. Diverter Valve: Directs the heated water either to the radiators or to the hot water tank. Ensure that the valve is positioned correctly for your intended use.

5. Reset Button: In case of a boiler fault or overheat, the reset button can be pressed to restore operation. Follow the manufacturer’s instructions for its precise use.

6. Indicator Lights: Provide visual cues about the boiler’s status, such as power on, heating activated, or a fault condition.

Once you have familiarized yourself with the controls, you can proceed to turn on your boiler. Refer to the manufacturer’s user manual for specific instructions regarding your particular boiler model.

Identifying the On/Off Switch

Locating the on/off switch for your boiler is a critical step in turning it on. The switch is typically situated in a prominent location, such as near the boiler’s control panel or on the side of the unit. It may be labeled as “Power” or “On/Off.”

In most cases, the switch will be a simple toggle switch that you can flip up or down to turn the boiler on or off. However, some boilers may have a more complex switch, such as a rotary dial or a combination of buttons.

If you are unsure of how to identify the on/off switch on your boiler, consult your boiler’s user manual or contact a qualified technician for assistance.

Type of Switch Description
Toggle Switch A simple switch that you flip up or down to turn the boiler on or off.
Rotary Dial A dial that you turn to select different settings, including the on/off setting.
Combination of Buttons Some boilers have a combination of buttons that you press to turn the unit on or off.

Resetting a Tripped Boiler

If your boiler has tripped, it means that a safety feature has been triggered to prevent damage. Here are the steps to reset a tripped boiler:

1. Identify the Reset Button

Look for a small red button or switch on the front panel of your boiler. This is the reset button.

2. Press the Reset Button

Press and hold the reset button for a few seconds. You may hear a click or feel a slight resistance when the button is pressed.

3. Wait for the Boiler to Restart

After pressing the reset button, wait for the boiler to restart. This may take a few minutes. During this time, the boiler will run through a self-test to ensure that all components are functioning properly.

Troubleshooting Tips

If your boiler does not reset after following these steps, there may be a more serious issue. Here are some troubleshooting tips:

Possible Issue Solution
Gas supply is turned off Check to make sure that the gas supply to your boiler is turned on.
Electrical fault Check the electrical connections to your boiler and make sure that they are secure.
Faulty component If you have tried all of the above troubleshooting steps and your boiler still will not reset, it may have a faulty component. You will need to call a qualified engineer to diagnose and repair the issue.

How To Turn On Boiler

Turning on your boiler can be a simple process, but there are a few things you should keep in mind to ensure that it starts up properly and runs efficiently. Here’s a step-by-step guide to help you get started:

  1. Check the power supply: Make sure that the boiler is plugged in and that the power switch is turned on. If the power supply is working, you should see a light on the boiler’s control panel.
  2. Open the gas valve: If your boiler uses gas, you’ll need to open the gas valve before you can turn it on. The gas valve is usually located near the boiler, and it will have a handle that you can turn to open or close it.
  3. Turn on the boiler: Once the power supply is on and the gas valve is open, you can turn on the boiler. The on/off switch is usually located on the boiler’s control panel.
  4. Set the temperature: Once the boiler is on, you’ll need to set the temperature. The temperature setting is usually located on the boiler’s control panel. You can adjust the temperature by turning the dial or pressing the up/down buttons.

Troubleshooting Common Boiler Issues

Boiler Won’t Turn On

If your boiler won’t turn on, there are a few things you can check:

  • Power supply: Make sure that the boiler is plugged in and that the power switch is turned on.
  • Gas valve: If your boiler uses gas, make sure that the gas valve is open.
  • Thermostat: The thermostat may be set too low. Try turning up the thermostat to see if the boiler turns on.
  • Pilot light: If your boiler has a pilot light, make sure that it is lit. You can usually find the pilot light on the front of the boiler.
  • Circuit breaker: The circuit breaker for the boiler may have tripped. Try resetting the circuit breaker to see if the boiler turns on.

Boiler Keeps Turning Off

If your boiler keeps turning off, there are a few things you can check:

  • Overheating: The boiler may be overheating. Try turning down the thermostat to see if the boiler stays on.
  • Low water pressure: The boiler may have low water pressure. Check the water pressure gauge on the boiler and add water if necessary.
  • Faulty pressure switch: The pressure switch may be faulty. The pressure switch is a safety device that turns off the boiler if the water pressure is too low.
  • Faulty thermostat: The thermostat may be faulty. The thermostat tells the boiler when to turn on and off. If the thermostat is faulty, the boiler may turn off prematurely.

Boiler Makes Noise

If your boiler makes noise, there are a few things you can check:

  • Loose parts: There may be loose parts inside the boiler that are making noise. Check the boiler for any loose screws or bolts.
  • Water hammer: Water hammer is a noise that occurs when water flows through the pipes too quickly. You can reduce water hammer by installing a water hammer arrestor.
  • Faulty pump: The pump may be faulty. The pump circulates the water through the boiler. If the pump is faulty, it may make noise.
  • Air in the system: There may be air in the boiler system. Air in the system can cause the boiler to make noise.

Boiler Leaking Water

If your boiler is leaking water, there are a few things you can check:

  • Leaking valve: A leaking valve is a common cause of boiler leaks. Check all of the valves on the boiler for leaks.
  • Leaking pipe: A leaking pipe can also cause a boiler leak. Check all of the pipes on the boiler for leaks.
  • Faulty heat exchanger: The heat exchanger is a component of the boiler that transfers heat from the burner to the water. A faulty heat exchanger can leak water.
  • Leaking pressure relief valve: The pressure relief valve is a safety device that releases pressure from the boiler. A leaking pressure relief valve can indicate a problem with the boiler.

Safety Precautions for Turning On a Boiler

Before turning on your boiler, it is crucial to ensure your safety and prevent potential accidents. Follow these comprehensive precautions for a safe and successful boiler startup:

1. Check the Gas Supply

Confirm that the gas supply is turned on and the gas valve is open. If you smell gas, evacuate the area immediately and contact your gas provider.

2. Inspect the Boiler

Thoroughly inspect the boiler for any visible damage or leaks. Ensure the flue is clear and unobstructed to allow proper ventilation.

3. Set the Thermostat

Adjust the thermostat to the desired temperature. Avoid setting the temperature too high, as this can strain the boiler and increase energy consumption.

4. Start the Boiler

Locate the ignition switch or button and press it to start the boiler. The boiler should ignite within a few seconds. If it does not, repeat the ignition process or consult a qualified technician.

5. Monitor the Boiler

For the first 30 minutes after turning on the boiler, closely monitor its performance. Check for any unusual noises, vibrations, or leaks. If any issues are detected, turn off the boiler immediately and contact a professional for assistance.

Boiler Monitoring Checklist

Observation Action
No unusual noises or vibrations Continue operating
No leaks or visible damage Continue operating
Flame burns steadily Continue operating
Any concerns or abnormalities Turn off boiler, contact technician

Emergency Situations

In the event of an emergency, such as a fire or gas leak, it is crucial to shut off the boiler and evacuate the area immediately. To turn off the boiler in an emergency:

  1. Turn off the gas supply at the main gas valve.
  2. Turn off the electricity to the boiler at the circuit breaker or fuse box.
  3. Contact emergency services and your local gas company.

Boiler Shutdowns

To shut down a boiler for maintenance or repairs:

  1. Turn off the gas supply at the main gas valve.
  2. Turn off the electricity to the boiler at the circuit breaker or fuse box.
  3. Allow the boiler to cool down completely.
  4. Drain the water from the boiler and heating system.
  5. Disconnect the electrical wires from the boiler.
  6. Disconnect the gas line from the boiler.
  7. Remove the boiler from its mounting.
  8. Transport the boiler to an appropriate location for repairs or disposal.

Repairs and Replacements

If your boiler requires repairs or replacement, it is recommended to consult with a qualified heating technician. Attempting to repair or replace a boiler on your own can be dangerous and may void the manufacturer’s warranty.

Repair Replacement
Leaky valves Failed heat exchanger
Faulty thermostat Burst boiler tank
Blocked flue Damaged gas valve

Signs of a Malfunctioning Boiler

A boiler is an integral part of any home, providing hot water and heat. However, when a boiler malfunctions, it can lead to a variety of problems. Here are some signs that your boiler may be malfunctioning:

1. Lack of Hot Water

One of the most obvious signs of a malfunctioning boiler is a lack of hot water. If you’re not getting any hot water from your taps or shower, it’s possible that your boiler is not working properly.

2. Lukewarm Water

Another sign of a malfunctioning boiler is lukewarm water. If the water coming from your taps or shower is only lukewarm, it’s possible that your boiler is not heating the water to the proper temperature.

3. No Heat

If your home is not heating up, it’s possible that your boiler is not working properly. A malfunctioning boiler can cause the radiators or baseboards in your home to be cold.

4. Unusual Noises

If you hear unusual noises coming from your boiler, such as banging, rattling, or whistling, it’s possible that something is wrong. These noises can be caused by a variety of problems, including loose parts, a faulty pump, or a build-up of sediment.

5. Leaks

If you see water leaking from your boiler, it’s a sign of a malfunction. Leaks can be caused by a variety of problems, including a cracked heat exchanger, a faulty valve, or a damaged pipe.

6. Error Codes

Many boilers have an electronic display that shows error codes. If you see an error code on your boiler, it’s possible that there is a problem with the boiler. The error code can help you identify the problem and find a solution.

7. High Energy Bills

If your energy bills have been increasing and your usage hasn’t changed, it’s possible that your boiler is malfunctioning. A malfunctioning boiler can use more energy than a properly functioning boiler.

8. Short Cycling

Short cycling occurs when a boiler turns on and off frequently. This can be caused by a variety of problems, including a faulty thermostat, a clogged filter, or a problem with the boiler’s controls.

9. Boiler Age

The average lifespan of a boiler is 10-15 years. If your boiler is older than this, it’s more likely to malfunction. As a boiler ages, it becomes less efficient and more likely to break down. In the table below you can see the breakdown of boiler age and likelihood of malfunction:

| Boiler Age | Likelihood of Malfunctioning |
|—|—|
| 0-5 years | Low |
| 6-10 years | Medium |
| 11-15 years | High |
| 16+ years | Very High |

How to Turn On a Boiler

Turning on a boiler can be a daunting task, but it doesn’t have to be. By following these simple steps, you can safely and effectively turn on your boiler and keep your home warm and comfortable.

  1. Check the boiler’s water pressure. The water pressure should be between 1.5 and 2.0 bar. If the water pressure is too low, you may need to add water to the system. If the water pressure is too high, you may need to release some water from the system.

  2. Purge the air from the boiler. This is done by opening the bleed valve at the top of the boiler and allowing the air to escape. Once the air has been purged, close the bleed valve.

  3. Turn on the boiler’s power. The power switch is usually located on the front of the boiler. Once the power is on, the boiler will begin to heat up the water.

  4. Set the thermostat. The thermostat controls the temperature of the water in the boiler. Set the thermostat to the desired temperature and the boiler will maintain that temperature.

    Once you have turned on the boiler, it is important to monitor the water pressure and temperature regularly. If you notice any problems, turn off the boiler and contact a qualified technician.

    People Also Ask about How to Turn On a Boiler

    How do I know if my boiler is on?

    There are a few ways to tell if your boiler is on.

    • The boiler’s indicator light will be lit.

    • You will hear the boiler’s fan running.

    • You will feel warm water flowing through the pipes.

      Why won’t my boiler turn on?

      There are a few reasons why your boiler may not turn on.

      • The boiler’s power switch may be turned off.

      • The boiler’s fuse may have blown.

      • The boiler’s pilot light may be out.

      • The boiler’s thermostat may be set too low.

        How do I reset my boiler?

        To reset your boiler, follow these steps:

        1. Turn off the boiler’s power switch.

        2. Wait 30 seconds.

        3. Turn the boiler’s power switch back on.

How To Disarm A Mean Girl

Unmask the Mean Girl’s Motives

Beneath the superficial demeanor of a mean girl lies a complex tapestry of underlying motivations. Understanding these motives is crucial for disarming their hurtful behavior. The following table presents some common triggers that drive mean girls’ actions:

Trigger Motivation
Insecurity: Mean girls often compensate for their own feelings of inadequacy by putting others down.
Competition: They perceive others as threats and resort to manipulation to maintain their perceived superiority.
Boredom: Mean girls may engage in hurtful behavior to create drama and relieve boredom in their lives.
Rejection: They may have experienced negative experiences in the past that lead them to lash out at others.
Self-esteem Issues: By putting others down, mean girls attempt to boost their own sense of worth and significance.

It is important to note that these motivations are not an excuse for mean behavior. However, recognizing them can help you respond with empathy and understand their underlying pain. By addressing the root causes, you can effectively disarm the mean girl’s tactics and foster a more positive and supportive environment.

Stay Calm and Collected

When dealing with a mean girl, it’s crucial to maintain your composure. Emotional reactions can fuel the situation, so stay calm and collected. Remember that her behavior is a reflection of her own insecurities, not a flaw in you. By staying calm, you prevent her from getting a rise out of you and disarm her attempts to provoke you.

1. Breathe Deeply

When you feel yourself getting worked up, take a deep breath and exhale slowly. This helps calm your nervous system and reduce stress. Repeat this process as needed to center yourself and maintain a clear head.

2. Focus on the Positive

Instead of dwelling on her negativity, focus on positive thoughts. Remind yourself of your strengths and the qualities that make you a valuable person. This helps build your self-confidence and resilience, making you less susceptible to her barbs.

3. Respond with Empathy and Understanding

This might seem counterintuitive, but showing empathy and understanding can be a powerful way to disarm a mean girl. Instead of lashing out or being confrontational, try to put yourself in her shoes and understand why she might be acting the way she does. It’s likely that she’s feeling insecure or has her own struggles that are driving her behavior. By showing compassion, you can break down her defensive walls and make her more receptive to your own perspective.

Empathetic Response Avoidant Response
“I understand that you’re feeling frustrated, but I don’t appreciate being treated rudely.” “Whatever, just leave me alone.”
“It must be difficult to feel so insecure about yourself that you have to put others down.” “You’re obsessed with me, get a life.”

Remember, the goal is not to tolerate her behavior but to disarm her and shift the dynamic. By staying calm, focusing on the positive, and responding with empathy and understanding, you can effectively neutralize a mean girl and maintain your own sense of well-being.

Use Humor to Defuse the Situation

Humor can be a powerful tool to disarm a mean girl and lighten the tension. When faced with hurtful comments or actions, try to respond with a witty remark or a humorous observation.

By using humor, you can shift the focus away from the negativity and create a more playful and lighthearted atmosphere. This can make it difficult for the mean girl to continue her attack, as she may feel less inclined to be malicious when met with laughter.

Here are some tips for using humor to defuse a situation:

Tip Example
Use self-deprecation “Wow, I’m so glad you pointed out my messy hair. I didn’t realize I looked like a scarecrow!”
Exaggerate the situation “I’m so offended by your comment, I might just have to write a 10-page essay on the dangers of mean-girl behavior!”
Turn the tables “Is it just me, or do you have a secret crush on me? Because your constant teasing is starting to feel like a weird form of flirting.”

Focus on Your Strengths

Remember that you are unique and have your own strengths. When a mean girl tries to put you down, take a moment to reflect on your positive qualities. Make a list of things you’re good at, whether it’s your intelligence, creativity, or sense of humor. Focus on these strengths and use them to your advantage. By highlighting your positive qualities, you’ll build confidence and make it harder for the mean girl to get to you.

Here are some tips for focusing on your strengths:

  • Make a list of your strengths and keep it somewhere you can see it often.
  • Talk to your friends and family about your strengths.
  • Set goals for yourself that will help you develop your strengths.
  • Don’t compare yourself to others. Everyone has their own unique strengths and weaknesses.
  • Be proud of your strengths and don’t let anyone tell you otherwise.

By following these tips, you can focus on your strengths and build confidence, which will make it harder for the mean girl to get to you.

Identify Her Weaknesses

Strengths Weaknesses
Intelligent Insecure
Athletic Jealous
Popular Lonely

Once you have identified her weaknesses, you can use this knowledge to your advantage. For example, if you know that she is insecure, you can avoid making comments that might make her feel threatened. Or, if you know that she is jealous, you can try to befriend her friends and make her feel left out.

Surround Yourself with Supportive People

Surrounding yourself with people who care about you and are there for you is crucial in dealing with mean girls. These individuals can provide emotional support, offer advice, and help you build your self-confidence. When you have a solid network of supportive people, it’s easier to handle the negative comments and actions of mean girls.

Who to Seek Support From

Consider reaching out to the following individuals for support:

Category Potential Supporters
Family Parents, siblings, grandparents
Friends Close friends, classmates, peers
Teachers Trusted teachers, counselors
Mentors Adults you admire and respect who can offer guidance
Support Groups Groups specifically designed for individuals dealing with bullying

These supportive individuals can provide a listening ear, offer words of encouragement, and remind you of your worth.

Seek Professional Help if Needed

If you have tried all the aforementioned strategies and the mean girl’s behavior continues to have a severe impact on your well-being, it may be time to consider seeking professional help. A therapist can provide an objective perspective, develop personalized coping mechanisms, and support you in addressing the underlying issues contributing to the bullying.

Seeking professional help for mean girl behavior can be beneficial in several ways:

Benefits of Seeking Professional Help
Provides an objective perspective and validates your experiences
Develops personalized coping mechanisms to reduce distress
Addresses underlying issues contributing to the bullying
Supports you in setting boundaries and asserting yourself
Promotes self-esteem and resilience

Practice Self-Care and Mindfulness

One of the most important steps in disarming a mean girl is to practice self-care and mindfulness. This means taking care of your physical and emotional health and being aware of your own thoughts and feelings. When you’re feeling confident and grounded, it’s much harder for mean girls to get under your skin.

Here are some tips for practicing self-care and mindfulness:

– **Get enough sleep.** When you’re well-rested, you’re better able to handle stress and conflict. Aim for 7-8 hours of sleep each night.

– **Eat a healthy diet.** Eating nutritious foods gives your body the energy it needs to function properly. Avoid sugary drinks and processed foods, and focus on eating fruits, vegetables, and whole grains.

– **Exercise regularly.** Exercise is a great way to relieve stress and boost your mood. Aim for at least 30 minutes of moderate-intensity exercise most days of the week.

– **Take time for yourself.**

Hobbies Activities
Reading Writing
Spending time with friends and family Volunteering

– **Connect with your spirituality.**

Religion Meditation Yoga
Prayer Mindfulness Deep breathing exercises

Remember that Mean Girls are often Insecure

It’s important to remember that mean girls are often insecure and are trying to make themselves feel better by putting others down. They may be jealous of you or feel threatened by you. By understanding this, you can have more compassion for them and it can help you to stay calm and not take their behavior personally.

9. Stand up for yourself

If a mean girl is picking on you, don’t be afraid to stand up for yourself. This doesn’t mean you have to be aggressive or mean back to her, but you should let her know that you’re not going to tolerate her behavior. You can do this by speaking up, setting boundaries, and walking away from the conversation if necessary.

Here are some tips for standing up for yourself:

– Look her in the eye and speak in a clear and confident voice.

– Set boundaries by telling her what behaviors you will and will not accept.

– Walk away from the conversation if she continues to be mean to you.

Model Positive Behavior

Mean girls are a fact of life, especially during the teenage years. Their behavior can seem irresistible, with their cliquey friendships and cutting remarks. However, there are ways to disarm a mean girl, without resorting to their level.

One of the most effective ways to disarm a mean girl is to model positive behavior. This means being polite, respectful, and compassionate, even when they are not.

10 Ways to Model Positive Behavior

# Behavior Description
1 Smile and make eye contact Showing kindness and openness can catch the mean girl off guard.
2 Be polite, even when you don’t like them Treat the mean girl with the same respect you would anyone else.
3 Ignore their hurtful comments Don’t react to their meanness. Instead, show them that their words don’t affect you.
4 Compliment them on something genuine Find something nice to say about the mean girl, even if it’s just their hair or outfit.
5 Offer help if you can If the mean girl is struggling with something, offer your assistance.
6 Don’t gossip or spread rumors Mean girls often thrive on creating drama. Don’t participate in their games.
7 Be yourself Don’t try to change who you are to please the mean girl. Confidence is attractive and can discourage bullying.
8 Stand up for yourself (or others) when necessary If the mean girl’s behavior crosses a line, don’t be afraid to speak up.
9 Surround yourself with positive people Spending time with supportive and kind individuals can help you build resilience to meanness.
10 Be patient and persistent Changing a mean girl’s behavior takes time and effort. Don’t give up on modeling positive behavior, even if it doesn’t work immediately.

5 Ways to Wrap A Skirt

5 Easy Steps to Cut a Perfect Glass Circle

Winding a skirt with precision and finesse is an art form that elevates your fashion game. Whether you’re prepping for a special occasion or simply seeking a polished everyday look, mastering the technique will empower you to create flattering silhouettes and enhance your wardrobe versatility. Embark on this sartorial journey with us, unraveling the intricacies of skirt wrapping and unlocking the secrets to effortlessly elegant attire.

Before commencing, gather the essential tools: a well-tailored skirt that complements your body shape, a sash or belt, and a dash of patience. Begin by laying the skirt flat on a stable surface, ensuring the hemline is evenly aligned. Locate the center point of the waistband and align it with your natural waistline. Next, wrap the left side of the skirt around your body, crossing it over the right side at the center front. Secure the overlap with the sash or belt, tightening it gently to create a comfortable fit.

To enhance the drape and fluidity of the skirt, adjust the gathers evenly. Experiment with different pleating techniques to achieve the desired fullness. Once you’re satisfied with the fit and draping, tie the sash or belt securely into a knot or bow. The final step is to gently steam or iron the skirt, removing any creases and imperfections. With newfound confidence, unveil your elegantly wrapped skirt, exuding both sophistication and an effortless allure.

How to Wrap a Skirt

Wrapping a skirt can be a versatile way to create a variety of looks. Whether you want to wrap it to the left or right, or want to create a more asymmetrical style, there are a few basic steps to follow. Here’s a step-by-step guide on how to wrap a skirt:

  1. Start with the skirt unrolled. Lay the skirt flat on a surface in front of you, with the waistband at the top.
  2. Center the skirt around your waist. Find the center of the waistband and line it up with the center of your waist.
  3. Wrap the skirt around your body. Bring the left-hand side of the skirt over to the right, overlapping it with the right-hand side by a few inches.
  4. Tie the skirt. Take the end of the left-hand side and tie it to the end of the right-hand side. Make sure the knot is secure.
  5. Adjust the fit. Once the skirt is tied, you can adjust the fit by pulling the left-hand side tighter or looser. You can also adjust the length of the skirt by rolling it up or down at the waist.

Tips for Wrapping a Skirt

  • Use a fabric belt to cinch the waist of the skirt and create a more defined silhouette.
  • Add a scarf or other accessory to the skirt to create a more unique look.
  • Experiment with different ways to wrap the skirt to create different looks.
  • If you’re having trouble getting the skirt to stay in place, you can use a safety pin to secure it.

People Also Ask About How to Wrap a Skirt

How do you wrap a skirt around your waist?

To wrap a skirt around your waist, start with the skirt unrolled and laid flat on a surface in front of you. Find the center of the waistband and line it up with the center of your waist. Bring the left-hand side of the skirt over to the right, overlapping it with the right-hand side by a few inches. Tie the end of the left-hand side to the end of the right-hand side. Make sure the knot is secure. You can adjust the fit by pulling the left-hand side tighter or looser. You can also adjust the length of the skirt by rolling it up or down at the waist.

How do you wrap a skirt to the left?

To wrap a skirt to the left, start with the skirt unrolled and laid flat on a surface in front of you. Find the center of the waistband and line it up with the left side of your waist. Bring the right-hand side of the skirt over to the left, overlapping it with the left-hand side by a few inches. Tie the end of the right-hand side to the end of the left-hand side. Make sure the knot is secure. You can adjust the fit by pulling the right-hand side tighter or looser. You can also adjust the length of the skirt by rolling it up or down at the waist.

How do you wrap a skirt to the right?

To wrap a skirt to the right, start with the skirt unrolled and laid flat on a surface in front of you. Find the center of the waistband and line it up with the right side of your waist. Bring the left-hand side of the skirt over to the right, overlapping it with the right-hand side by a few inches. Tie the end of the left-hand side to the end of the right-hand side. Make sure the knot is secure. You can adjust the fit by pulling the left-hand side tighter or looser. You can also adjust the length of the skirt by rolling it up or down at the waist.

best nerf gun to mod for highest fps

In the realm of Nerf enthusiasts, modifying blasters for increased firepower is an exciting and challenging pursuit. For those seeking the ultimate fps (feet per second) performance, discerning the best Nerf gun to mod can be paramount. However, this endeavor is not without its complexities, as various factors such as blaster design, spring strength, and air pressure dynamics must be carefully considered.

Amidst the vast array of Nerf blasters available, determining the optimal platform for modding can be a daunting task. Some models possess inherent advantages, such as a robust spring mechanism or an efficient plunger tube system, which lend themselves well to performance enhancements. Understanding the technical specifications and potential upgrade options for different blasters is crucial in making an informed choice.

Furthermore, the choice of modding components plays a significant role in achieving high fps levels. Upgrading to a stiffer spring, optimizing airflow through the blaster, and utilizing high-quality darts can collectively enhance power and accuracy. However, it’s essential to ensure compatibility between mods and the specific blaster model, as improper installations can compromise performance or even damage the blaster.

Best NERF Gun to Mod for Highest FPS

If you’re looking to get the most out of your NERF gun, modding is the way to go. With a few simple modifications, you can increase your gun’s FPS (feet per second), range, and accuracy. But not all NERF guns are created equal. Some guns are better suited for modding than others. Here are a few of the best NERF guns to mod for highest FPS:

NERF Rival Khaos MXVI-4000
The Rival Khaos MXVI-4000 is a fully automatic flywheel blaster that can shoot up to 8 rounds per second. It has a high capacity magazine and a built-in hopper, making it perfect for sustained fire. With a few simple mods, you can increase the Khaos MXVI-4000’s FPS to over 150.

NERF Elite 2.0 Turbine
The Elite 2.0 Turbine is a semi-automatic blaster that uses a flywheel system to fire darts. It has a high rate of fire and a long range. With a few mods, you can increase the Turbine’s FPS to over 130.

NERF Ultra One
The Ultra One is a single-shot blaster that uses a new type of dart called the Ultra Dart. Ultra Darts are smaller and more aerodynamic than traditional NERF darts, giving them a higher FPS. With a few mods, you can increase the Ultra One’s FPS to over 120.

Once you’ve modded your NERF gun, be sure to test it out to make sure it’s firing at the desired FPS. You can also experiment with different mods to see what works best for your gun. With a little bit of effort, you can turn your NERF gun into a high-powered blaster that will give you an edge in any NERF battle.

People Also Ask

What is the best way to mod a NERF gun for highest FPS?

There are a few different ways to mod a NERF gun for highest FPS. One common method is to replace the stock spring with a stronger aftermarket spring. Another method is to modify the flywheel system to spin faster. You can also experiment with different types of darts to find the ones that give you the highest FPS.

What is the highest FPS you can get from a modded NERF gun?

The highest FPS you can get from a modded NERF gun depends on the gun and the mods you use. However, it is possible to achieve FPS over 150 with some of the best modded NERF guns.

Is it safe to mod NERF guns?

Modding NERF guns can be safe if done correctly. However, it is important to use caution and follow all safety instructions. If you are not sure how to mod a NERF gun, it is best to leave it to a professional.

5 Ways to Style Thigh High Socks

thigh high socks

Thigh high socks have become a wardrobe staple over the years, providing both warmth and a touch of fashion to any outfit. However, styling these socks can be tricky, as they can either elevate your look or make it appear mismatched. To ensure you always hit the fashion mark, follow these expert tips on how to style thigh high socks with confidence and flair.

First, consider the socks’ material and texture. For a more sophisticated look, opt for thigh high socks made of opaque fabrics like cotton, wool, or velvet. These materials provide a smooth, polished finish that pairs well with dresses, skirts, and heels. Alternatively, if you’re aiming for a more casual and playful style, sheer or fishnet thigh high socks are a fun and flirty choice. They can be paired with shorts, ripped jeans, or combat boots for a trendy and edgy ensemble.

Next, think about the color of your socks. Black thigh high socks are a versatile option that goes with almost anything, but you can also experiment with different colors and patterns to add a pop of personality to your outfit. For a classic and elegant look, pair neutral-colored socks with a matching skirt or dress. Alternatively, if you want to make a bold statement, choose brightly colored or patterned socks to contrast with your outfit. Remember, the key is to find a balance between subtle sophistication and playful expression.

Sock Pairing for Versatility

Thigh-high socks are a versatile fashion staple that can be styled in many different ways. By pairing them with different shoes and clothing items, you can create a variety of looks, from casual and edgy to chic and feminine. Here are a few tips on how to style thigh-high socks for versatility:

Choose the right socks for your outfit

The first step to styling thigh-high socks is to choose the right pair for your outfit. Consider the color, texture, and pattern of the socks, as well as the overall style of your outfit. For a casual look, opt for solid-colored socks in a neutral hue, such as black, navy, or gray. For a more edgy look, choose socks with a bold pattern or texture, such as lace, fishnet, or crochet. And for a more feminine look, go for socks in a delicate shade, such as pink, lavender, or cream.

Sock type Outfit Accessories
Neutral-colored socks Casual outfits Sneakers, flats, or boots
Bold-patterned or textured socks Edgy outfits Heels, combat boots, or ankle boots
Delicate-colored socks Feminine outfits Heels, sandals, or wedges

Pair your socks with the right shoes

The type of shoes you wear with thigh-high socks can have a big impact on the overall look. For a casual look, pair your socks with sneakers, flats, or ankle boots. For a more edgy look, pair your socks with heels, combat boots, or knee-high boots. And for a more feminine look, pair your socks with heels, sandals, or wedges.

Accessorize your look

Accessories can help you complete your look and add a personal touch. For a casual look, add a beanie or baseball cap. For a more edgy look, add a leather jacket or moto boots. And for a more feminine look, add a statement necklace or earrings.

Creating a Retro or Vintage Vibe

Embrace the allure of the past by pairing thigh-high socks with vintage-inspired pieces. Start with a classic A-line dress or a high-waisted skirt, cinched at the waist to accentuate your curves. For a playful touch, add a cropped cardigan or a beret. Complete the look with platform shoes or retro sneakers to channel the era of your choice.

8. Accessorize with Sophistication

Enhance the elegance of your thigh-high socks by incorporating accessories with a touch of sophistication. A statement necklace, a pair of oversized sunglasses, or a dramatic hat can elevate your ensemble to new heights. Consider adding a fur stole or a vintage brooch for an added touch of glamour. The key here is to balance the playful nature of the socks with elements of sophistication, creating a harmonized and stylish look.

Here’s a table for easy reference of accessories that complement thigh-high socks:

Accessory Impact
Statement necklace Adds a bold and eye-catching element
Oversized sunglasses Creates a retro and mysterious vibe
Dramatic hat Brings a touch of glamour and sophistication
Fur stole Adds a touch of luxury and warmth
Vintage brooch Injects a touch of history and intrigue

How To Style Thigh High Socks

Thigh high socks are a stylish and versatile accessory that can be worn in a variety of ways. They can be dressed up or down, and can be worn with a variety of different outfits. Here are a few tips on how to style thigh high socks:

  1. With a skirt or dress. Thigh high socks look great with skirts and dresses of all lengths. For a more casual look, pair them with a short skirt or dress and sneakers. For a more formal look, pair them with a long skirt or dress and heels.
  2. With shorts. Thigh high socks can also be worn with shorts. This is a great way to add a touch of warmth to your outfit during the cooler months. Pair thigh high socks with denim shorts and a t-shirt for a casual look, or with dress shorts and a blouse for a more formal look.
  3. With leggings. Thigh high socks are also a great way to add some extra coverage to your leggings. This is a great option for when you want to wear leggings but don’t want to show too much skin. Pair thigh high socks with leggings and a tunic or sweater for a comfortable and stylish look.

People Also Ask About How To Style Thigh High Socks

What shoes should I wear with thigh high socks?

You can wear thigh high socks with a variety of different shoes, including sneakers, boots, heels, and sandals. The type of shoe you choose will depend on the look you’re going for. For a more casual look, pair thigh high socks with sneakers or boots. For a more formal look, pair them with heels or sandals.

What are some different ways to wear thigh high socks?

There are a variety of different ways to wear thigh high socks. You can wear them over or under your knees, scrunched down, or even folded over. You can also wear them with a variety of different outfits, including skirts, dresses, shorts, and leggings. Experiment with different ways to wear thigh high socks to find the look that you like best.

How do I keep my thigh high socks from falling down?

There are a few different ways to keep your thigh high socks from falling down. You can use a garter belt, thigh high sock holders, or even just a pair of sticky pads. If you’re using a garter belt, make sure to adjust it so that it’s snug but not too tight. If you’re using thigh high sock holders, make sure to place them in the middle of your thigh, just below your knee. If you’re using sticky pads, simply place them on the inside of your thigh, just below your knee.

7 Best Landing Spots for Epic Fortnite Loot

5 Easy Steps to Cut a Perfect Glass Circle
$title$

Prepare yourself to embark on an exhilarating expedition within the realms of Fortnite. Whether you’re a seasoned Battle Royale veteran or a novice adventurer, the choice of your landing spot can profoundly impact the trajectory of your in-game journey.

To conquer the challenges that lie ahead, consider descending upon the hallowed grounds of Pleasant Park, renowned for its central location and ample supply of resources. Amidst the quaint cottages and sprawling greenery, you’ll find an abundance of weapons and materials to bolster your arsenal. However, be prepared for fierce competition, as this popular drop zone often attracts a throng of eager adversaries.

Should you seek a more secluded sanctuary, venture towards the isolated outskirts of Holly Hedges. Nestled amidst rolling hills and verdant fields, this tranquil haven offers ample opportunities for stealthy maneuvering and strategic planning. Scout the perimeter for concealed stashes of loot and secure a formidable position before engaging in confrontations with unsuspecting foes.

Tilted Towers: High-Octane Battleground for Skilled Players

Tilted Towers is the ultimate destination for skilled Fortnite players seeking adrenaline-fueled battles. This bustling urban center is a hub of intense action, where every corner holds the potential for fierce combat. With its towering skyscrapers, cramped corridors, and ample loot, Tilted Towers attracts the best of the best. Only the most skilled and daring players can emerge victorious from this chaotic battleground.

Mastering the Mayhem of Tilted Towers

Surviving and thriving in Tilted Towers requires a combination of lightning-fast reflexes, strategic positioning, and a keen eye for loot. Players must land with precision, securing a valuable weapon and high ground to gain an early advantage. The dense urban environment provides countless opportunities for cover and ambush, but it also limits visibility and makes it crucial to anticipate opponent movements.

Here are some expert tips for maximizing your success in Tilted Towers:

Tip Description
Secure a Legendary Weapon Prioritize searching chests and floor loot for powerful weapons to gain an edge in close-quarters combat.
Control High Ground Climb to rooftops or upper floors to gain a strategic advantage and enhance your visibility.
Anticipate Opponent Movement Pay attention to footsteps and gunfire to predict enemy positions and avoid being caught off guard.
Utilize Cover Wisely Use buildings, walls, and objects as cover to reduce exposure and increase your chances of survival.
Move Quickly and Unpredictably Constantly shift positions and avoid staying in one place for too long to make yourself a harder target.

Retail Row: Commercial Center with Hidden Gems and Sniper Perches

Nestled amidst the urban sprawl, Retail Row offers a unique blend of bustling activity and hidden treasures. This iconic location caters to all playstyles, from loot-hungry shoppers to eagle-eyed snipers.

Hidden Gems


Beneath the surface of Retail Row’s bustling streets lie secret stashes of loot. Explore the basements of buildings, tucked away from prying eyes, uncover chests filled with valuable weapons and gear.

Sniper Perches

Retail Row’s towering buildings provide ample opportunities for snipers to pick off unsuspecting enemies from afar. The rooftops and windows offer excellent vantage points, allowing snipers to dominate the surrounding area.

Table of Notable Buildings

Building Features
West-Side Hardware High ground and cover for sniping
Retail Row Market Basement loot and rooftop access
West-Side Jewelry Store Hidden chest in the back room

Rickety Rig: Offshore Platform with Elevated Gunfights

Rickety Rig is a remote offshore platform located amidst the turbulent waters of the Fortnite map. This industrial labyrinthine structure towers high above the surrounding sea, offering a unique and treacherous battleground for skilled combatants.

Landing on Rickety Rig is a risky endeavor, as it is often contested by numerous players eager to secure its valuable loot. However, those who manage to establish a foothold on this elevated fortress can reap the rewards of its strategic vantage point and abundant resources.

The main structure of Rickety Rig consists of several interconnected platforms, each providing cover and offering opportunities for ambushes. Players should be wary of the narrow corridors and tight corners, which can easily become kill zones if not navigated carefully.

Rickety Rig is also home to a number of large cranes and towers that extend high into the sky. These structures provide unparalleled visibility and long-range firing positions, allowing players to dominate the surrounding area with snipers and assault rifles.

In addition to its advantageous positioning, Rickety Rig boasts an impressive array of loot. Players can expect to find high-tier weapons, armor, and consumables scattered throughout the platform. The central platform contains several supply drops, making it a prime target for those seeking the best gear.

9. Strategic Rotations and Escape Routes

Rickety Rig’s isolated location can be both a blessing and a curse. While it offers a safe haven from the chaos of the mainland, it also limits players’ options for rotation and escape. The only land connection to Rickety Rig is a narrow bridge that can be easily defended or destroyed.

Players should plan their rotations carefully, taking note of the following escape routes:

Escape Route Advantages Disadvantages
Jump into the water and swim away Difficult for enemies to follow Can be slow and risky
Use the ziplines to reach the mainland Fast and convenient Can be exposed to enemy fire
Build a bridge or platform to connect to nearby islands Allows for more control over the situation Requires materials and time to construct

By understanding the strategic complexities of Rickety Rig, players can overcome its challenges and emerge victorious from this elevated battleground.

Fortnite Best Landing Spots

Fortnite is a popular battle royale game where 100 players compete to be the last one standing. Players can choose to land anywhere on the map, but some locations are more popular than others. Here are some of the best landing spots in Fortnite:

  • Tilted Towers: This is one of the most popular landing spots in Fortnite. It’s a large city with plenty of loot and action. However, it’s also one of the most dangerous spots to land, so be prepared for a fight.
  • Retail Row: This is another popular landing spot. It’s a smaller city with less loot than Tilted Towers, but it’s also less dangerous. Retail Row is a good place to land if you’re looking for a more relaxed game.
  • Pleasant Park: This is a small town with a lot of loot. It’s a good place to land if you’re looking for a quiet spot to loot up. However, Pleasant Park is also a popular spot for snipers, so be careful.

People also ask

What is the best landing spot in Fortnite?

Tilted Towers is the most popular landing spot in Fortnite, but it’s also one of the most dangerous. If you’re looking for a more relaxed game, Retail Row or Pleasant Park are good options.

Where is the best place to loot in Fortnite?

Tilted Towers and Retail Row are the best places to loot in Fortnite. These locations have a lot of chests and floor loot.

What is the best way to survive in Fortnite?

The best way to survive in Fortnite is to stay hidden and avoid fights. If you do get into a fight, try to use cover and outmaneuver your opponents.

3 Easy Steps to Master the Swoop Card Game

5 Easy Steps to Cut a Perfect Glass Circle
Playing Swoop Card Game

Swoop: The Ultimate Card Game for Families and Friends

Swoop is a fast-paced, exciting card game that is perfect for families and friends of all ages. The game is easy to learn, but difficult to master, and is sure to provide hours of fun and entertainment. Swoop is a great way to improve your reflexes, strategic thinking, and hand-eye coordination.

How to Play Swoop

Materials:

  • Standard deck of 52 playing cards
  • 4 or more players

Instructions:

  • Shuffle the cards and deal 7 cards to each player.
  • The remaining cards form the draw pile.
  • Place the top card from the draw pile face up to start the discard pile.
  • The player to the left of the dealer goes first.

Objective:

Gameplay:

On your turn, you must either:

  • Play a card that matches the rank or suit of the top card on the discard pile.
  • If you cannot play a card, you must draw a card from the top of the draw pile.
  • If the card you draw matches the top card on the discard pile, you can play it immediately.
  • If you can play a card, you can continue to play cards until you cannot play any more.

Swooping:

If you play all 7 of your cards in one turn, you swoop. When you swoop, you win all of the cards in the discard pile and add them to your hand.

Winning the Game:

The first player to get rid of all of their cards wins the game.

Gameplay: Taking Turns and Drawing Cards

Taking Turns

Swoop is played in turns, with each player taking turns clockwise around the table. On your turn, you have three options:

  • Play a card: You can play a card from your hand that matches the color, number, or symbol of the card on the discard pile.
  • Draw a card: If you cannot play a card, you must draw a card from the draw pile.
  • Swoop: If you have four cards of the same color or number, you can "swoop" them and place them on the discard pile in any order. This ends your turn and the next player starts their turn.

Drawing Cards

From the draw pile: If you cannot play a card or swoop, you must draw a card from the draw pile. If the draw pile is empty, the discard pile is shuffled and becomes the new draw pile.

From the face-down deck: If you draw a card from the draw pile that has a joker symbol on it, you can choose to draw the top card from the face-down deck instead. The face-down deck contains one joker of each color and one special "Wild" card.

Special Cards

The following special cards are included in the deck:

Card Effect
Joker Can be used to match any card.
Wild Can be used to match any card or to change the active suit.

Scoring and Winning

General Scoring

The aim of Swoop is to get rid of all your cards. Points are given to the player who plays the last card:

  • 2 points for every remaining card in other players’ hands
  • 25 points if a player ends with the Queen of Spades

Special Cards

Certain cards have special scoring rules:

  • Aces: 1 point
  • Kings: 13 points
  • Queens: 12 points

Swoop

If a player manages to empty their entire hand in one turn, it is called a “swoop.” The swooping player earns 5 points per swoop, and all other players receive 25 penalty points.

Going Out

The first player to successfully get rid of all their cards wins the game. They receive 50 bonus points for winning.

Winning the Game

The game continues until one player reaches a predetermined score (usually 100 or 200 points). The player with the highest score at the end is declared the winner.

Swoop Card Game Etiquette

To avoid misunderstandings and create a positive playing environment, it is important to adhere to certain rules of etiquette while playing Swoop:

9. Revealed Cards

When a card is revealed, all players must immediately focus their attention on it. Avoid distracting conversations or actions that may hinder others from seeing the card clearly.

Additionally, players should not touch or move revealed cards unless they are their own or they are about to place a card on top of them. Once a card is placed on top of another, it is considered locked and cannot be removed by other players.

Furthermore, if a player notices an error in the placement of a card (e.g., it does not match the number or suit), they should politely point it out to the player who made the mistake. The incorrect card should then be removed and placed back in the appropriate spot.

10. Advanced Strategies

The mastery of Swoop lies in its intricate strategies and psychological tactics. Here are some advanced tips to elevate your gameplay:

  1. Control the Center: Seize control of the central area of the board. This strategic position gives you a wider range of options and limits your opponent’s movements.
  2. Predict Opponent’s Moves: Observe your opponent’s playing style and anticipate their potential moves. This foresight allows you to plan your own strategy and counter their actions.
  3. Play the Odds: Analyze the number of cards in each suit and estimate the probability of drawing a specific card. This information can guide your decisions and improve your chances of capturing cards.
  4. Play Around the Strongest Suit: Focus on capturing cards from your opponent’s strongest suit. This weakens their hand and makes it harder for them to score points.
  5. Bluff and Deception: Sometimes, it pays off to bluff and mislead your opponent. Play a card that might not have the highest value, but could potentially deceive them into discarding a valuable card.
  6. Exploit Weaknesses: Identify your opponent’s weaknesses and exploit them to your advantage. If they are struggling in a particular suit or have limited options, capitalize on their vulnerabilities.
  7. Manage Your Discards: Discard cards strategically to create a balance between offense and defense. Keep useful cards in your deck and discard those that are less valuable or unlikely to be captured.
  8. Master the Art of Psychology: Swoop involves not only strategic gameplay but also psychological manipulation. Use your demeanor and language to influence your opponent’s thinking and decision-making.
  9. Learn from Your Mistakes: Analyze your losses and identify areas where you could have played differently. Learning from your mistakes is crucial for improving your gameplay and becoming a more formidable opponent.
  10. Practice and Experience: The more you play, the more you will develop your skills and strategies. Practice with friends or family, or join online tournaments to gain experience and hone your techniques.

How to Play Swoop Card Game

Materials:

  • Standard deck of 52 cards

Objective:

To be the first player to get rid of all their cards by swooping them into piles.

Setup:

  1. Shuffle the deck and deal 5 cards to each player.
  2. Place the remaining cards face down in the center of the table to form the draw pile.

Gameplay:

  1. The player to the left of the dealer goes first.
  2. On their turn, a player must try to "swoop" cards from the table into a pile in front of them.
  3. To swoop, a player must play a card that matches the rank or suit of the top card in one of the piles on the table.
  4. If a player successfully swoops, they take all the cards in the pile and place them in a new pile in front of them.
  5. If a player cannot swoop, they must draw a card from the draw pile.
  6. The game continues until one player has no cards left.

Winning:

The player who is the first to get rid of all their cards wins the game.

People Also Ask About How to Play Swoop Card Game

What is the difference between swooping and drawing?

  • Swooping: Taking cards from the table by matching the rank or suit of the top card in a pile.
  • Drawing: Taking a card from the draw pile.

Can you swooped cards from your own piles?

No, you can only swoop cards from piles on the table.

What happens if the draw pile runs out?

If the draw pile runs out, shuffle the discard pile and use it as the new draw pile.

5 Best USB Media Apps for Xbox X

USB Media Apps for Xbox X

In the realm of gaming, where entertainment and technology intertwine like a symphony, the Xbox X stands as a towering monolith, offering unparalleled immersive experiences. To enhance the gaming tapestry further, a constellation of USB media apps has emerged, each illuminating a unique path towards unbridled entertainment. These apps, harnessed through the enigmatic power of the Xbox X, transcend the boundaries of traditional gaming, transforming your console into a multifaceted entertainment powerhouse. Prepare to embark on an extraordinary journey where innovation and creativity collide, igniting a boundless world of entertainment possibilities.

Among the myriad of USB media apps available, a select few stand out as beacons of digital brilliance. VLC, a venerable name in the media landscape, graces the Xbox X with its versatility and open-source ingenuity. Effortlessly navigate through an eclectic collection of video and audio formats, immersing yourself in a symphony of entertainment. Plex, a maestro of media organization, orchestrates your personal library with unmatched precision. Stream movies, TV shows, and music seamlessly from your other devices, creating a harmonious entertainment ecosystem. Kodi, an enigmatic force in the realm of home media, empowers you with customizable skins and a vast repository of add-ons. Explore an infinite universe of entertainment, tailored to your whims and desires.

The advent of these USB media apps transforms the Xbox X into a multimedia maestro, unlocking a world of entertainment far beyond the realm of gaming. Picture yourself curled up on the couch, enveloped by the cinematic grandeur of a blockbuster movie streamed through Plex. Imagine hosting a virtual movie night with friends, sharing laughter and creating memories over a curated selection of films through Kodi. The possibilities are endless, bounded only by the limits of your imagination. As the night unfolds, the Xbox X, once a mere gaming console, emerges as a radiant star in your entertainment constellation, casting a captivating glow upon your living room.

Unleashing the Power of USB Media on Xbox X

Harnessing External Storage for Expanded Capabilities

The Xbox Series X console introduces a groundbreaking feature that grants users the ability to leverage external storage devices via USB. This advancement empowers gamers to seamlessly expand their storage capacity and enhance their gaming experience. Users can now connect USB hard drives or SSD (Solid State Drive) devices to their Xbox Series X console, granting them additional space for installing games, apps, and other digital content. External storage on the Xbox Series X offers a potent solution for overcoming storage constraints, ensuring that gamers can maintain a vast library of digital content. By utilizing external storage, users can conveniently maintain their favorite games, apps, and personal media files within easy reach, fostering an uninterrupted and immersive gaming experience.

The integration of external storage on the Xbox Series X console offers several notable advantages. Firstly, it eliminates the constraints imposed by the console’s internal storage capacity, enabling users to expand their storage capabilities significantly. This expanded storage capacity empowers gamers to download and install a greater number of games, apps, and other digital content without encountering storage limitations. Secondly, external storage provides a convenient way to store and access media files such as movies, TV shows, and music. This functionality transforms the Xbox Series X console into a comprehensive entertainment hub, allowing users to enjoy their favorite multimedia content in addition to gaming.

Selecting the ideal external storage device for the Xbox Series X console requires careful consideration of several factors. Users must ensure that their chosen device meets specific compatibility requirements, including supporting USB 3.0 or higher and being formatted to the NTFS file system. Additionally, the storage capacity of the device should align with the user’s specific storage needs. It is important to note that while external storage devices can enhance the Xbox Series X experience, they do not offer the same level of performance as the console’s internal SSD. However, external storage devices remain a cost-effective and convenient way to expand storage capacity and elevate the gaming experience.

Seamless Integration and Effortless Management

The integration of external storage on the Xbox Series X console is designed to provide a seamless and user-friendly experience. Once an external storage device is connected to the console, users are guided through a straightforward setup process. The console automatically detects the connected device and prompts the user to format it for use with the Xbox Series X. This intuitive setup process ensures that users can quickly and easily configure their external storage devices without encountering any technical complexities.

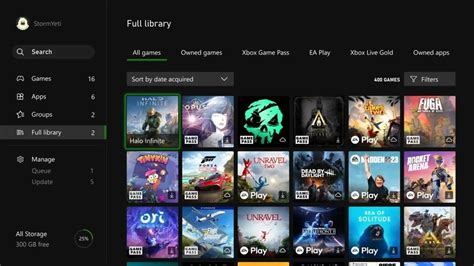
Managing external storage devices on the Xbox Series X console is equally straightforward. Users can conveniently access and manage their external storage devices through the console’s user interface. This intuitive interface allows users to view the contents of their external storage devices, install and launch games and apps, and perform other management tasks. The user interface is designed to provide users with a clear and concise overview of their external storage devices and their contents, ensuring effortless management and organization.

Unleashing the Potential: A Comprehensive Guide

Xbox Series X External Storage Requirements
USB 3.0 or higher
NTFS file system
Minimum storage capacity: 128GB

By adhering to these simple requirements, users can ensure that their external storage devices are fully compatible with the Xbox Series X console and ready to elevate their gaming experience.

Essential Apps for Enhanced Media Playback

VLC Media Player

VLC Media Player is an open-source media player renowned for its versatility and support for a wide range of video and audio formats, including MKV, MP4, AVI, and FLV. It offers advanced playback features such as adjustable playback speed, subtitle support, and customizable audio and video filters. Additionally, VLC allows you to stream media from network sources like YouTube and supports playback of encrypted content.

Kodi

Kodi is a feature-rich media center application that extends far beyond basic media playback. It functions as a multimedia hub, enabling you to organize and manage your video, music, and photo collections. Kodi supports numerous add-ons that enhance its functionality, including streaming services, video on demand, and live TV. With its customizable interface and support for various input devices, Kodi offers a personalized and convenient media experience.

Plex

Plex is a server-client media streaming solution that allows you to access and share your media library from anywhere. It organizes your content automatically and provides a user-friendly interface for browsing and playing. Plex supports various media formats, including high-definition (HD) and ultra-high-definition (UHD) content, and features advanced playback options like automatic subtitles, chapter navigation, and multi-user profiles.

Media Player Classic – Home Cinema (MPC-HC)

Media Player Classic – Home Cinema (MPC-HC) is a lightweight and powerful media player that offers advanced playback features and customization options. It supports a wide range of video codecs and provides fine-grained control over playback settings, including adjustable playback speed, video filters, and audio equalization. MPC-HC is also designed with a customizable user interface, allowing users to tailor the player to their preferences.

PotPlayer

PotPlayer is a feature-packed media player known for its support for various media formats, including 360-degree videos and 3D content. It offers a wide range of playback options, including adjustable playback speed, subtitle support, and customizable video and audio effects. PotPlayer also features an in-built video converter and supports various remote control options, making it a versatile choice for media playback.

| App | Notable Features |
|—|—|
| VLC Media Player | Versatile media playback, advanced features, streaming support |
| Kodi | Multimedia hub, add-on support, customizable interface |
| Plex | Server-client streaming, automatic content organization, user profiles |
| Media Player Classic – Home Cinema (MPC-HC) | Advanced playback controls, customization options, lightweight interface |
| PotPlayer | Support for 360-degree and 3D content, customizable effects, in-built video converter |

Streamlining Your Media Experience

Enhanced Navigation and Organization

USB media apps for Xbox X provide a more user-friendly and intuitive experience when navigating your media files. They offer customizable menus and sorting options, allowing you to organize your content according to genre, artist, or year of release. This eliminates the hassle of scrolling through endless folders and ensures quick and easy access to the media you want.

Playback Optimization

These apps are designed to optimize playback performance for a seamless viewing experience. They support various codecs and file formats, ensuring compatibility with most media files. Additionally, many apps offer features such as hardware-accelerated decoding and advanced video processing, which enhance image quality and reduce buffering.

Advanced Features for Media Customization

For those who enjoy customizing their media, USB media apps offer a range of advanced features. These include the ability to create and manage playlists, apply subtitles, and adjust playback speed and aspect ratio. Additionally, some apps provide support for external media players, allowing you to integrate your favorite video and music apps with Xbox X.

Feature Benefits
Customizable Menus Tailor media navigation to your preferences
Advanced Sorting Options Organize content efficiently by genre or date
Playback Optimization Enhanced video quality and reduced buffering
Playlist Management Create and manage playlists for curated listening experiences
Subtitle Support Enhance foreign language content or improve accessibility
Playback Customization Adjust playback speed and aspect ratio for personalized viewing
External Media Player Integration Use preferred video and music apps on Xbox X

Embracing Cross-Platform Media Sharing

Seamlessly Accessing Media Across Platforms

Media App Cross-Platform Compatibility Key Features
Plex iOS, Android, Windows, macOS, Xbox Organize and stream local media, cloud storage integration
Emby iOS, Android, Windows, macOS, Xbox, Fire TV Similar to Plex, plus live TV and DVR support
Kodi Windows, macOS, Linux, Android, Xbox Highly customizable, supports a wide range of media formats
Media Player Classic – Home Cinema (MPC-HC) Windows, Linux, macOS Compact and efficient, supports advanced audio and video codecs
PotPlayer Windows Feature-rich, includes customizable subtitles and audio tracks

Utilizing USB Media Playback on Xbox X

The Xbox X’s built-in media player allows for effortless playback of media stored on USB drives. To access this feature, simply connect your USB drive to one of the console’s USB ports and navigate to the Media section in the Xbox dashboard.

Recommended Media Apps for Xbox X

Numerous media apps are available for download on the Xbox X, providing users with a plethora of options for organizing and streaming their media content. Some highly recommended apps include:

  • Plex
  • Emby
  • Kodi

Optimizing Cross-Platform Media Experiences

To ensure a seamless cross-platform media experience, it’s crucial to consider the following tips:

  1. Choose a media app that supports both your Xbox X and other devices you use.
  2. Organize your media content consistently across platforms for easy navigation.
  3. Ensure that your devices are connected to the same network for smooth streaming.
  4. Stay updated with the latest app updates for improved performance and compatibility.

By embracing cross-platform media sharing and utilizing the Xbox X’s USB media playback capabilities, users can effortlessly enjoy their favorite content anytime, anywhere.

Enhancing Accessibility with USB Support

Benefits of USB Support

USB support on the Xbox X offers numerous benefits for enhancing accessibility, including:

  • Connecting specialized assistive technology devices
  • Playing media from external storage drives
  • Recording gameplay footage

Supported USB Devices

The Xbox X supports a wide range of USB devices, including:

Device Type Function
Adaptive controllers Providing access for gamers with disabilities
External hard drives Expanding storage capacity
Flash drives Transferring files and playing media
Webcams For video communication and streaming

Connecting USB Devices

To connect a USB device to the Xbox X:

  1. Plug the device into a USB port on the console.
  2. The Xbox X will automatically detect and configure the device.
  3. Follow any on-screen prompts to complete the setup.
  4. Media Playback

    Once a USB storage device is connected, you can play media files from it using the Xbox X media player app. The app supports a variety of file formats, including:

    • Video: 4K, HDR, and Dolby Vision
    • Audio: Dolby Atmos, DTS:X, and Windows Sonic
    • Images: JPEG, PNG, BMP, and GIF

    Game Capture

    USB storage devices can also be used to record gameplay footage on the Xbox X. To start a recording, press the Xbox button on the controller, select “Capture,” and then “Start Recording.” The recording will be saved as a video file on the USB storage device.

    Exploring the Versatility of USB Drives

    Connecting a USB drive to your Xbox Series X expands its capabilities, making it a versatile entertainment hub. Here’s a comprehensive overview of the benefits and uses of USB media apps on your Xbox Series X.

    Storing Media and Games

    USB drives allow you to store a vast library of media files, including movies, TV shows, and music. You can also install games on external USB drives, freeing up valuable internal storage space on your console.

    Streaming Apps

    Several streaming apps are available as USB media apps, including Netflix, Disney+, and Hulu. By installing these apps on an external USB drive, you can access your favorite movies and TV shows directly from your console without having to switch devices.

    Multimedia Players

    USB drives can also act as multimedia players, allowing you to playback your personal media files. You can connect your USB drive to your Xbox Series X and use the built-in media player to view photos, watch videos, and listen to music.

    Capturing Game Clips and Screenshots

    If you love capturing your gaming moments, you can set your Xbox Series X to automatically save game clips and screenshots to a connected USB drive. This frees up space on your console’s internal storage, allowing you to keep more of your favorite gaming moments.

    Recording Gameplay

    Some USB media apps offer recording capabilities, allowing you to record your gameplay footage and share it with others. This can be a valuable feature for aspiring streamers or content creators who wish to share their gaming experiences with the world.

    System Backup and Restore

    You can create a system backup on your USB drive to protect your important data in case of system issues. If your Xbox Series X experiences a problem, you can use the USB backup to restore your console to its previous state, preserving your games, saved data, and settings.

    App Features
    Plex Media server, playback for movies, TV shows, and music
    Kodi Media center with customizable interface and support for various plugins
    VLC Lightweight media player with support for a wide range of file formats
    Infuse Media player optimized for Apple devices, offers synchronization with iCloud

    Maximizing Storage Capacity for More Content

    Xbox Series X consoles come with a limited amount of internal storage, typically 512GB or 1TB. With the size of modern AAA games, it’s easy to fill up your console’s storage quickly. Here are some ways to maximize your storage capacity for more content.

    1. Use an External Storage Device

    The most effective way to increase your storage capacity is to connect an external storage device, such as a USB hard drive or SSD, to your Xbox Series X. External storage devices can be used to store games, apps, and media, freeing up space on your console’s internal storage for more important things.

    2. Choose the Right External Storage Device

    Not all external storage devices are created equal. When choosing an external storage device for your Xbox Series X, look for one that is specifically designed for gaming. These devices will typically have faster read and write speeds, which will reduce loading times and improve overall performance.

    3. Format Your External Storage Device Properly

    Before you can use an external storage device with your Xbox Series X, you need to format it properly. This will erase any existing data on the device, so make sure you back up any important files before you format it.

    4. Move Games and Apps to Your External Storage Device

    Once your external storage device is formatted, you can start moving games and apps to it. To do this, go to the “My Games & Apps” section on your Xbox Series X dashboard, select a game or app, and then select the “Move” option.

    5. Delete Unwanted Games and Apps

    If you’re running out of storage space, the best way to free up some room is to delete unwanted games and apps. To do this, go to the “My Games & Apps” section on your Xbox Series X dashboard, select a game or app, and then select the “Uninstall” option.

    6. Clear the Cache

    The cache is a temporary storage area on your Xbox Series X that stores frequently accessed data. Over time, the cache can fill up with unnecessary files, which can take up storage space. To clear the cache, go to the “Settings” menu on your Xbox Series X dashboard, select the “System” tab, and then select the “Clear Local Xbox 360 Storage” option.

    7. Invest in a Storage Expansion Card

    If you’re still running out of storage space, you can invest in a storage expansion card. Storage expansion cards are proprietary devices that plug into the back of your Xbox Series X and add additional storage space. Storage expansion cards are more expensive than external storage devices, but they offer faster read and write speeds and are designed to work seamlessly with your Xbox Series X.

    | Storage Type | Advantages | Disadvantages |
    |—|—|—|
    | Internal Storage | Fast | Limited capacity |
    | External Storage Device | More capacity | Slower speed than internal storage |
    | Storage Expansion Card | Fast | Expensive |

    Navigating the App Marketplace with Ease

    Accessing the Xbox App Marketplace is a breeze, offering a vast selection of media apps tailored to your entertainment needs. Here’s a step-by-step guide to seamlessly navigate the marketplace:

    1. Accessing the Marketplace

    From the Xbox Home screen, scroll over to the “Store” tab and select “Apps.” This will lead you directly to the App Marketplace.

    2. Filtering and Browsing

    Utilize the filters to refine your search based on categories such as “Entertainment,” “Music,” or “Social.” You can also browse through the curated lists or use the search bar to find specific apps.

    3. App Details and Reviews

    Once you’ve found an interesting app, select it to view its details, screenshots, and user reviews. This information can help you make an informed decision about which apps to download.

    4. Downloading and Installing

    Select the “Install” button to initiate the download and installation process. Once completed, the app will be added to your Xbox library and available for use.

    5. Managing Apps

    To manage your installed apps, go to “My Games & Apps” > “Apps” and select the app you want to modify. You can update, uninstall, or move the app to a different storage device.

    6. Xbox App Recommendations

    Based on your previous downloads and browsing history, Xbox provides personalized app recommendations. These suggestions can help you discover new and relevant apps that align with your interests.

    7. App Updates

    To ensure optimal performance and functionality, regularly check for app updates. Navigate to “My Games & Apps” > “Updates” to view available updates and install them.

    8. Essential Media Apps for Xbox Series X

    Category App Description
    Streaming Video Netflix A vast library of movies, TV shows, and documentaries.
    Music Streaming Spotify Access millions of songs and create personalized playlists.
    Social Media YouTube Watch videos, follow creators, and share content.
    Live TV Streaming Hulu + Live TV Stream live TV channels, sports, and on-demand content.
    Cloud Gaming Xbox Game Pass Unlimited access to a library of over 100 games.

    Troubleshooting Common USB Media Issues

    Many issues can cause a USB drive to not work with an Xbox X. Some of the most common issues include:

    Formatting Issues

    The USB drive must be formatted in the NTFS file system. If it is formatted in a different file system, such as FAT32 or exFAT, it will not be recognized by the Xbox X.

    File Size Limitations

    The Xbox X can only read files up to 4GB in size. If a file is larger than 4GB, it will need to be split into smaller files before it can be played on the Xbox X.

    File Type Compatibility

    The Xbox X can only play certain file types. These file types include:

    File Type Extensions
    Video .mp4, .mkv, .mov, .avi
    Music .mp3, .wma, .wav
    Pictures .jpg, .png, .bmp

    USB Drive Speed

    The speed of the USB drive can affect how well it works with the Xbox X. A slow USB drive may cause stuttering or buffering during playback.

    USB Drive Compatibility

    Not all USB drives are compatible with the Xbox X. Some USB drives may not be able to provide enough power to the Xbox X, or they may not be able to handle the high data transfer rates required for gaming.

    Other Issues

    Other issues that can cause a USB drive to not work with an Xbox X include:

    • A damaged USB drive
    • A loose connection between the USB drive and the Xbox X
    • A problem with the Xbox X’s USB port
    • A software bug in the Xbox X’s operating system

    Future-Proofing Media Consumption on Xbox X

    1. Embracing UHD Blu-ray Support

    Harness the transformative power of Ultra HD Blu-rays, delivering unparalleled visual fidelity and immersive audio experiences that push the boundaries of entertainment.

    2. Enhanced DVD and CD Playback

    Elevate your classic media collection with the Xbox Series X’s exceptional DVD and CD playback capabilities, ensuring compatibility with legacy discs.

    3. External Storage Expansion

    Unlock the full potential of your Xbox X with external storage support, expanding your media library and keeping your favorite content within reach.

    4. Media App Integration

    Leverage the convenience of dedicated media apps, such as Netflix, Hulu, and Prime Video, to access a vast streaming catalog.

    5. Game Pass Perks

    Enjoy exclusive benefits and discounts on gaming content and movie purchases through the Xbox Game Pass subscription service.

    6. Controller-Free Navigation

    Embrace the seamless control of your media experience using voice commands or the Xbox app on your smartphone.

    7. Dolby Atmos and DTS:X Support

    Immerse yourself in the cinematic depth of Dolby Atmos and DTS:X surround sound, delivering a truly captivating audio experience.

    8. Optimized Networking

    Take advantage of the Xbox X’s advanced networking capabilities for smooth and uninterrupted media streaming.

    9. 4K Video Upscaling

    Enhance your media experience with the Xbox X’s powerful 4K video upscaling technology, elevating the quality of non-native content to breathtaking clarity.

    10. Supporting a Wide Range of Media Formats

    The Xbox X boasts exceptional media format support, ensuring compatibility with various audio, video, and image file types.

    Media Format Supported
    MP4 Yes
    MKV Yes
    AVI Yes
    FLAC Yes
    WAV Yes

    Best USB Media Apps for Xbox X: A Comprehensive Guide

    Enhance your Xbox X experience with the best USB media apps, empowering you to stream your favorite shows, movies, music, and more directly to your console. These apps provide a seamless and convenient way to enjoy your multimedia content on a bigger screen, making the most of your gaming setup. In this guide, we’ll discuss the top USB media apps for Xbox X, highlighting their key features and benefits to help you make an informed choice.

    Top 5 USB Media Apps for Xbox X

    1. Plex

    Plex is a versatile media server and player that allows you to access your entire media library from multiple devices, including your Xbox X. It features a user-friendly interface, support for a wide range of media formats, and the ability to stream live TV and DVR recordings. With its powerful search and discovery features, Plex transforms your Xbox X into a comprehensive entertainment hub.

    2. Kodi

    Kodi is another open-source media player known for its customization options and extensive add-on support. It provides access to a vast array of media content, including movies, TV shows, live TV, and music. Kodi’s user-friendly interface and ability to integrate with various streaming services make it a great choice for entertainment enthusiasts.

    3. Emby

    Emby is a cloud-based media server that combines the functionality of Plex and Kodi. It offers a wide range of features, including media playback, live TV streaming, and DVR support. Emby’s mobile app provides convenient remote access and control of your media library, allowing you to manage your content from anywhere.

    4. Jellyfin

    Jellyfin is a free and open-source media server that provides a user-friendly interface and support for various media formats. It emphasizes privacy and security, allowing you to share your media library with others without compromising your data. Jellyfin is a great choice for those looking for a self-hosted and customizable media solution.

    5. MrMC

    MrMC is a premium media player designed specifically for the Xbox family of consoles. It offers a tailored user interface that seamlessly integrates with the Xbox ecosystem. MrMC supports a wide range of media formats, including 4K HDR content, and provides access to streaming services like Netflix and YouTube. Its advanced features, such as support for Dolby Vision and Dolby Atmos, deliver an immersive media experience.

    People Also Ask About Best USB Media Apps for Xbox X

    What are the key features to consider when choosing a USB media app for Xbox X?

    When selecting a USB media app for Xbox X, consider factors such as user interface, support for media formats, integration with streaming services, customization options, and features like live TV streaming and DVR support.

    Which app offers the best value for money?

    The best value for money varies depending on individual preferences and requirements. However, Plex and Kodi are popular choices due to their comprehensive features, open-source nature, and compatibility with various devices.

    Can I use these apps to stream from external hard drives?

    Yes, most USB media apps for Xbox X support streaming content from external hard drives. Simply connect your hard drive to your Xbox X and the app should detect it automatically.